Paintbrush
Paint, blend, blur and smudge on the image, stroke by stroke
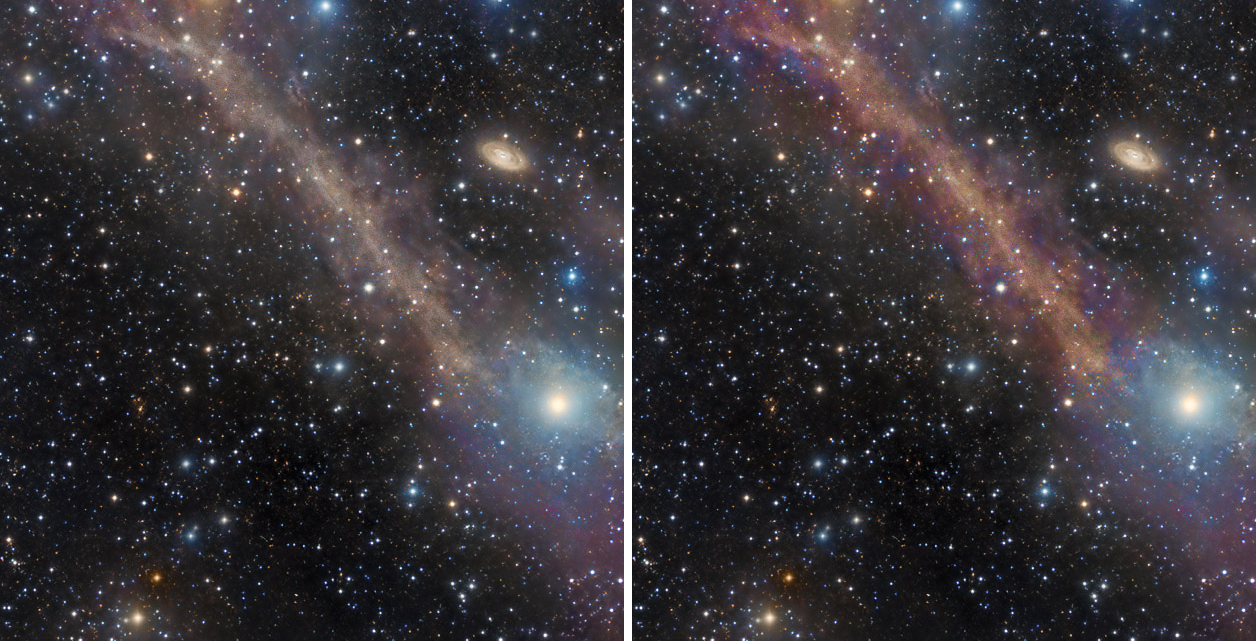
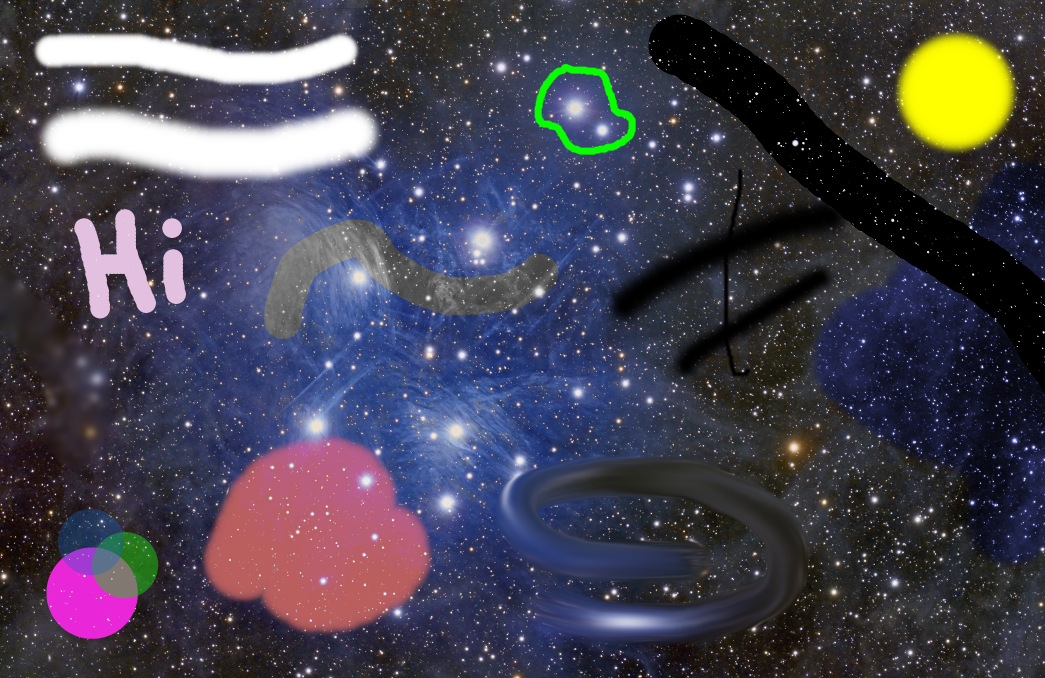
The Paintbrush paints directly on the image with a freehand brush: a color, or an action that changes what is under the brush (saturation, contrast, dodge and burn, sharpen, lighten, darken, neutralize, smudge, blur). It is made for the small, local touches that are tedious as a global process, such as calming a color cast in one corner, softening a seam or lifting a dim dust lane, and for painting masks by hand. Every stroke goes through the image's mask and can be undone, and the whole session becomes one history step.
1Introduction
Most processes change the whole image, or the part a mask lets through. The Paintbrush works the other way around: we choose what the brush does, set its size, softness and opacity, and paint, stroke by stroke, on the image itself, seeing each stroke as we make it.
The brush is more than a color. Its Action decides what each stroke does: paint a color over the image, recolor it while keeping its brightness, raise or lower saturation or local contrast, brighten or darken it like a darkroom print, keep only what gets lighter or darker, take the color out of it, sharpen it, blur it, or smear it along the stroke. Three actions work both ways: holding Ctrl as the stroke starts reverses them. Protect highlights spares the bright stars while we work on the background.
The strokes go through the image's mask, as a process does, so a star mask or a selection turned into a mask keeps them where they belong. Within the session every stroke is a step of its own, undone and redone at will; Apply makes them one history step of the image.
The Paintbrush is the engine of the DynamicPaintbrush module for PixInsight, so a stroke here paints the same pixels it paints there.
2Quick Start
- Open the image and click Paintbrush on the toolbar. The Tool panel shows the Paintbrush.
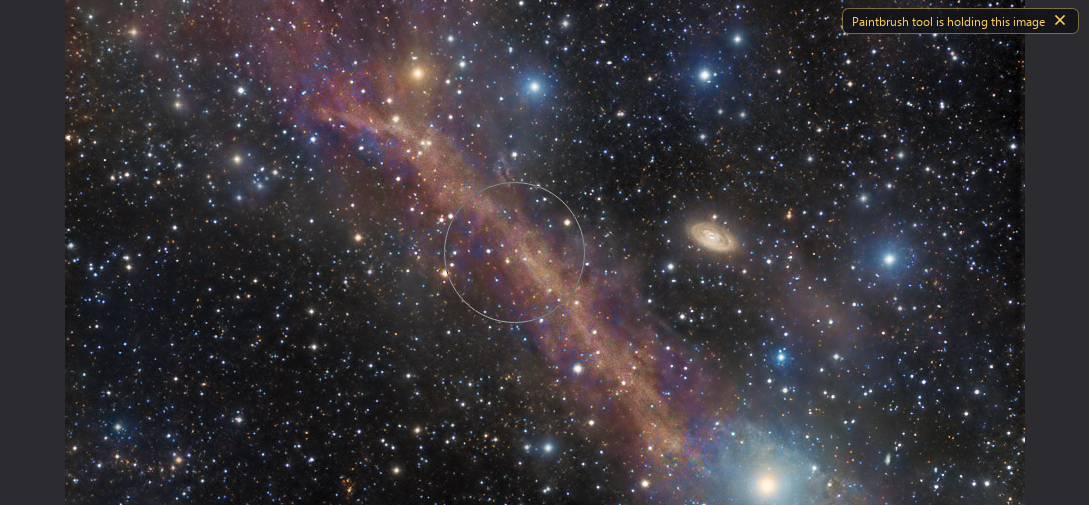
- Choose the Action, then the Size, Softness and Opacity of the brush. A circle the size of the brush follows the pointer over the image.
- Paint: each drag is a stroke. The first one starts the session on that image. Ctrl+Z takes the last stroke back, Ctrl+Y paints it again.
- Click Apply. The strokes become one history step of the image.
3Interface & Parameters
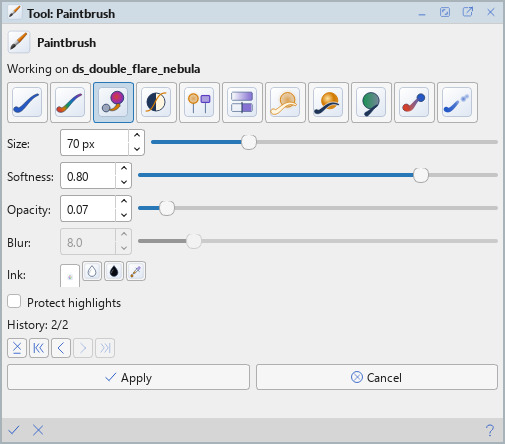
The Tool panel shows the tool's name and icon on its first row; its tooltip says what the tool does and how to use it. Under it, the image the session is on ("Working on M45", or "No image yet: click on one."), the brush, the ink, Protect highlights, the stroke history, then Apply and Cancel. The bar along the bottom of the panel has Apply (a check mark) and Cancel (a cross) on the left, and Help on the right.
3.1The Brush
Action: What the brush does. Every action follows Size, Softness, Opacity and the image's mask:
- Normal: paints the ink color over the image.
- Color: gives the image the ink's hue and saturation and keeps its brightness: it recolors without changing the detail, for a patch of nebula or a star of the wrong color.
- Saturation: raises the saturation of the colors under the brush, keeping their hue and brightness; with Ctrl held, lowers it toward gray. The ink is not used.
- Contrast: raises local contrast, pushing the tones away from middle gray; with Ctrl, lowers it. The ink is not used.
- Dodge/Burn: brightens what is under the brush (dodge); with Ctrl, darkens it (burn). A smooth change of exposure, unlike the hard limit of Lighten and Darken.
- Sharpen: sharpens the local detail with an unsharp mask; Detail sets the scale of the structures it brings out.
- Lighten: paints only where the result is brighter than the image.
- Darken: paints only where the result is darker than the image.
- Neutralize: takes the color out toward a neutral gray of the same brightness: a local color cast, a tinted halo. The ink is not used.
- Smudge: picks up the pixels under the brush and drags them along the stroke, as a finger drags wet paint. The ink is not used; Opacity is the strength.
- Blur: a Gaussian blur under the brush, of the radius Blur sets. The ink is not used; Opacity is the strength.
Color, Saturation and Neutralize work on color and are disabled on a grayscale image.
Size: The brush's radius, from 1 to 255 pixels of the image. The circle that follows the pointer shows it. 75 by default.
Softness: How the brush fades from its core to its edge: 0 is a hard edge, 1 a very soft falloff, 0.5 (the default) a Gaussian.
Opacity: The strength of the brush, from 0.01 to 1. It holds within a stroke: going over the same place in one drag does not build up. To build up, we lift the brush and paint again. For Blur, Sharpen, Smudge and Dodge/Burn it is the action's strength.
Blur: For the Blur action, the radius of the Gaussian blur (sigma, in pixels). For Sharpen it is called Detail: the scale of the structures the sharpening brings out. Enabled only with those two actions; 8 by default.
3.2The Ink
Ink: The color Normal, Color, Lighten and Darken paint with, white by default. The swatch shows it; a click on it opens a color dialog.
White: Makes the ink pure white.
Black: Makes the ink pure black.
Pick: The eyedropper: click it, then click on an image to take the color under the pointer as the ink. Alt+click on any image does the same at any time, without the button.
Protect highlights: When on, the stroke fades out where the image is bright, so it mostly changes the darker background and leaves stars and highlights largely as they were. It works with every action. It goes by brightness, not by stars: bright nebula cores are partly protected too. Off by default.
Brush handle: The brush icon at the end of the Protect highlights row. Dragged onto a LaunchPad, it makes a button that selects the Paintbrush with this brush: its action, size, softness, opacity, blur or detail radius and ink. See LaunchPads.
3.3The Strokes
A line says where the session is: "No image selected" before the first click, "History: no strokes", then "History: 3/3", the strokes painted and the strokes there are in all, undone ones included.
Delete: Drops the last stroke for good (Delete over the image).
|<: Undoes every stroke.
<: Undoes the last stroke (Ctrl+Z over the image).
>: Paints the last undone stroke again (Ctrl+Y).
>|: Paints every undone stroke again (Ctrl+Shift+Y).
3.4Apply and Cancel
Apply: Ends the session with its strokes in the image: one history step, holding only the parts of the image the strokes changed. then takes all of them back at once.
Cancel: Ends the session with the image as it was when it began: every stroke is gone, to the last bit.
4Painting
4.1The Session
The first stroke on an image starts the Paintbrush's session on it, and paints: no stroke is lost to choosing the image. Each drag is a stroke, painted into the image at once.
While the session is open the Paintbrush holds the image: it cannot be closed, processed, saved or undone from the History panel, and DSPX says so ("The Paintbrush tool is working on it: apply or cancel it first."). The image's tab and the status line say that the Paintbrush is on it. Over that image, Ctrl+Z and Ctrl+Y are the Paintbrush's, one stroke at a time, and the Edit menu says so ("Undo in Paintbrush"); with another image in front they are that image's undo and redo. Bringing another image to the front leaves the session where it is.
Choosing another tool with strokes painted asks whether to apply them, discard them, or keep working.
4.2Strokes and the Mask
Every stroke goes through the image's mask, its inversion included: where the mask is black nothing changes, and its soft edges feather the stroke. The mask can be enabled, disabled or inverted during the session, and the Paintbrush paints its strokes again under the new mask; it cannot be replaced or removed until the session ends. A selection does not limit the strokes: to keep them inside a region drawn with the Selection tool, we make a mask of the selection first and attach it to the image.
To keep the brush off the stars, a star mask, inverted, does it precisely; Protect highlights is a quicker, gentler way.
4.3Two Ways With Ctrl
Saturation, Contrast and Dodge/Burn have two directions: as we paint, they raise saturation, raise contrast or brighten; with Ctrl held when the stroke starts, they lower saturation, lower contrast or darken. One brush covers both directions.
4.4Painting Masks
The Paintbrush started as a way to paint masks by hand, and it is still ready for it: with the image we paint being a mask (a mask image opened in its own tab), White and Black inks, Normal, and a soft brush, we add to the mask and take away from it, stroke by stroke. The mask is then attached to its image with .
5Usage Tips and Tricks
Recolor without flattening. Color changes the hue of a patch of nebula or of a star and keeps its brightness and its detail.
Sample, then paint. Alt+click takes the ink from the image; the color dialog then lets us move it toward gray for a subtle tint that matches.
Build up gently. A low opacity and several strokes give more control than one strong stroke: the opacity holds within a stroke, and each new stroke adds to the last.
Background work, stars spared. Turn Protect highlights on before blurring, neutralizing or recoloring a star field; for full protection, use an inverted star mask.
Brushes on a LaunchPad. Drag the brush handle onto a pad for each brush we use often; a click on a button then switches to that brush.
Blur in passes. For a stronger blur, lift the brush and paint again, or raise the Blur radius.
Sharpen what was smoothed too much. Sharpen at a low opacity brings back local detail; a larger Detail aims at larger structures.
Smudge along the feature. Drag in the direction the color should travel, across a seam or along a halo, with a soft brush at low opacity.
Neutralize local casts. A low opacity Neutralize brush calms a green or magenta cast in one area without touching the rest of the image.
Stay on the image. Ctrl+Z, Ctrl+Y and Delete over the image let us try and take back without going to the panel.
6Related Tools
The Selection tool: a selection drawn by hand (freehand, shapes, polygon, magic wand), which becomes a mask that keeps the strokes inside it. The better choice when the area must be precise.
The Draw tool: filled and outlined shapes, when the area is a shape rather than a stroke.
The Clipboard: copies a region of an image and pastes it, blended, into another place or image.
Deep Star Mask: a star mask, to keep the brush off the stars or on them alone.