
Deep Star Mask
Star masks from a starless estimate, star by star
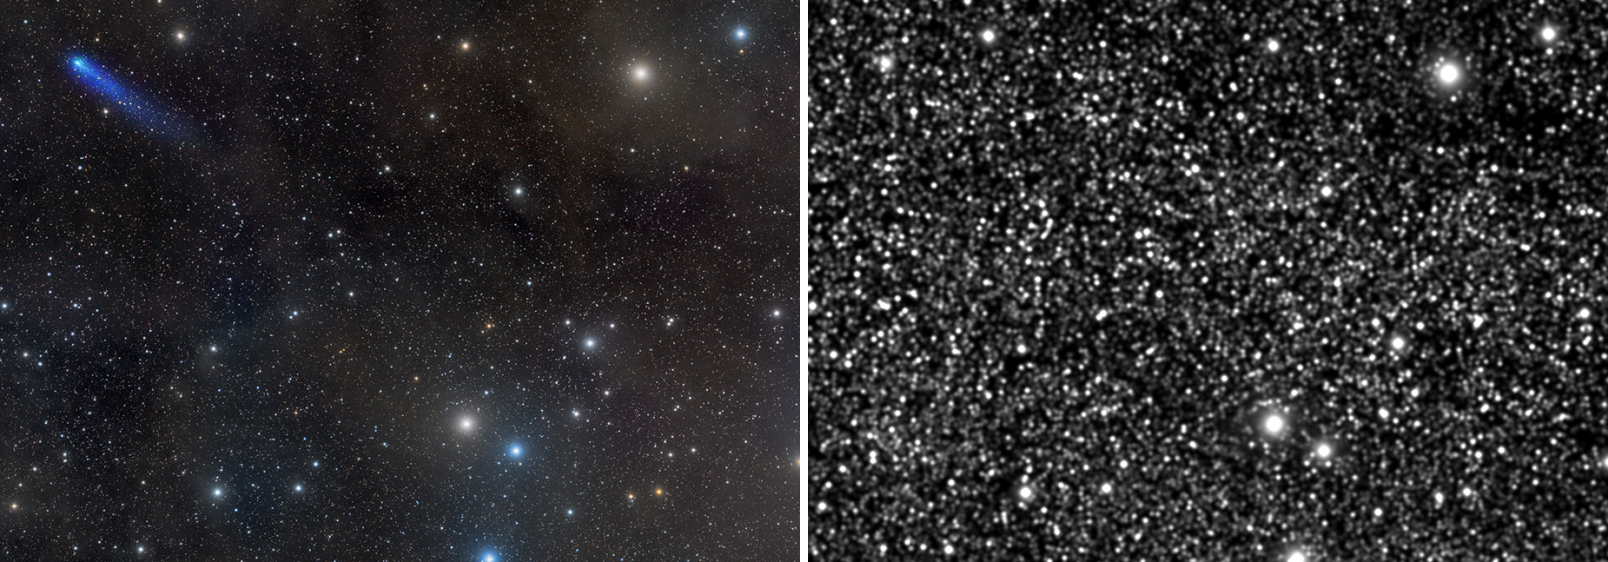
Deep Star Mask makes a star mask: a new image that is bright where the stars are and dark everywhere else, so that we can protect the stars while we process the rest of the image, or work on the stars alone. It finds the stars by taking a starless estimate of the image away from it, so every star keeps its own core, halo and diffraction spikes, and it lets us choose which stars go into the mask and how much of each one.
1Introduction
Deep Star Mask builds the mask from the star light itself. It makes a starless estimate of our image and subtracts it: what is left is star light alone, cores, halos and spikes, with every pixel carrying as much light as the stars put there. The mask is made from that residual, pixel by pixel. Nothing has to decide where one star ends and the next begins before the mask exists, which is why the result changes smoothly and predictably as we move the settings.
Two engines can make the starless estimate. The AI model, a trained neural network, handles crowded fields, wide halos and diffraction spikes without being told anything about them. The parametric engine, a multiscale median detection that we drive with two settings, needs no model file at all. The AI model is ethically sourced: it was trained only on the author's own images and on material released to the public domain or under CC0.
Because the residual holds stars and nothing else, Deep Star Mask can measure each star in it and act on it: keep only the stars within a range of size or brightness, keep only the saturated ones, decide how far down each star's own profile the mask reaches, grow every star by a margin, in pixels or in proportion to the star. The mask can be a single gray channel, the classic star mask, or a color mask in which each channel comes from that channel's own star light.
The image itself is never changed: the mask arrives as a new image, which we then attach to the image as its mask in one action.
2Quick Start
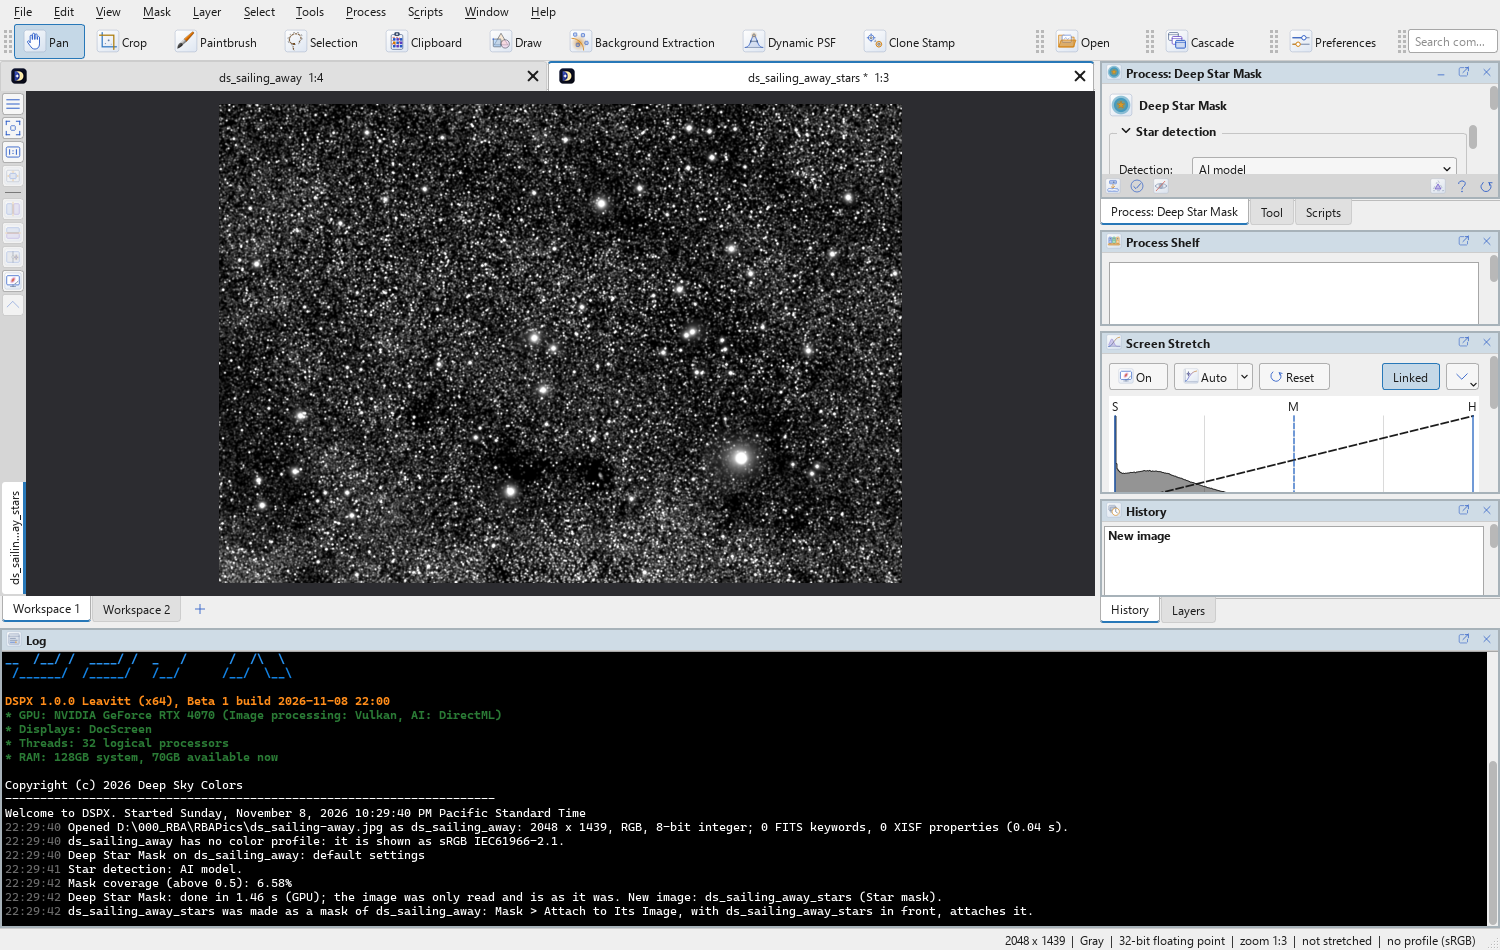
- Open the image and choose . The panel opens, with the image in front as its target ("Applies to").
- Leave Detection on AI model and the other settings as they are: the defaults make a good mask of most images.
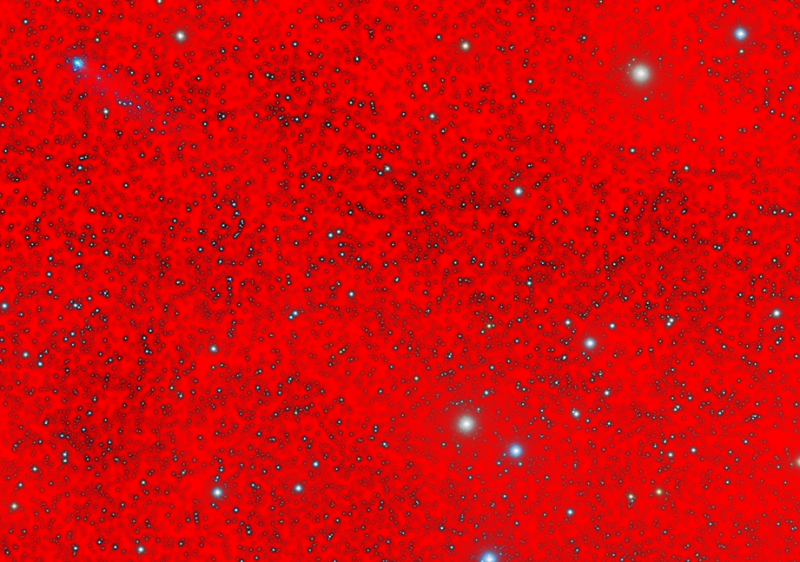
- To check the settings on a part of the image first, choose The visible area or A region under Preview and click Preview. The mask is shown over the image, which does not change.
- Click Apply. The mask arrives in a new tab, named after the image with
_starsat the end:M45_starsforM45. - With the mask in front, choose (Ctrl+Shift+M). The processes we apply to the image now act through it.
3Interface & Parameters
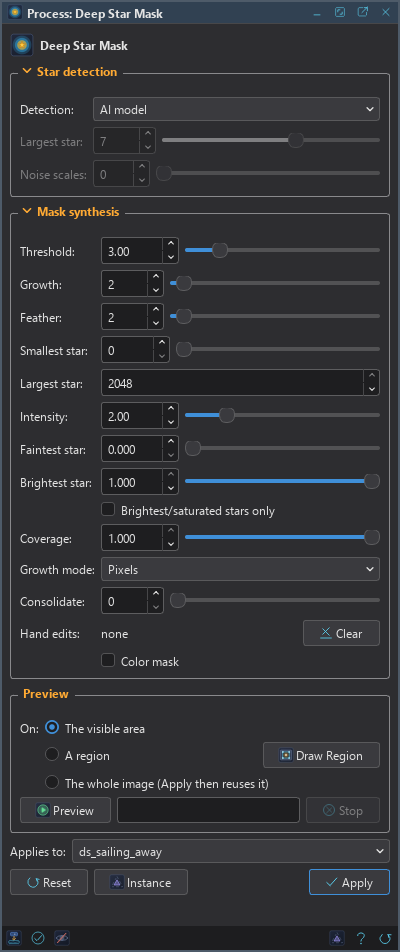
The panel has two sections of settings, Star detection and Mask synthesis, each of which folds away with the arrow beside its title, then the Preview box, the image the process applies to, the buttons and the system bar along the bottom. Detecting the stars is the slow step: the two parametric settings of Star detection, and the choice of engine, decide it. Everything in Mask synthesis works on the detection, so it is where we spend our time.
3.1Star Detection
Detection: How the starless estimate is made.
- AI model: a trained neural network, run through ONNX Runtime on the graphics card where it can, on the processor otherwise. It gives the best detection, spikes and large halos included, and it is the default. When its files are missing or cannot run, Deep Star Mask uses the parametric engine and says so in the Log; shows what was found.
- Parametric: a multiscale median detection driven by the two settings below. Stars stand out against their neighborhood and vanish under the median, while nebulosity survives it. It needs no model file and gives the same result every time; it can leave slight residues around the largest halos and sharp nebular knots.
Largest star: For the parametric engine: how large a structure can still be taken for a star, as a scale. The reach is about 2 to the power of this value, in pixels: 7 is about 128 pixels, 9 about 512. We raise it when big stars are left out of the mask, and lower it when nebulosity starts to be detected as stars.
Noise scales: For the parametric engine: how many of the finest scales are left out of the star light. Each step removes one more level of the smallest detail, where the noise is. At 0 everything is kept, down to single pixels. We raise it when grain is masked as if it were tiny stars, knowing that the smallest real stars go with it.
3.2Mask Synthesis
These settings shape the mask from the star light detected. The first two set its footprint, how much of each star it covers.
Threshold: How far above the noise, in sigma, star light must rise to enter the mask. Lower keeps fainter star light, down into the noise; higher keeps only the bright cores. It moves the footprint and nothing else: the pixels that stay keep their own brightness.
Coverage: How much of each star the mask covers, measured down that star's own profile. Coverage is proportional, so a faint star keeps as much of its glow as a brilliant one. At 1 (the default) the footprint is all that Threshold kept; lower values give tighter masks, down to 0, the peak pixels alone.
The next settings choose which stars are in the mask. Each acts on whole stars: the star light is split by its peaks, so two stars that touch are still two stars, and a cluster is never taken for one giant star.
Smallest star: Keep only the stars at least this big, in pixels across (the diameter of a disk with the star's masked area, halo and spikes included). 0, the default, sets no minimum.
Largest star: Keep only the stars at most this big, in pixels across. At its maximum, 2048, the default, there is no limit.
Faintest star: Keep only the stars at least this bright: each star's peak in the star light, from 0 to 1. 0, the default, sets no limit. Raising it masks the prominent stars alone, whatever their size.
Brightest star: Keep only the stars at most this bright. 1, the default, sets no limit. Lowering it lets us work on the faint stars and leave the brilliant ones alone.
Brightest/saturated stars only: Keep only the blown stars and the few brightest ones, with their halos and spikes. A star qualifies when its peak sits at the top of the data and its core is flat there, which is what a clipped star looks like; this is measured on the image's own values, never on its screen stretch. A few very bright stars that are not quite clipped come along. An image whose values were rescaled below full scale has nothing clipped, and the mask is then empty.
The last settings shape what is left.
Growth: Grows each star's footprint outward with a circular dilation, so grown stars stay round. What the number means is set by Growth mode.
Growth mode: What Growth counts:
- Pixels: the same margin, in pixels, for every star.
- % of star: a margin in proportion to each star's own radius, so the big stars gain much more room than the small ones.
Feather: Softens the mask's edges with a smooth blur of this radius, in pixels, for a gentle falloff into the sky.
Intensity: The brightness of the mask, a linear gain: 1 leaves it as it is, 2 is the default. Raising it brings the brightest star peaks to full strength first, then the halos and the fainter stars. Values near the noise stay near the noise, so faint residue that is not a star is not raised with the stars.
Consolidate: Raises faint parts of the mask to full strength where they are broad, never where they are a thin edge. It is meant for the heart of a globular cluster, where the stars are detected one by one but the glow between them is not, and the mask comes out as a sprinkle of dots. The value is a thickness in pixels: faint areas thicker than it are raised (a core 100 pixels wide needs a value near 10). It never adds a pixel, joins two stars or moves an edge. 0, the default, turns it off.
Hand edits: Stars taken out of the mask or put into it by hand, and strokes of a mask brush, made with the star picker and the brush of DeepStarMask's PixInsight module. They come with a saved process or a PixInsight process icon, and they are applied last, as the module applies them. They cannot be drawn in DSPX. The panel says how many there are; Clear removes them all.
Color mask: Off, the mask is one gray channel made from each star's luminance: the classic star mask, and the right choice for most work. On, it is a three-channel mask in which each channel is that channel's own star light, so a star that is brighter or wider in red gets a wider mask in the red channel. A color mask needs a color image; on a gray one, the mask is gray.
3.3Apply, Preview and Instance
Preview: Shows the mask Deep Star Mask will make over the image, without changing it, computed at full resolution on The visible area, on A region we draw on the image with Draw Region, or on The whole image, which Apply then reuses instead of running again. A preview never starts by itself: it is computed when we click Preview, with its progress and Stop. On a part of the image it is close, not exact: the noise and the saturation level are measured on the part, and the AI model's tiles fall differently. With hand edits, which are placed in the whole image, only the whole image can be previewed.
Applies to: The image Deep Star Mask makes the mask of, chosen in a list of the open images. It shows the image in front, and follows it as we bring other images to the front. Picking another image in the list makes the panel work on that one, its preview included, without bringing it to the front; the pick stays while we work on other images, and Follow Active, the small button that appears beside the list, makes the panel follow the image in front again. An image that a tool or a run is working on is listed, but cannot be picked.
Apply: Makes the mask from the image named in Applies to. The mask is a new image in 32-bit
floating point, named after the image with _stars at the end, with the image's FITS keywords and
properties. The image itself is only read: no history step, and its own mask plays no part.
Instance: Shows the process as the panel has it now, as text: the settings as a DSPX
process (.dsproc) or as a PixInsight process icon (.xpsm) that DeepStarMask's PixInsight module
opens, chosen under Format. Copy puts the text on the clipboard; Save... saves it as a file and puts
it on the Process Shelf. A saved process gives exactly the mask its panel gives with the same settings, hand edits
included.
Reset: Puts every setting back to its default.
The system bar along the bottom of the panel has the same commands as small icons: at the left, drag to apply and Apply; at the right, Instance, Help (this page) and Reset. Drag to apply, the first icon, carries the process with its settings: dropped on an image's window, it makes the mask of that image, whatever image the panel works on; dropped on the Process Shelf, it is kept there as a row of its own. With , the bar alone has them.
4Working With the Mask
4.1Attaching It to the Image
A mask Deep Star Mask made knows the image it was made from. With the mask in front, (Ctrl+Shift+M) makes it that image's mask. Any other image of the same size can take it too, with .
Once attached, the processes we apply to the image act where the mask is bright and leave alone where it is dark: on the stars, and not on the sky around them. turns it around, to work on everything but the stars, and turning off sets it aside without removing it.
4.2What Deep Star Mask Does
Deep Star Mask follows the same steps as its PixInsight module, and gives the same mask for the same settings:
- A linear image is stretched for the detection with an automatic screen stretch computed on the whole image (the Log says so). The image keeps its values.
- The starless estimate is made by the AI model or the parametric engine, and subtracted: the residual is star light alone. Its noise is measured on each channel.
- The residual is cut at Threshold into a footprint, and each star in it is measured, so the size, brightness and saturation filters can keep or drop whole stars and Coverage can cut each one against its own peak.
- The stars kept are grown, feathered, consolidated where asked and scaled by Intensity, then the hand edits are applied, so a star edited by hand always wins over what the settings decided.
4.3The AI Model's Files
The AI model needs its model file and ONNX Runtime, both installed with DSPX. shows what was found and what the network last ran on. Under Processor, Automatic runs the network on the graphics card when there is one it can use, else on the processor; CPU only always uses the processor, which is slower and can differ slightly from the card's result. When a file is missing, Deep Star Mask makes the mask with the parametric engine and the Log says which file, where it was looked for and what to do.
5Usage Tips and Tricks
Detection first, then everything else. The engine decides what can be masked at all. Once the detection is right, the Mask synthesis settings are what we move.
Coverage changes the feel of the mask. Threshold decides what is in the mask; Coverage decides how much of each star stays, in proportion. When a mask is too heavy on the bright stars, we lower Coverage before anything else.
Preview a region on a large image. A region over the most demanding stars previews in a fraction of the time of the whole image, and shows what the mask does where it matters.
Growth in percent for mixed fields. When the big stars need room but the small ones must stay tight, Growth mode % of star gives each star a margin of its own size.
Intensity raises from the top down. It is a gain, not a curve: the brightest cores reach full strength first and the noise stays where it is. It is the setting to raise when the mask covers the right pixels but protects them too gently.
Saturated only, for blown cores. To repair clipped stars, Brightest/saturated stars only selects them with their halos. An empty mask means nothing in the image is clipped.
Crowded cores. Where stars are packed too tightly to be told apart, a small Consolidate value fills the faint glow between them without moving any edge.
Hand edits travel with the process. A PixInsight icon saved with hand edits gives the same mask here, edits included; they belong to the image they were made on.
6Related Tools
Deep Star Removal: removes the stars, giving a starless image and a star image. The choice when we want the stars out of the image rather than a mask of them.
Range Mask: a mask from a range of brightness. Better when the area we want is defined by its brightness rather than by its stars.
Deep Morphology: shrinks stars, through the star mask Deep Star Mask makes.
The Selection and Paintbrush tools: a selection drawn by hand, or a mask painted, when the area is easier to point at than to detect.