
Cosmetic Correction
Hot and cold pixels of calibrated frames replaced by their neighbors
Cosmetic Correction replaces the defective pixels of calibrated frames, the hot pixels that a dark subtraction leaves behind and the cold ones it digs, by the median of their neighbors. The defects are found in the master dark, or given by a defect map. It works on files: each corrected frame is written as a new file, ready for debayering or registration.
1Introduction
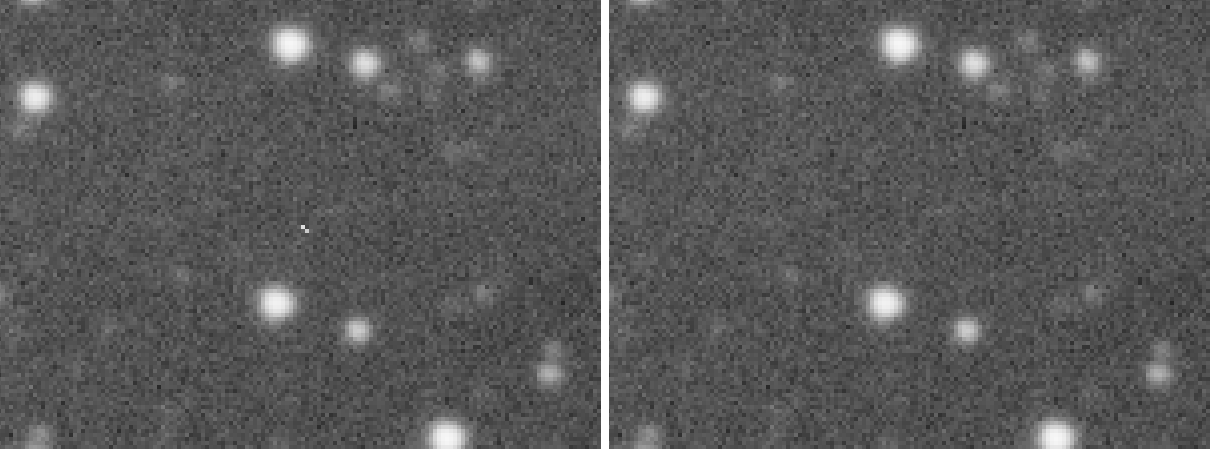
Every sensor has pixels that do not behave: some collect far more dark current than the others, some are stuck low. Calibration subtracts the dark, but a hot pixel saturated in the dark, or one whose dark current changed between the dark and the light, is still there after it: an isolated bright dot that registration and integration can turn into short lines, and that debayering spreads into colored crosses.
Cosmetic Correction finds the defects once, in the master dark with its large-scale structure (amp glow, a gradient) taken away: each pixel less the median of the 5 by 5 pixels of its color around it. Per color of the color filter array, or over the whole frame for a monochrome camera, it measures the median m of that result and its robust sigma s on each side, 1.4826 times the median absolute deviation. A pixel is hot where it is above m + Hot sigma × s, and cold where it is below m − Cold sigma × s. Where the dark is noisier than elsewhere, as in strong amp glow, the thresholds there rise with the noise. A defect map adds the pixels it marks with zero, as PixInsight's DefectMap writes them.
Each defect of each frame is then replaced by the median of its nearest valid neighbors of the same color: a gray pixel takes its eight neighbors, a green pixel of a Bayer mosaic its four diagonal greens, a red or blue one the eight of its color two pixels away, looking farther out when those are defects too. Defects never serve as neighbors, so the order of the corrections does not matter.
Cosmetic Correction is our own algorithm, the one Calibration applies while it calibrates. Its files, master dark and output settings take PixInsight's CosmeticCorrection parameters where they mean the same, so a PixInsight icon of CosmeticCorrection opens here with its frames and its dark; its detection levels, automatic detection and defect list belong to PixInsight's own algorithm and are kept in the icon, not used.
2Quick Start
- Choose .
- Add Files..., and choose the calibrated frames. For a one-shot color camera, turn CFA on.
- Give the Master dark of the frames' camera, the one they were calibrated with if any.
- Click Run. The corrected frames are listed under the results, each named after its frame with
_ccat the end.
3Interface & Parameters
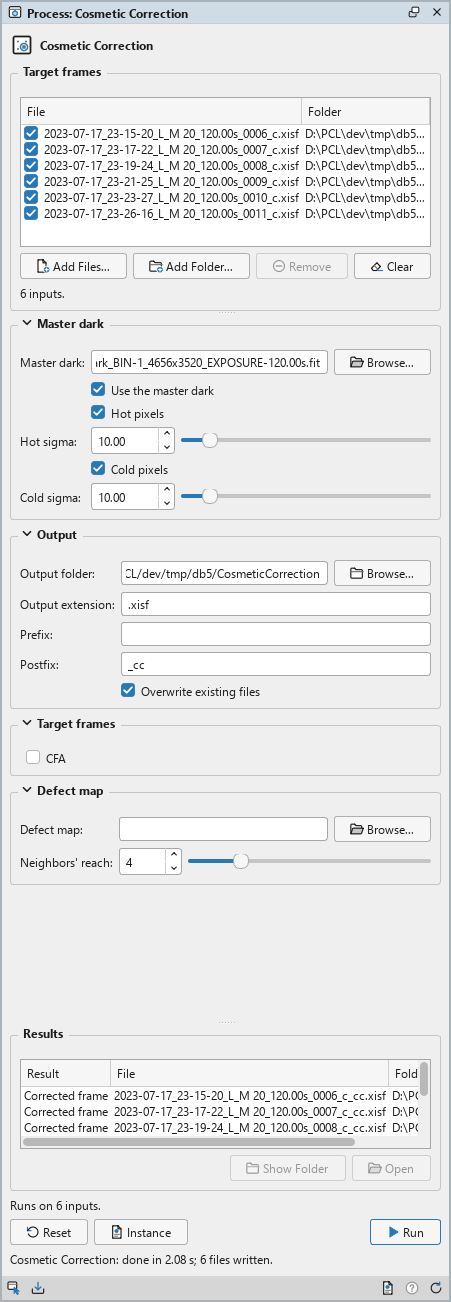
Cosmetic Correction is a process that works on files: its panel lists the frames at the top, under Target frames, with the CFA switch under the list, and has three sections of settings, Master dark, Output and Defect map, each of which folds away with the arrow beside its title. Under them are the results of the last run, the buttons and the system bar along the bottom. It works on no open image, so it has no Applies to and no live preview.
3.1Target frames
Target frames: The calibrated frames to correct. Each row shows a file and its folder, with a check box that keeps it in the run or leaves it out. Add Files... and Add Folder... add frames; Remove takes the selected rows away; Clear empties the list. The line under the list says how many frames there are.
CFA: Under the list. Off by default. The frames are mosaics of a one-shot color camera: the defects are found per color and a defect is replaced from neighbors of its own color, by each frame's Bayer pattern. A frame with no pattern is a warning and is left out. Correct such frames before Debayer.
3.2Master dark
Use the master dark: On by default. Find the defective pixels in the master dark.
Master dark: The master dark's file, of the frames' size, chosen with Browse...: the one the frames were calibrated with.
Hot pixels: On by default. Correct the pixels the dark shows hot.
Hot sigma: A pixel is hot where the dark exceeds its local median by this many robust sigmas, from 1 to 100; 10 by default. Lower finds more, warm pixels included.
Cold pixels: Off by default. Correct the pixels the dark shows cold.
Cold sigma: A pixel is cold where the dark is below its local median by this many robust sigmas, from 1 to 100; 10 by default.
3.3Defect map
Defect map: An image of the frames' size whose zero pixels are defective, the convention of PixInsight's DefectMap: bad columns, a known cluster. Its pixels are corrected with the dark's. Empty, the default: none.
Neighbors' reach: How far a defect's valid neighbors are looked for, in steps of pixels of the same color, from 1 to 16; 4 by default. A defect with no valid neighbor within it is left as it is.
3.4Output
Output folder: Where the corrected frames are written. Empty, the default: next to each frame. Browse... chooses a folder.
Output extension: .xisf, the default, or .fits. The frames are
written in 32-bit floating point whatever their format: the median of two values is their mean, which integers would
round.
Prefix: Text put before each frame's name. Empty by default.
Postfix: Text put after each frame's name: _cc by default.
Overwrite existing files: Off by default: a file of the same name is kept, and the new one gets
a new name, with _1, _2... at the end. On, it is replaced.
3.5Run and Instance
Run: Corrects the frames checked in the list. A run with neither the dark nor a defect map is refused ("Nothing to correct"), and so is one that asks for the dark without giving it. The Log gives the defects found for each frame size, hot, cold and mapped, then each frame's corrections and a summary. A frame that cannot be read is a warning and the others are written; a canceled run leaves none of its files.
Results: What the last run wrote, a corrected frame a row, not opened: a double click, or Open, opens one as an image; Show Folder shows its folder.
Instance: Shows the process as the panel has it now, as text: the settings as a DSPX
process (.dsproc) or as a PixInsight process icon (.xpsm) of CosmeticCorrection, chosen under
Format, the frames included. Copy puts the text on the clipboard; Save... saves it as a file and
puts it on the Process Shelf. PixInsight reads the icon's frames, dark and switches, but finds defects its own way:
its result is not ours.
Reset: Puts every setting back to its default and empties the list.
The system bar along the bottom of the panel has the same commands as small icons: at the left, drag and Run; at the right, Instance, Help (this page) and Reset. Dropped on the Process Shelf, the first icon keeps the process there as a row of its own, with its frames. With , the bar alone has them.
4What a Corrected Frame Holds
The corrected frame keeps the calibrated frame's keywords and properties, its noise and PSF signal estimates among them, and adds HISTORY lines: how many hot, cold and mapped pixels were corrected, and the names of the dark and the map. The defects are found once for each frame size and pattern in the run, so a run of a thousand frames reads the dark once.
Cosmetic Correction works the same with the PixInsight compatibility mode on or off.
5Usage Tips and Tricks
Or in one step. Calibration has the same correction in its Cosmetic correction section: turn it on there, and the frames come out of calibration corrected, with no second set of files.
Frames calibrated without a dark. A camera of little dark current is often calibrated with a flat alone. Its hot pixels are then still there, and a master dark used here only to find them takes them away.
Start at 10 sigmas. The default finds the clearly hot pixels. If dots remain in the registered frames, lower Hot sigma a few steps at a time; too low, and the correction starts replacing ordinary pixels that only look warm in a noisy dark.
Before debayering. On a one-shot color camera, correct the CFA frames, with CFA on, before Debayer: a hot pixel debayered becomes a colored cross that no longer looks like a single defect.
6Related Tools
Calibration: calibrates the frames, and can correct them as it goes.
Integration: makes the master dark, and its pixel rejection removes what defects are left.
Debayer: the corrected CFA frames into RGB frames.