
Deep Morphology
Morphological transformations, with reconstruction and attribute filters
Deep Morphology reshapes the structures of an image by comparing each pixel with its neighborhood: erosion, dilation, opening, closing, median and the other rank operators through a structuring element, with a geodesic reconstruction that keeps them from digging dark rings around stars, and attribute filters that remove features by their area or their contrast instead of their shape. Its most common use is reducing stars, through a star mask.
1Introduction
A morphological transformation looks at each pixel through a small shape, the structuring element, and replaces it with something taken from the pixels under that shape: the smallest value for an erosion, the largest for a dilation, the median, any percentile. Bright structures smaller than the element shrink or vanish under an erosion, and grow under a dilation. That is how stars are made smaller without touching anything larger than them.
Deep Morphology has the full set of rank operators (erosion, dilation, opening, closing, median, selection and midpoint) through an element of any of six shapes, with interlacing, thresholds, iterations and an amount. It adds two things the classic tools lack:
- Reconstruction, a geodesic step after an erosion, dilation, opening or closing that clamps the result to the original image, so it cannot sink below the local background. It is the classic cure for the dark rings left by star reduction, and with its extent it becomes a halo safe star reduction.
- Attribute filters, which work on connected regions instead of a fixed element: area opening and closing remove bright or dark regions smaller than an area, and h-maxima and h-minima remove features by their contrast rather than their size.
In DSPX, Deep Morphology runs the engine of its PixInsight module and gives the same result for the same settings. Its effect shows live on the image while we change the settings.
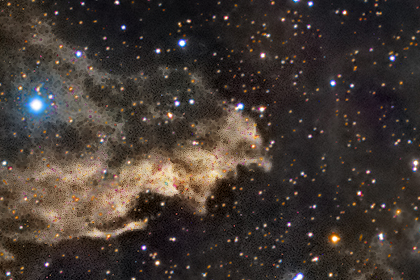
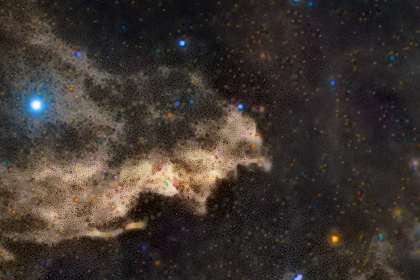
2Quick Start
The most common session with Deep Morphology: making the stars of an image smaller.
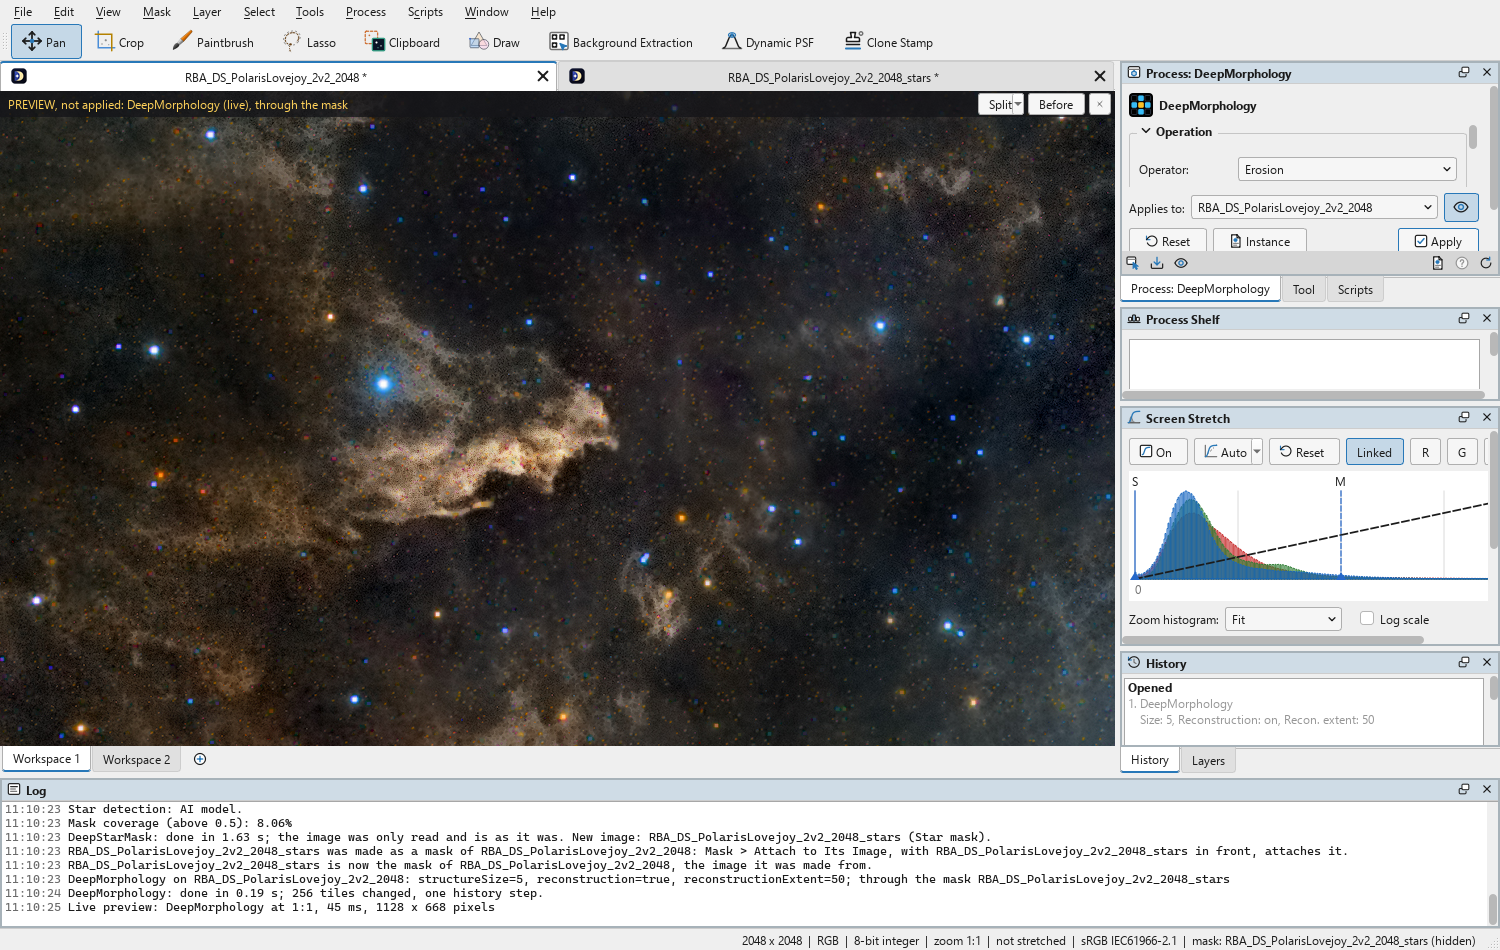
- Open the image. Make its star mask with Deep Star Mask, and attach it to the image with (Ctrl+Shift+M), so that only the stars are changed.
- With the image in front, choose .
- Leave Operator on Erosion and Structure on Circular, and set Size a little larger than the stars we want to reduce: 5 or 7 for most images.
- Turn on Reconstruction and lower Recon. extent from 100 until the stars are as small as we want them: the lower the extent, the stronger the reduction. The live preview (the eye) shows the result as we move it; \ held, or Before in the image's banner, shows the image as it is.
- Click Apply. The image changes in one history step, which takes back.
3Interface & Parameters
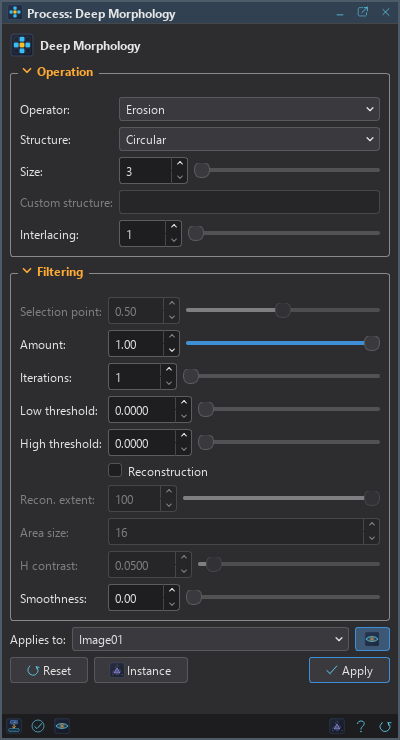
The panel has two sections, Operation (the operator and its structuring element) and Filtering (what shapes the result), each of which folds away with the arrow beside its title, then the image the process applies to with the live preview's eye, the buttons and the system bar along the bottom. The settings that do nothing for the operator chosen are grayed out.
3.1Operation
Operator: The operation. The first seven work through the structuring element:
- Erosion: the smallest value of the neighborhood. Shrinks bright structures and widens dark ones.
- Dilation: the largest value of the neighborhood. Widens bright structures and shrinks dark ones.
- Opening: a dilation followed by an erosion, as PixInsight's MorphologicalTransformation does it.
- Closing: an erosion followed by a dilation.
- Median: the median of the neighborhood: a robust smoothing that removes specks.
- Selection: a percentile of the neighborhood, set by Selection point.
- Midpoint: the mean of the smallest and the largest values of the neighborhood.
The last four, Area opening, Area closing, H-maxima and H-minima, are attribute filters: they ignore the structuring element ("Attribute Filters" below).
Structure: The shape of the structuring element.
- Box: every pixel of the square.
- Circular: a disk, the default. It keeps round structures such as stars round.
- Orthogonal: a horizontal and a vertical line, crossed.
- Diagonal: the two diagonals.
- Star: the orthogonal and diagonal lines together.
- Custom: the element written in Custom structure.
Size: The side of the structuring element, in pixels, from 3 to 101. An even value is taken as the next odd one.
Custom structure: The element used when Structure is Custom: Size times Size characters,
x where the element is and - where it is not, row after row. Several ways (masks the
operator is applied through, and whose results are combined) are separated by ;. A size 3 cross is
-x-xxx-x-. There is no editor for it in DSPX yet: an element painted in the PixInsight module's
editor comes with its saved process or icon.
Interlacing: The distance between the element's samples. It widens the element's reach without adding samples, so a small element covers a larger area at the same cost.
3.2Filtering
Selection point: For the Selection operator: the percentile taken, from 0 (an erosion) through 0.5 (the median) to 1 (a dilation).
Amount: How much of the result is blended over the original, from 0 to 1. 1, the default, is the full effect.
Iterations: How many times the operation is applied in a row, each time on the previous result. Two erosions erode twice.
Low threshold: Limits the change where the result is below the original by less than this amount: smaller darkenings are only partly applied. 0 sets no limit.
High threshold: The same where the result is above the original: smaller brightenings are only partly applied.
Reconstruction: After an erosion, dilation, opening or closing, a geodesic reconstruction clamps the result to the original image, so that it cannot sink below (or rise above) the local background. See "Reconstruction" below.
Recon. extent: How far the reconstruction goes, in percent. At 100, the default, the structures smaller than the element are removed and everything larger is restored to its original shape; below 100 the survivors grow back only part of the way, a graduated reduction with the halos clamped; at 0 there is no reconstruction.
Area size: For Area opening and Area closing: the bright (opening) or dark (closing) connected regions smaller than this many pixels are removed.
H contrast: For H-maxima and H-minima: the bright (maxima) or dark (minima) features whose contrast with their surroundings is below this value, from 0 to 1, are suppressed.
Smoothness: A last smoothing, confined to what the operator changed and a small feather around it, so the untouched background stays sharp and only the changed structures (the reduced stars) are softened. Its reach grows with this value and with Size. 0, the default, turns it off.
3.3Apply, Preview and Instance
Live preview (the eye): At the end of the Applies to row; Preview in the system bar is the same switch. On by default. The image shows Deep Morphology applied to the part in view, as the settings change, with the banner "PREVIEW only, nothing applied"; the image itself does not change until Apply. At 1:1 and closer, the preview is what Apply gives. At a reduced zoom (Fit, 1:2...) it is computed on the reduced view, with Size, Interlacing and Area size scaled to it, and the banner says "approximate: sizes scaled"; Exact, in the banner, then computes the part in view at full resolution. The attribute filters and a full reconstruction follow structures across the whole image, so their preview of a part is close, not exact.
Applies to: The image Deep Morphology works on, chosen in a list of the open images. It shows the image in front, and follows it as we bring other images to the front. Picking another image in the list makes the panel work on that one, its live preview included, without bringing it to the front; the pick stays while we work on other images, and Follow Active, the small button that appears beside the list, makes the panel follow the image in front again. An image that a tool or a run is working on is listed, but cannot be picked.
Apply: Applies Deep Morphology to the image named in Applies to, through its mask and selection if it has them. The image changes in one history step.
Instance: Shows the process as the panel has it now, as text: the settings as a DSPX
process (.dsproc) or as a PixInsight process icon (.xpsm) that DeepMorphology's PixInsight module
opens, chosen under Format. Copy puts the text on the clipboard; Save... saves it as a file and puts
it on the Process Shelf.
Reset: Puts every setting back to its default.
The system bar along the bottom of the panel has the same commands as small icons: at the left, drag to apply and Apply; at the right, Instance, Help (this page) and Reset. Drag to apply, the first icon, carries the process with its settings: dropped on an image's window, it applies them to that image, whatever image the panel works on; dropped on the Process Shelf, it is kept there as a row of its own. With , the bar alone has them.
4Reconstruction
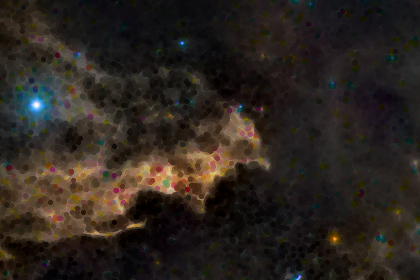
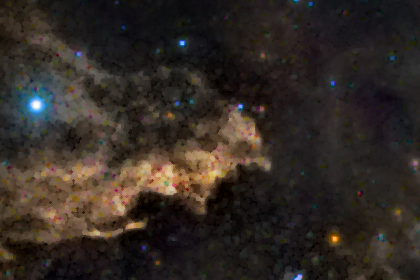
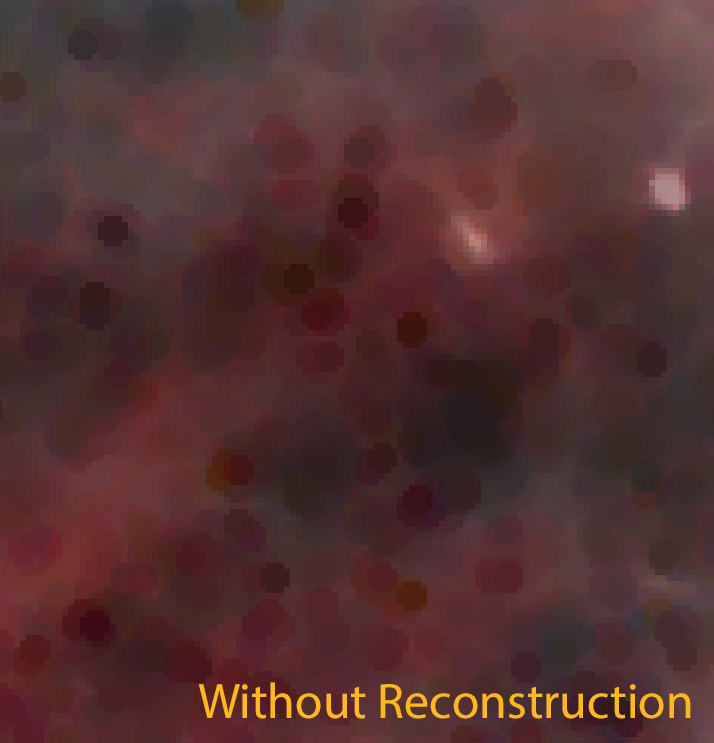
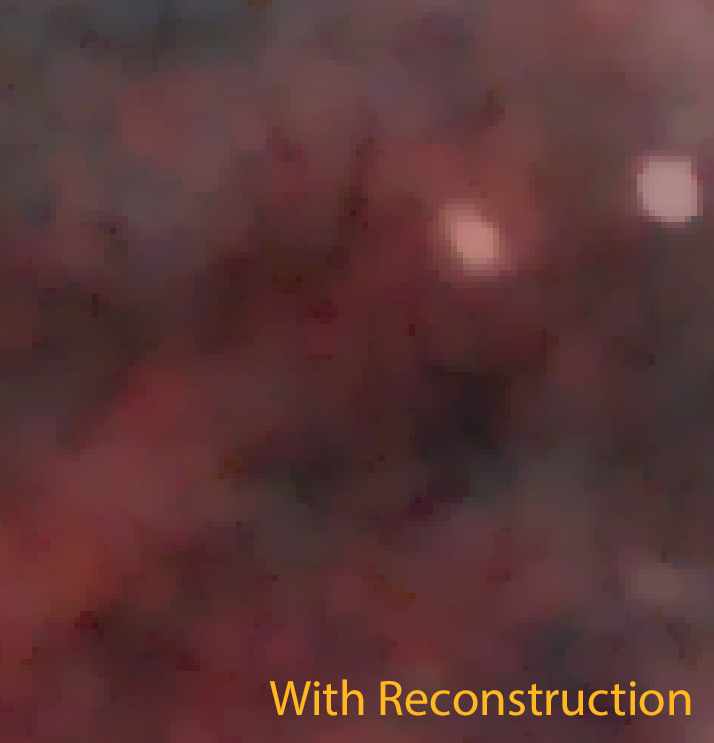
A plain erosion pulls bright structures down, and their glow with them, below the background around them: a dark ring or patch is left where a bright star was, the classic flaw of morphological star reduction. Reconstruction is a geodesic step after the operator that clamps the result to the original image, so that it cannot go below the local background. It applies to the four classic operators: erosion, dilation, opening and closing.
Its extent decides how far it goes:
- 100: a full reconstruction. Structures smaller than the element are removed entirely; everything larger is restored to its exact original shape, with no reduction at all. It removes the small things and protects the large ones perfectly: small stars, hot pixels and specks vanish, large structures are untouched.
- Below 100: a partial reconstruction. The survivors grow back only part of the way: a graduated reduction (erosion, opening) or growth (dilation, closing) with the dark halos clamped. Size sets how much the operator can reduce, and the extent how much is given back.
- 0: no reconstruction: the full reduction, and the rings with it.
5Attribute Filters
The last four operators do not use a structuring element. They act on connected regions, and remove or suppress them by an attribute, their area or their contrast. Structure, Size, Interlacing, Iterations and the thresholds are grayed out while one of them is chosen.
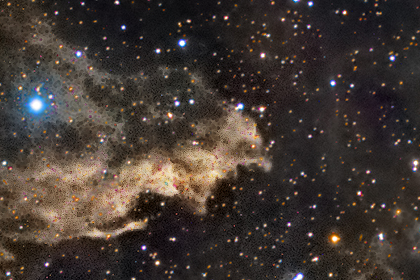
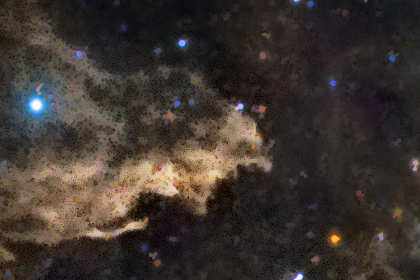
- Area opening and Area closing remove the bright (opening) or dark (closing) regions smaller than Area size. Area opening is an ideal despeckle: it erases small stars and hot pixels of a given size and leaves the larger structures crisp, with no rounding from an element.
- H-maxima and H-minima suppress the bright maxima or dark minima whose contrast with their surroundings is below H contrast. They select by how much a feature stands out, not by its size, so they can lower faint blobs of any size and keep the strong features.
6Recipes
Remove small features. Area opening, with Area size just above the size of the specks or stars to remove. Area closing does the same for small dark holes.
Remove small stars cleanly. Erosion with Reconstruction on and Recon. extent at 100, and a Size a little larger than the stars to remove. The stars smaller than the element vanish; the larger ones come back as they were, with no rings.
Halo safe star reduction. Erosion, a Circular structure of moderate Size (how much it can shrink), Reconstruction on, and Recon. extent lowered from 100 (how much is given back). A touch of Smoothness feathers the reduced stars. Through a star mask, only the stars change.
Lower faint blobs. H-maxima, raising H contrast until the unwanted bright features are suppressed and the strong ones remain.
7Usage Tips and Tricks
Work through a star mask. Without a mask, an erosion changes every structure smaller than the element, the fine detail of the nebula included. A star mask from Deep Star Mask limits it to the stars.
Opening and closing as in PixInsight. Deep Morphology follows PixInsight's MorphologicalTransformation convention, so a recipe brought from it gives the same kind of result.
Full reconstruction does not reduce. At Recon. extent 100, what survives is restored exactly. For a reduction, lower the extent.
Circular keeps stars round. On a star field, a circular element keeps round structures truer than a box.
Keep Amount at 1 while tuning. A lower Amount blends the result back toward the original and hides the difference between settings. Tune at full strength, then lower it at the end.
Judge the preview at 1:1. At a reduced zoom the sizes are scaled and the preview is close, not exact. At 1:1, or with Exact, it is what Apply gives.
Keep the recipe. Instance, then Save..., keeps every setting, a custom element included, as a process file to apply again to other images, or to drag onto them from the Process Shelf. To use it once on another open image, drag the system bar's first icon onto that image.
8Related Tools
Deep Star Mask: the star mask to apply Deep Morphology through, so that it changes the stars alone.
Deep Star Removal: removes the stars entirely, when reducing them is not enough.
Blur: linear filtering through a kernel. Better when the goal is a weighted average rather than a rank or a connected region.