
Deep Star Removal
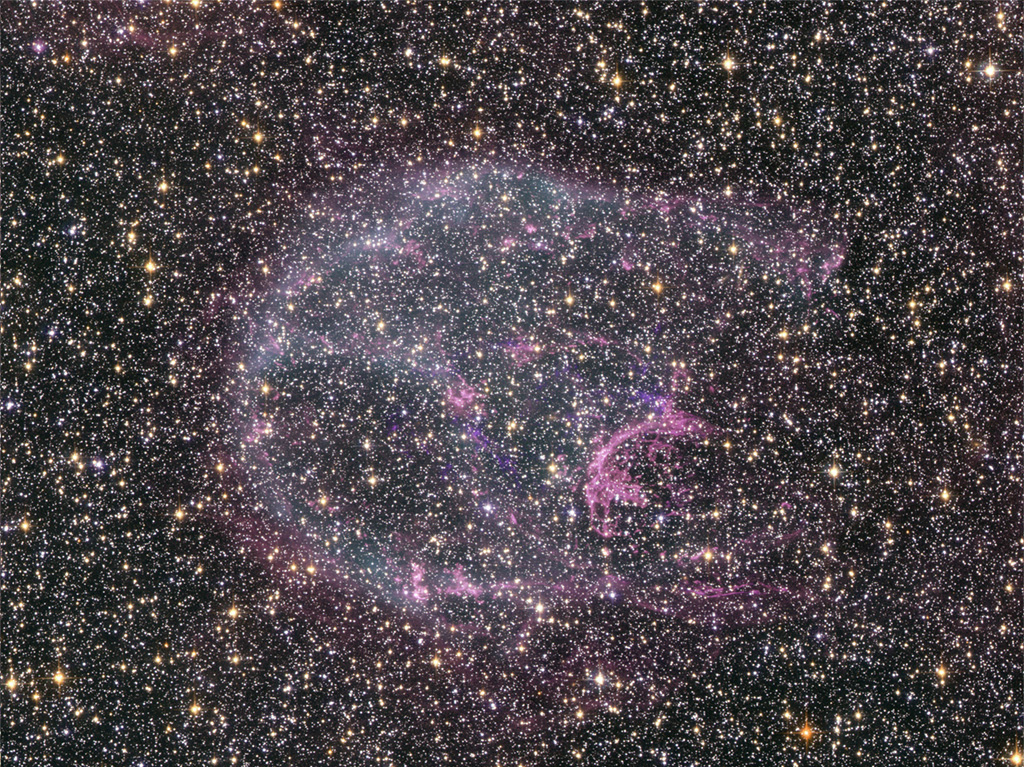
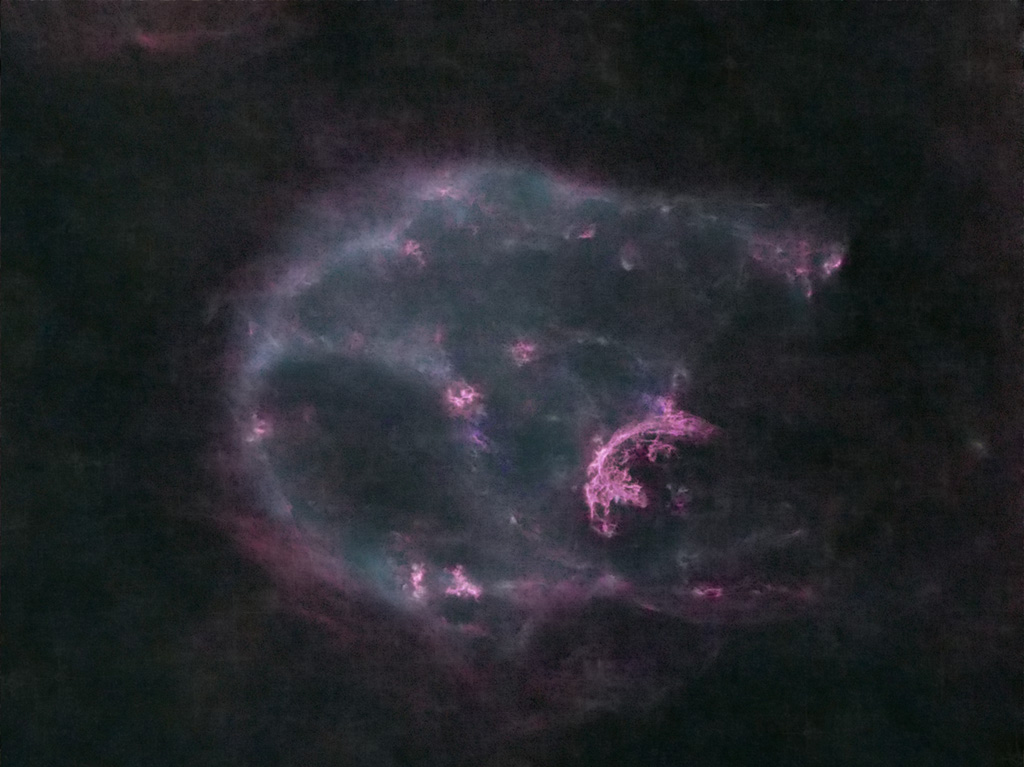
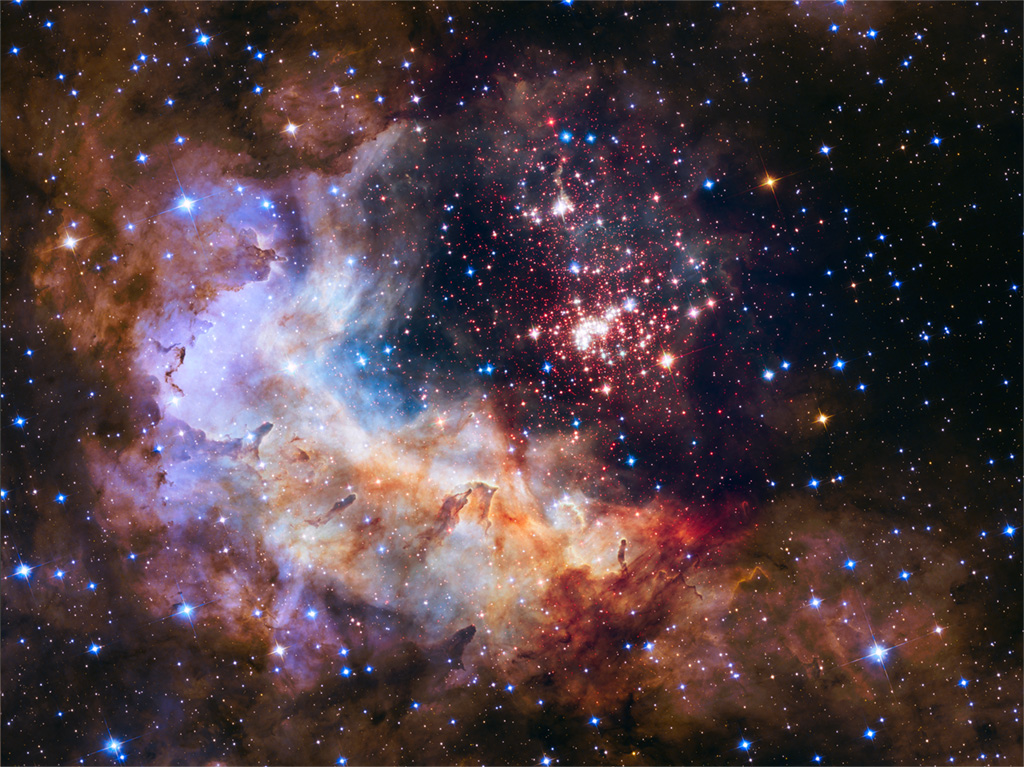
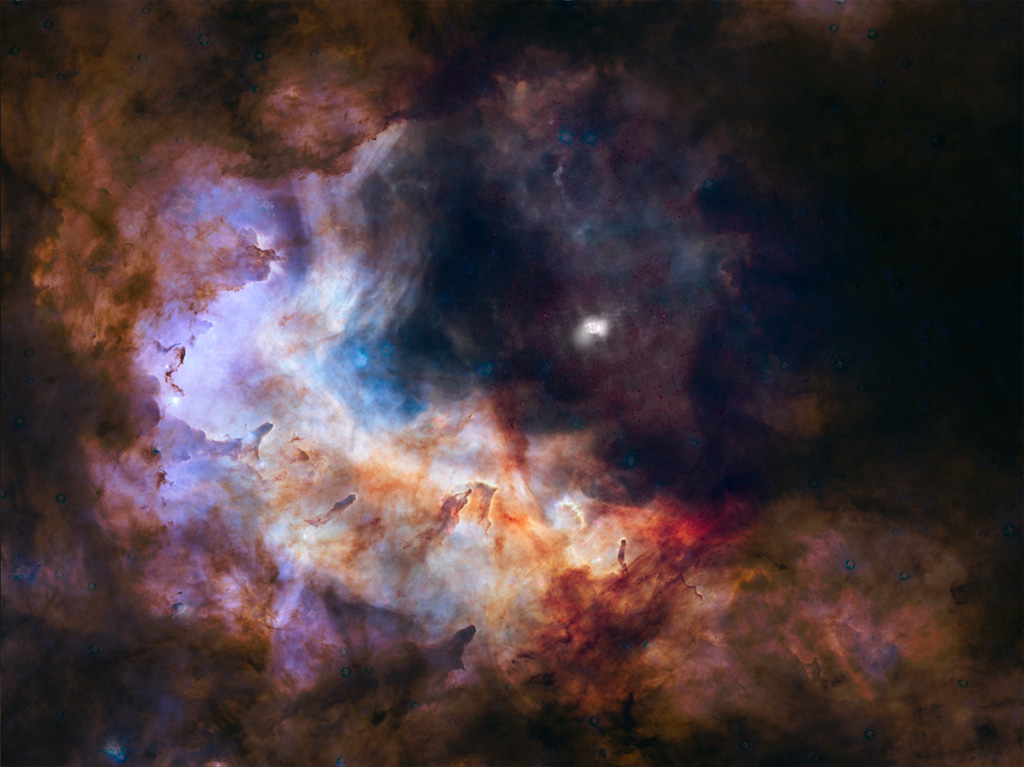
Starless and star images from a trained network, with the removed areas repaired
Deep Star Removal removes the stars from an image with a trained neural network, leaving the nebulosity, the dust and the background behind. Alongside the starless image it can make a star image holding exactly the star light that was taken out, so that we can process the two apart and put the stars back at the end. The areas where stars were removed are repaired for us: their color recovered, the dark fills of large stars lifted, the largest ones healed.
1Introduction
The removal itself is one step with nothing to tune: the network looks at the image and fills every star with what it expects to find underneath. What we control is what happens around it: how much of the star light is removed, where the starless image goes, how the star image is built so that it recombines cleanly, and whether the image is linear or stretched.
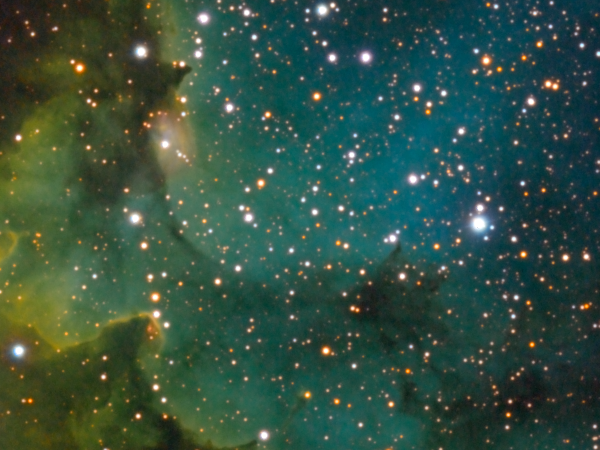
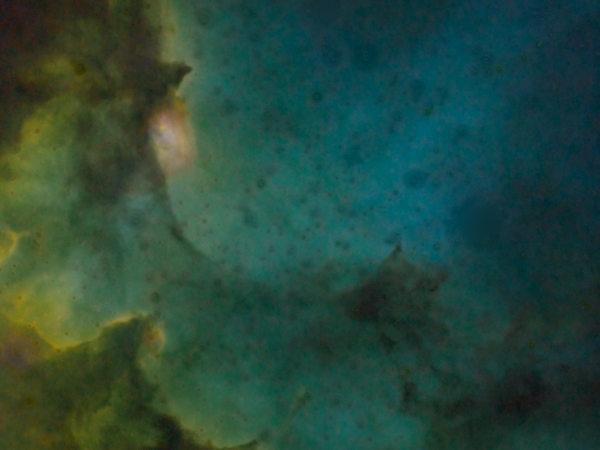
Star removal is never perfect, and three artifacts are common enough that Deep Star Removal repairs them. The filled areas tend to come out grayish and desaturated; the fills of large, bright stars tend to come out darker than their surroundings; and the largest stars can leave a shape behind that no brightness correction hides. All the repairs are measured on the image itself: the removed star light says where each star was, and the pixels around it say which color and brightness the fill should have. They are on by default, and each can be turned off.
Deep Star Removal works on color and gray images. Its network runs on the graphics card where it can, and on the processor otherwise. The model is ethically sourced: it was trained only on the author's own images and on material released to the public domain or under CC0.
2Quick Start
- Open the image and choose .
- Turn on Linear if the image has not been stretched yet; leave it off for a stretched image.
- To check the result on the largest stars first, choose A region under Preview, draw it over them with Draw Region, and click Preview.
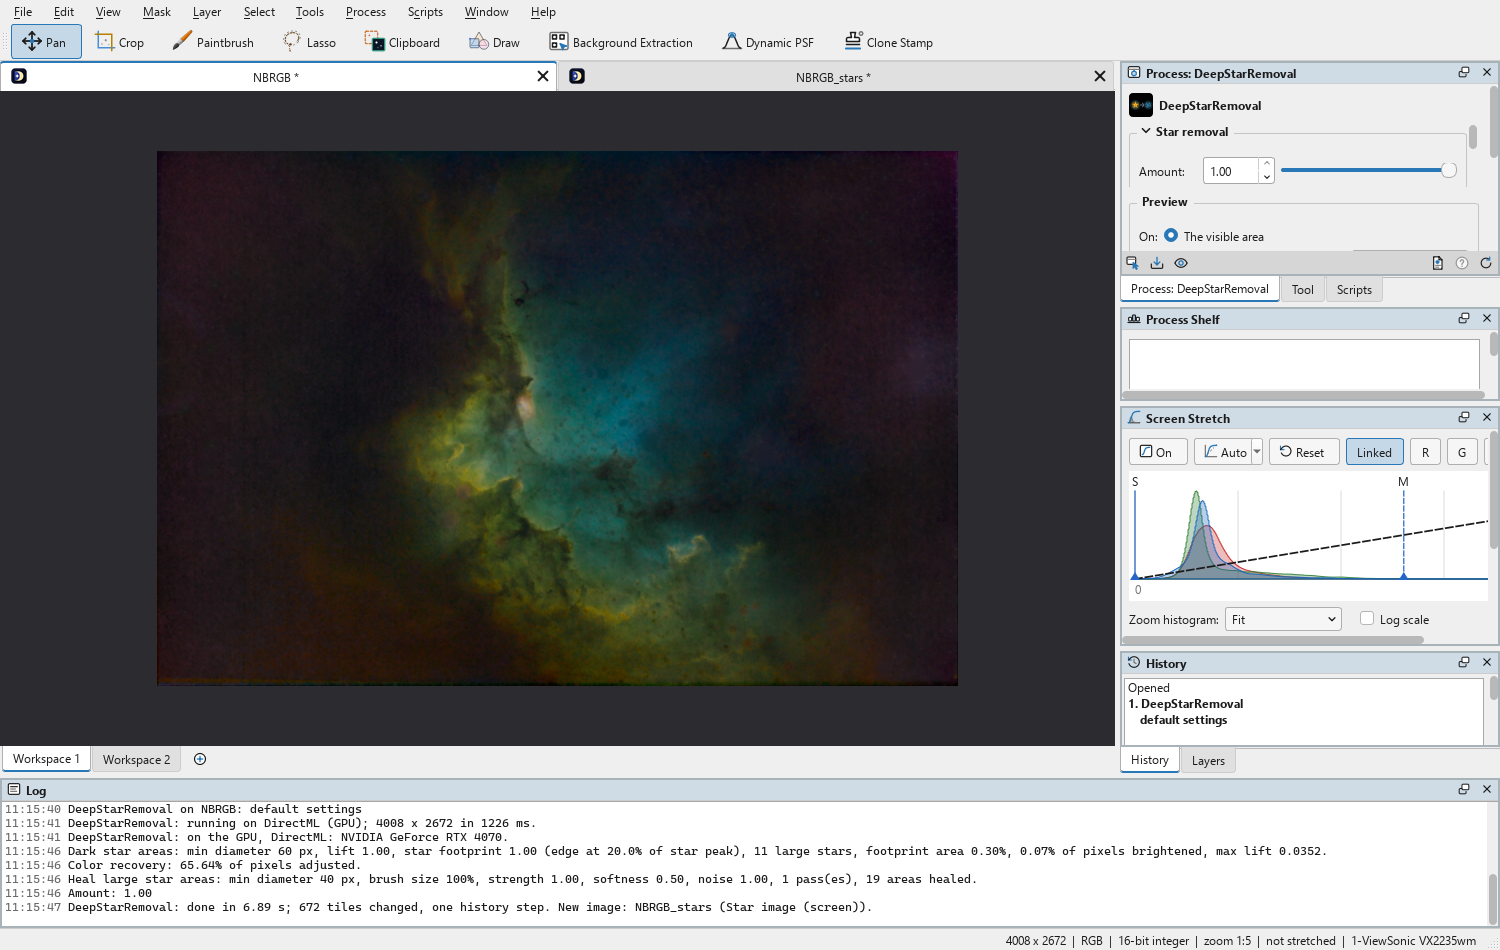
- Click Apply. The image becomes starless, in one history step, and the star image arrives as a new image
named after it with
_starsat the end. - Process the starless image, then put the stars back ("Putting the Stars Back" below).
3Interface & Parameters
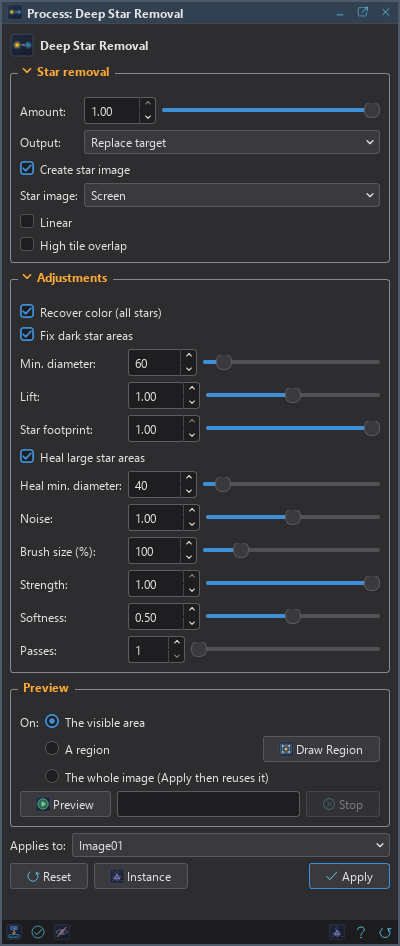
The panel has two sections: Star removal, which decides what the process makes, and Adjustments, which repairs the areas where stars were removed. Each folds away with the arrow beside its title; the defaults of Adjustments suit most images. Under them are the Preview box, the image the process applies to, the buttons and the system bar along the bottom.
3.1Star Removal
Amount: The fraction of the star light that is removed, from 0 to 1. At 1, the default, the stars are removed completely. Lower values reduce them instead: every star keeps its share of its light, so at 0.7 each star keeps 30% of it. The star image always holds exactly what was taken out, so recombining the two still gives back the original.
Output: Where the starless image goes.
- Replace target: the default. The image itself becomes starless, in one history step that Undo takes back, through the image's mask if it has one.
- New image: the image is left untouched, and the starless image arrives as a new image named after it with
_starlessat the end.
Create star image: Also makes an image of the removed star light, named after the image with
_stars at the end. On by default; we turn it off when we only want the starless image.
Star image: How the star image is built, which decides how it recombines with the starless image. Both are exact: the unprocessed starless and star images, recombined with the matching operation, give back the original.
- Screen: the default. Built for a screen blend, 1 − (1 − starless) × (1 − stars). A screen blend never clips, even after the starless image has been brightened, which makes it the safe choice for stretched images.
- Additive: the plain difference between the original and the starless image, recombined by addition, starless + stars. Simple and exact, but bright stars can clip once the starless image has been brightened.
Linear: On for linear images, those not stretched yet. The network was trained on stretched images, so the image is stretched for it with an automatic screen stretch, and the starless and star images are brought back to the original's linear scale. Off, the default, for images already stretched. The Log says which stretch was used.
High tile overlap: The image is processed in tiles of 512 pixels blended across their overlap. On, the overlap grows from 64 to 192 pixels, which hides tile seams on difficult images at about 2.5 times the processing time. Off by default; most images never need it.
3.2Adjustments
These repair the areas where stars were removed, and only those. They are measured on the removal itself, before Amount and the linear conversion are applied.
Recover color (all stars): Star removal tends to fill the areas where stars were with a grayish, desaturated tint. With this on, each of those areas is tinted again with the color of the pixels immediately around it, free of stars, while its brightness is kept. How far around each star the color is sampled follows the star's size, and the new color is blended in across a soft edge. It applies to every removed star, and has no settings. Color images only.
Star footprint: How far each large star's footprint reaches, from 0 to 1. The footprint is traced in the removed star light, outward from the star's center, until the light falls to a fraction of the star's peak: 80% at 0, 50% at 0.5, 20% at 1, the default. Higher values give larger footprints. Both repairs below use it: it sets the area Fix dark star areas brightens, and decides which areas Heal large star areas heals and how large each heal is.
Fix dark star areas: The fills of large, bright stars are sometimes darker than their surroundings, leaving a visible hole. With this on, each large star's footprint is brightened up to the level of the ring of pixels immediately around it. The correction follows gradients across the star, keeps the texture of the fill, and only ever brightens. On color and gray images.
Min. diameter: For Fix dark star areas: the smallest diameter, in pixels, of a star to be checked for a dark fill, from 20 to 500; 60 by default. Smaller stars are left alone.
Lift: For Fix dark star areas: how much of the measured darkening is added back, from 0 to 2. At 1, the default, the dark area is brought to the level of its surroundings; above 1 over corrects, below 1 corrects part of the way.
Heal large star areas: The areas left by the largest stars often need more than a brightness correction. With this on, each of them is replaced outright, the way spot healing does it: a smooth fill fitted to a ring of pixels around the area, with noise added to match that ring, blended in across a soft edge. Each heal covers the star's footprint generously, and the areas of other removed stars are never used as reference. It runs after the other repairs, with the same detection of large stars and the same Star footprint as Fix dark star areas, whether that one is on or not.
Heal min. diameter: The smallest diameter, in pixels, of a removed star's footprint to be healed, from 10 to 400; 40 by default. Smaller areas are left to the other repairs.
Noise: The noise added to the healed areas, relative to the noise measured around each one, from 0 to 2. At 1, the default, it matches the surroundings; lower gives a smoother fill, higher a grainier one.
Brush size (%): The size of the healing brush, in percent of the size worked out for each area, from 10 to 500; 100 by default. Larger values reach farther into the surroundings, smaller ones stay closer to the center.
Strength: The opacity of the healing brush, from 0.1 to 1. At 1, the default, the area is replaced fully within the brush's soft edge; lower values blend the healed fill with what is there.
Softness: How gradually the healed fill fades into the image toward the brush's edge, from 0, a hard edge, to 1, a fade from the center outward; 0.5 by default. The fade is relative to the brush, so a larger brush also widens it.
Passes: How many times each area is healed, from 1 to 4. At 1, the default, each area is healed once, at its center. With 2 to 4 passes, the heals are placed half a brush radius from the center: 2 to the left and right; 3 at 12, 4 and 8 o'clock; 4 at 12, 3, 6 and 9 o'clock. Each pass builds on the ones before.
3.3Apply, Preview and Instance
Preview: Shows the starless image on the image without changing it, computed at full resolution on The visible area, on A region we draw on the image with Draw Region, or on The whole image, which Apply then reuses instead of running again. A preview never starts by itself: it is computed when we click Preview, with its progress and Stop. On a part of the image the network sees exactly what it sees on the whole image, but the repairs are made from what the part holds, so with them on the preview is close, not exact; the banner says so. Before, in the image's banner, or the backslash key held, shows the image as it is.
Applies to: The image Deep Star Removal works on, chosen in a list of the open images. It shows the image in front, and follows it as we bring other images to the front. Picking another image in the list makes the panel work on that one, its preview included, without bringing it to the front; the pick stays while we work on other images, and Follow Active, the small button that appears beside the list, makes the panel follow the image in front again. An image that a tool or a run is working on is listed, but cannot be picked.
Apply: Removes the stars from the image named in Applies to, as Output says, and makes the star image when it is asked for, in one run. The run shows its progress in the panel, and Cancel leaves the image as it was.
Instance: Shows the process as the panel has it now, as text: the settings as a DSPX
process (.dsproc) or as a PixInsight process icon (.xpsm) that DeepStarRemoval's PixInsight
module opens, chosen under Format. Copy puts the text on the clipboard; Save... saves it as a file
and puts it on the Process Shelf.
Reset: Puts every setting back to its default.
The system bar along the bottom of the panel has the same commands as small icons: at the left, drag to apply and Apply; at the right, Instance, Help (this page) and Reset. Drag to apply, the first icon, carries the process with its settings: dropped on an image's window, it removes the stars of that image, whatever image the panel works on; dropped on the Process Shelf, it is kept there as a row of its own. With , the bar alone has them.
4Removing Stars
A typical session:
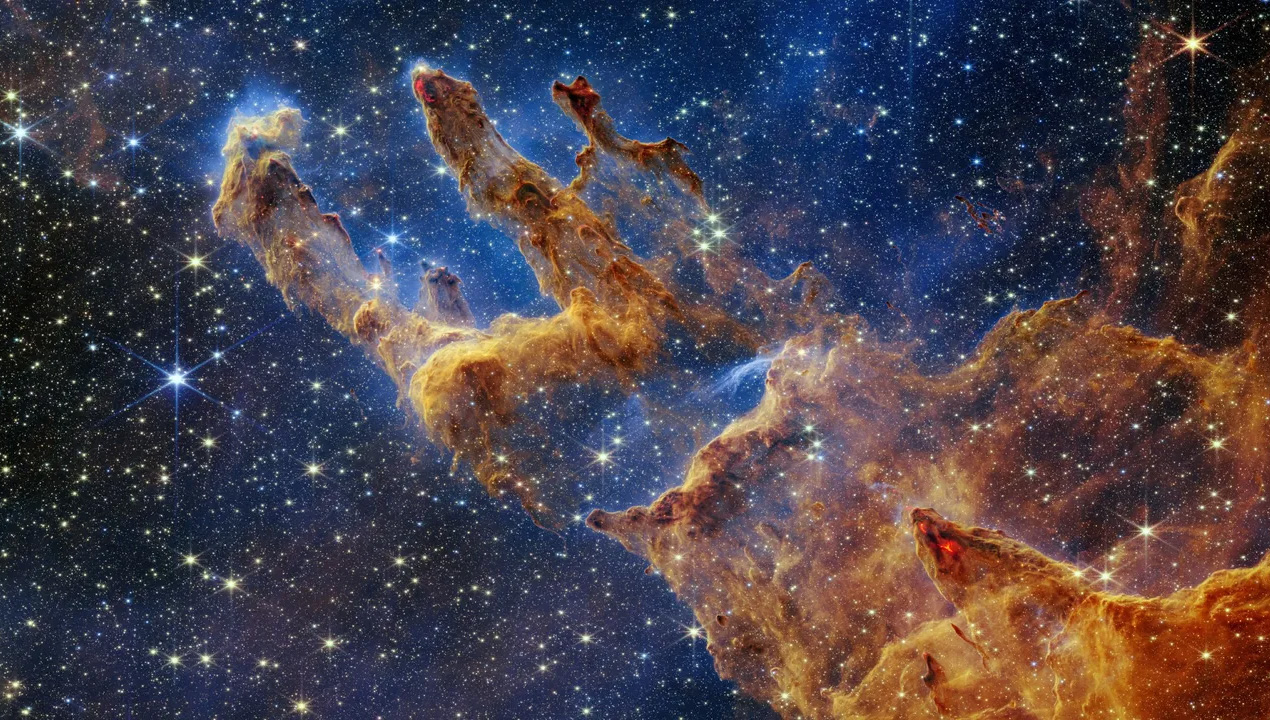
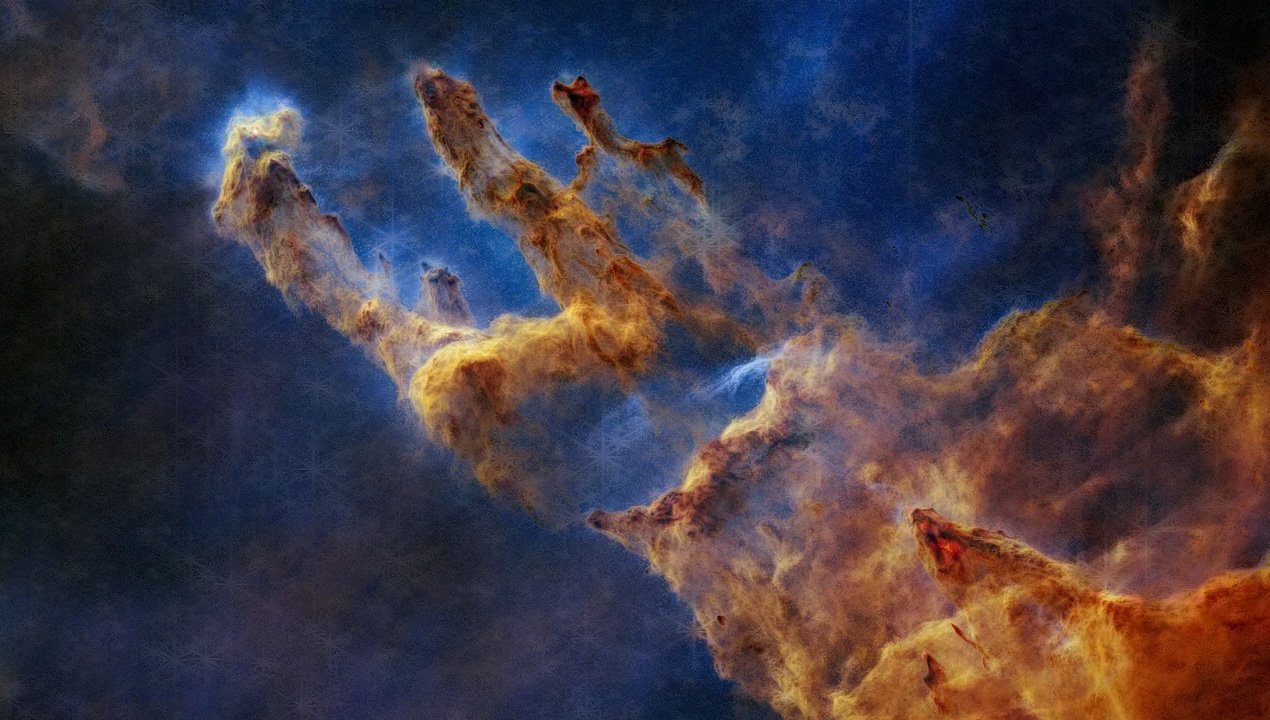
- Tell Deep Star Removal which domain the image is in: Linear on for a linear image, off for a stretched one.
- Decide what we want back. Amount at 1 removes the stars, lower reduces them. Replace target or New image, and Create star image on if the stars are to go back later, with Screen unless we want an additive recombination.
- Preview a region over a few large, bright stars. That is where the repairs matter most, and where tile seams would show if High tile overlap were needed.
- Adjust the repairs only if needed. If a large star still shows a dark hole, raise Star footprint or Lift; if smaller stars need the fix too, lower Min. diameter.
- Apply to the whole image. Instance, then Save..., keeps the recipe.
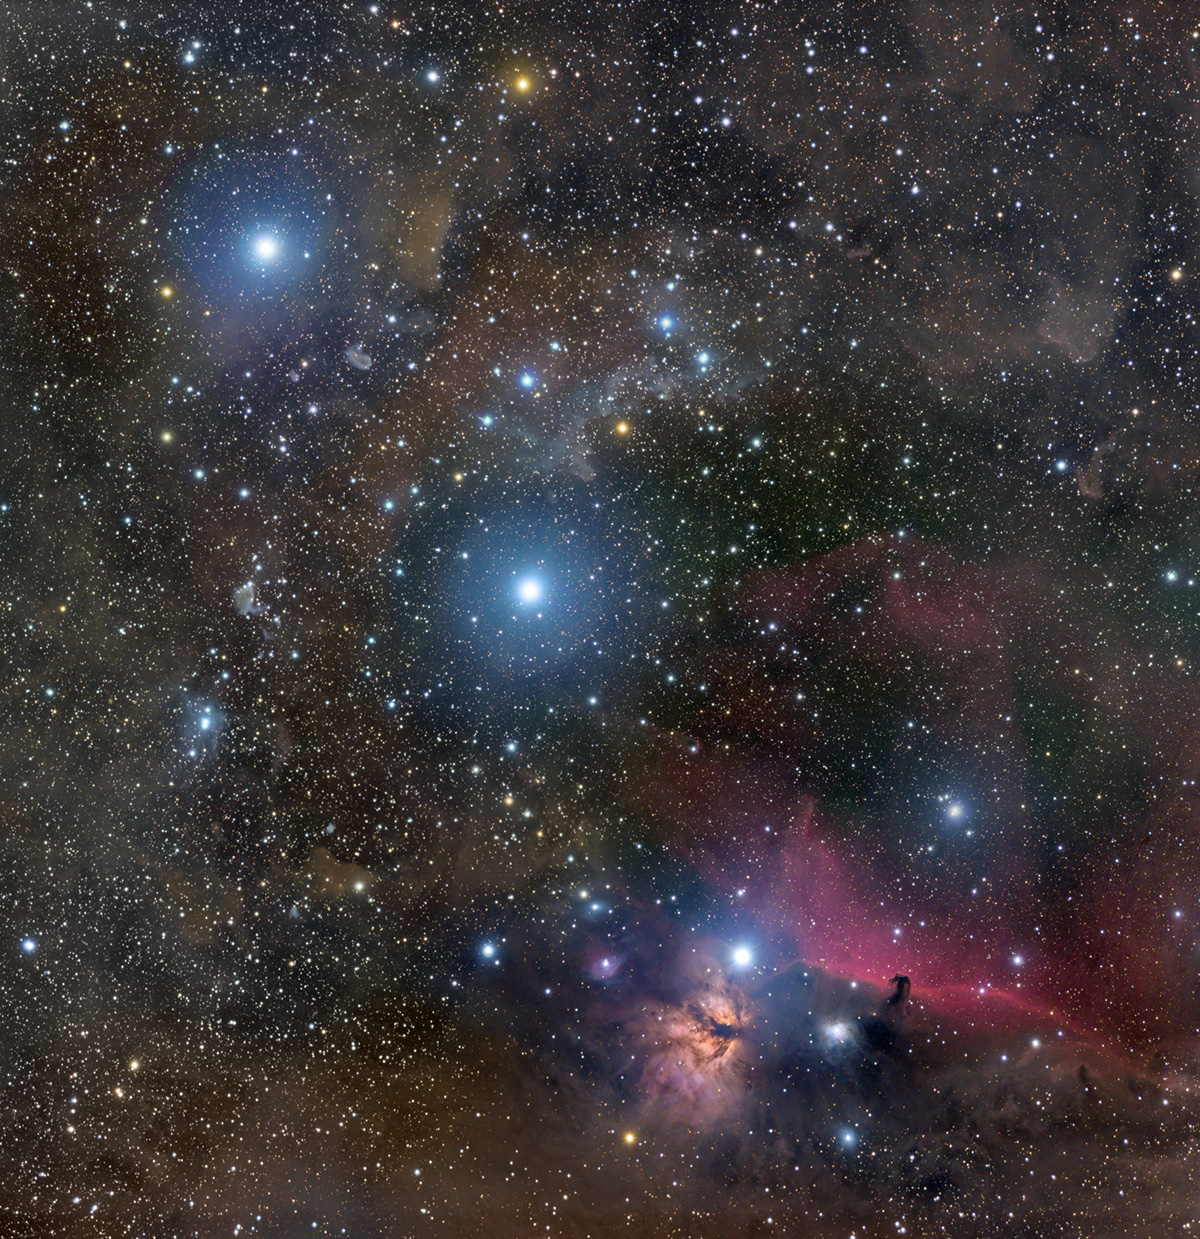
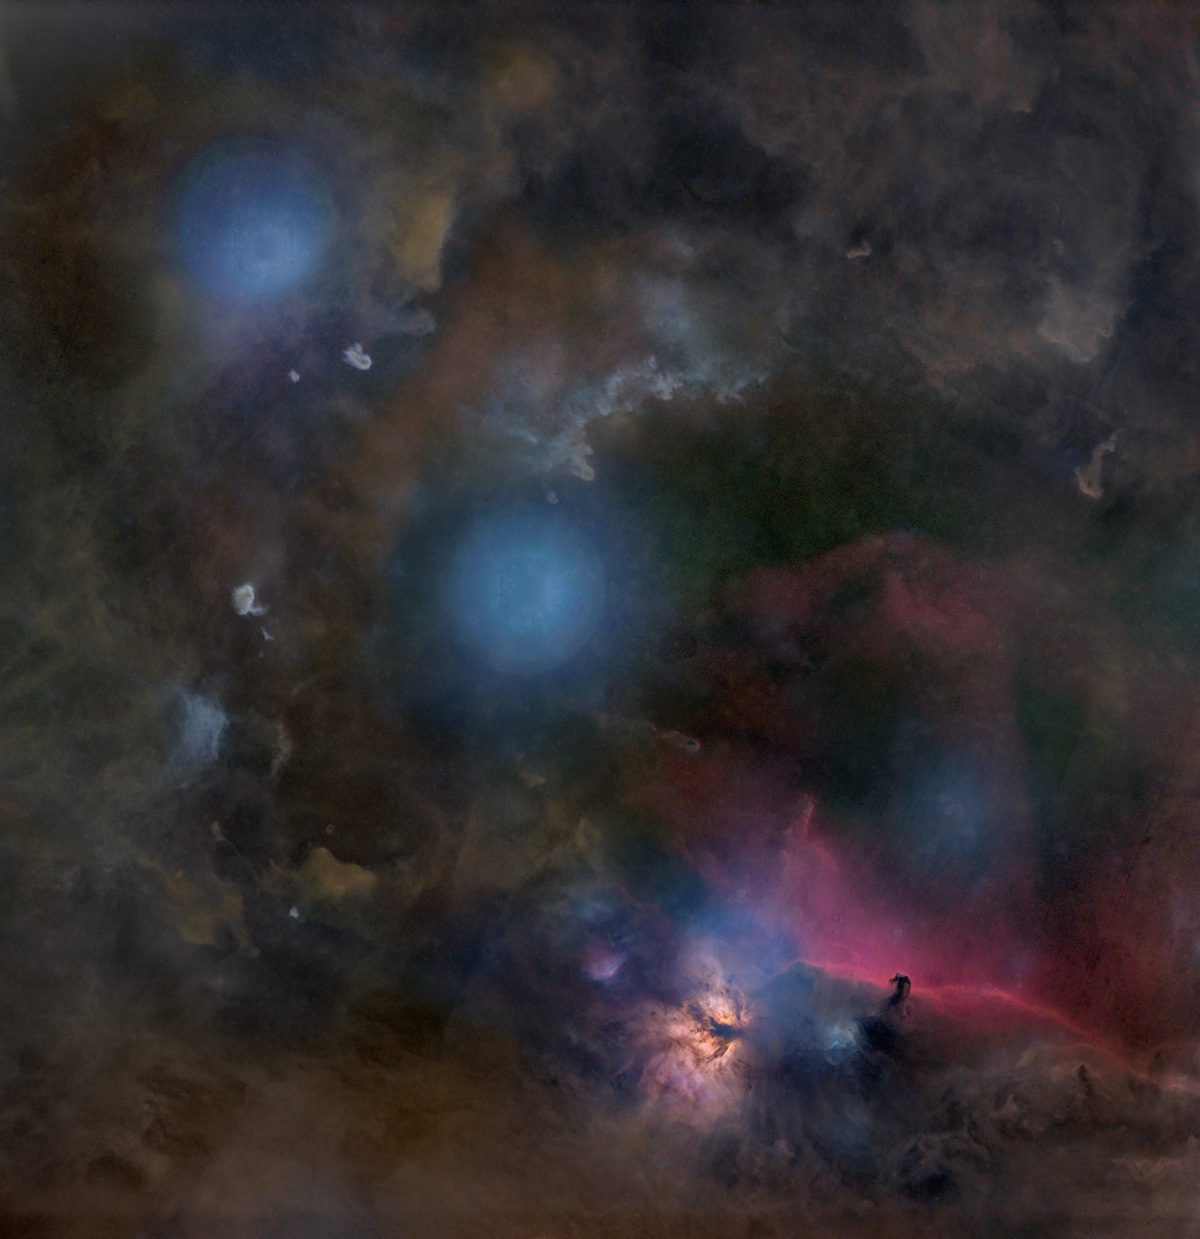
4.1The Star Image
The star image holds exactly the star light that was taken out, built for the recombination Star image names. It can be processed on its own before the stars go back: reduced, desaturated or softened.
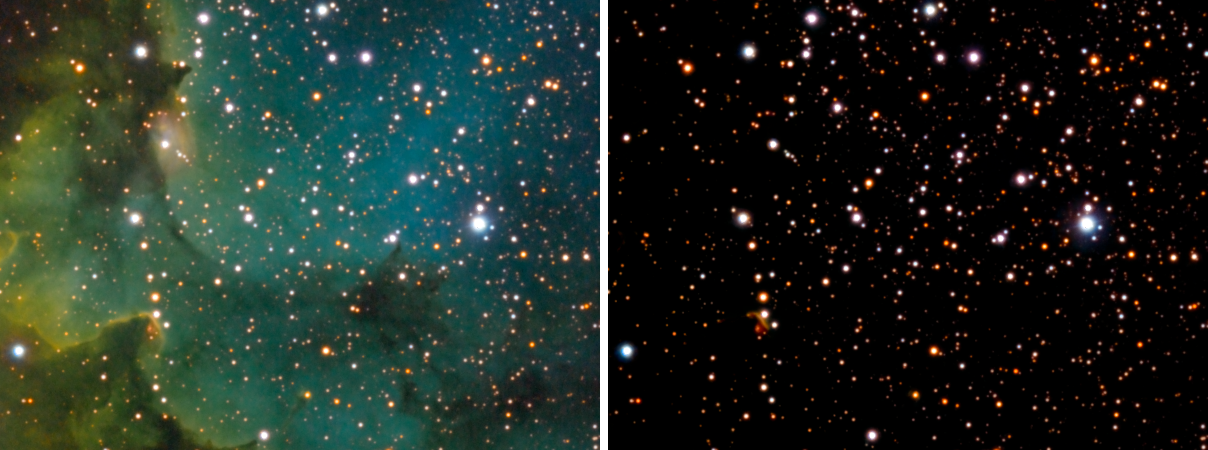
4.2Putting the Stars Back
The point of separating the stars is to process the starless image freely, stretching, sharpening, color work, and then add the stars back with the operation that matches the Star image they were made with. Star Recombination does it in one step: pick the starless and the star image, and the Mode that matches Star image (Screen or Add). Its Stars amount scales the stars, and its Result can also be a layered image, to adjust later.
The same by hand, in Pixel Math, applied to the processed starless image, with stars the star image's
name:
| Star image | Pixel Math expression |
|---|---|
| Screen | ~((~$T)*(~stars)) |
| Additive | $T + stars |
| Either, approximate | max( $T, stars ) |
Screen and Additive each give back the original exactly, as long as the star image was made in that mode. The last row keeps whichever image is brighter at each pixel. It never brightens the background, which makes it forgiving when the two images no longer match, but it does not give back the original: where star light and background overlap, the fainter of the two is dropped instead of being added.
The stars can go back at less than full strength by scaling the star image first, for example
~((~$T)*(~(0.8*stars))).
In the Layers panel, the same is done interactively: the starless image on the bottom layer, the star image on the layer above it with its blend mode set to Screen (or Lighten), and its opacity to taste.
5Usage Tips and Tricks
Match Linear to the data. A linear image with Linear off reaches the network as a nearly black frame, unlike anything it was trained on; a stretched image with Linear on is stretched a second time. When in doubt, look at the image with the screen stretch off: if it is almost black, it is linear.
Star reduction is a lower Amount. There is no separate mode: Amount at 0.5 halves every star's light, faint and bright alike, and the star image holds the other half.
Screen for stretched work. Once the starless image has been brightened, an additive recombination can clip the brightest stars; a screen recombination cannot.
Preview a region first. A region over the brightest stars shows in seconds whether the repairs need adjusting, and whether High tile overlap is worth its cost.
New image to compare. With New image, the original stays as it was next to the starless image, to compare them or to try other settings on the same image.
Tile seams are rare. They show as faint straight lines 448 pixels apart. If we see them, High tile overlap removes them.
Rings and discs. A dark ring left around a large star means the corrected footprint stops short of the dark area: raise Star footprint. A bright disc means it reaches too far or lifts too much: lower Star footprint or Lift.
Read the Log. It says which stretch was used for linear data, how many pixels each repair adjusted, and what the network ran on.
6Related Tools
Deep Star Mask: a star mask with control star by star. Better when we want to protect or isolate the stars while processing, rather than take them out of the image.
Star Recombination: puts the stars back, as one image or as layers.
Pixel Math: recombines the starless and star images with one expression.
Deep Morphology: shrinks the stars in place, through a star mask, when we want them smaller rather than gone.
Filament Sharpen: on a starless image, finds the filaments without the stars in the way.
Star Stretch: a script that removes the stars with this process (or StarNet2), stretches the stars on their own, and puts them back on a starless image with Screen, Add or Lighten: the whole star workflow in one run.