
Invert
Black becomes white, and white black
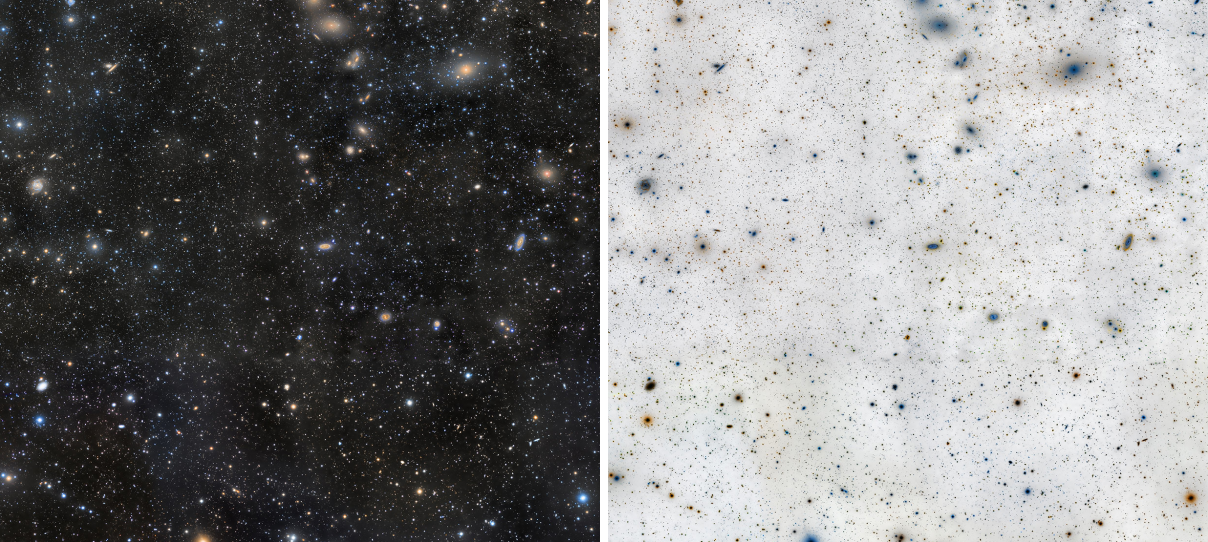
Invert makes the negative of an image: black becomes white, white becomes black, and every value in between is turned around. We use it to look at faint structures as dark on a light background, to turn a mask around so that it protects what it selected, and as a step of Pixel Math style workflows that work on the inverse of an image.
1Introduction
Invert replaces each value by its distance from white: in a floating point image, a value x becomes 1 − x; in an integer image, the largest value of its format less x, so an 8-bit 10 becomes 245 and a 16-bit 1000 becomes 64535. Every color channel is inverted; alpha channels stay as they are. Values of a floating point image outside the range from 0 to 1 are inverted as they are, not clipped.
The eye finds faint gray shapes on a light background more easily than on a dark one, which is why an inverted copy of a stretched image is a good way to look for faint nebulosity, gradients and the edges of a galaxy's halo. Inverting is also how a mask is turned around: a star mask inverted protects the stars instead of selecting them.
Invert is our own engine, with PixInsight's arithmetic: its result is the same as PixInsight's Invert, sample for sample, in floating point and in 16 bits. A PixInsight icon of Invert opens here, and the panel saves one that PixInsight opens.
2Quick Start
- Open the image and choose . With the live preview (the eye) on, the negative shows on the image at once.
- Click Apply. Invert again, or Undo, brings the image back.
3Interface & Parameters
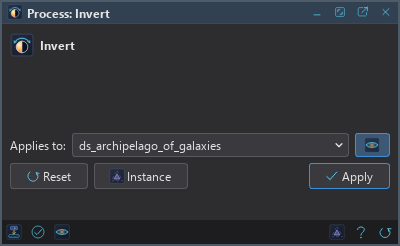
Invert has no settings. Its panel has the image the process applies to with the live preview's eye, the buttons and the system bar along the bottom.
3.1Apply, Preview and Instance
Live preview (the eye): At the end of the Applies to row; Preview in the system bar is the same switch. On by default. The image shows its negative over the part in view, with the banner "PREVIEW only, nothing applied"; the image itself does not change until Apply. Before, in the banner, or the backslash key held, shows the image as it is.
Applies to: The image Invert works on, chosen in a list of the open images. It shows the image in front, and follows it as we bring other images to the front. Picking another image in the list makes the panel work on that one, its live preview included, without bringing it to the front; the pick stays while we work on other images, and Follow Active, the small button that appears beside the list, makes the panel follow the image in front again. An image that a tool or a run is working on is listed, but cannot be picked.
Apply: Inverts the image named in Applies to, in one history step that Undo takes back, through the image's mask if it has one. The size, the sample format, the metadata and the astrometric solution stay as they are.
Instance: Shows the process as text: as a DSPX process (.dsproc) or as a
PixInsight process icon (.xpsm) of Invert, chosen under Format. Copy puts the text on the
clipboard; Save... saves it as a file and puts it on the Process Shelf.
Reset: Invert has no settings to reset; the button is there as on every panel.
The system bar along the bottom of the panel has the same commands as small icons: at the left, drag to apply and Apply; at the right, Instance, Help (this page) and Reset. Drag to apply, the first icon, carries the process: dropped on an image's window, it inverts that image, whatever image the panel works on; dropped on the Process Shelf, it is kept there as a row of its own. With , the bar alone has them.
4Inverting Masks and Inverting Images
A mask is an image too, so Invert works on it as on any other: bring the mask's own tab to the front and apply. The image the mask is attached to then uses the inverted mask at once.
Invert also works through a mask: where the mask is white the image is inverted, where it is black it is left alone, and in between the two are mixed. A process layer of Invert inverts the layers under it.
Inverting twice gives the image back exactly: integers are turned around within their format, and floating point values are not clipped, so nothing is lost.
5Usage Tips and Tricks
Look for faint signal. Invert a stretched copy, or watch the live preview without applying, to judge a gradient, a faint arm or the extent of a halo; then switch the preview off.
The other side of a mask. Rather than making a second mask, invert the one we have: a star mask becomes a mask that protects the stars, a range mask of the bright parts one of the background.
Process the inverse. Some operations are easier on the negative: a darkening on the inverse is a brightening of the image. Invert, process, invert again.
6Related Tools
Range Mask: its Invert option makes the mask inverted from the start.
Pixel Math: 1 - $T, or any other transformation of the values.
Curves: a curve from white to black is an inversion that can be shaped.