
Pixel Math
An expression evaluated at every pixel
Pixel Math evaluates an expression at every pixel: arithmetic, functions, conditions, other open images by their names, image statistics and variables. With it we blend images, build narrowband palettes, make masks, fix values and write the small operations no other process has. The result replaces the image or goes to a new one.
1Introduction
An expression such as 0.5*$T + 0.5*OIII is computed for each pixel of the image it is applied to:
$T is that image, OIII another open image of that name, and the result is the pixel's new
value. One expression can serve every channel, or each channel can have its own, so that a color image can be built from
gray ones. Variables, comparisons, conditional values and statements let an expression do in one pass what would
otherwise take several processes.
Pixel Math is our own engine: a parser, which says where an expression is wrong as we type it, and an evaluator that computes a block of pixels at a time on every processor thread. Its language is PixInsight's published PixelMath syntax wherever it applies, and its parameters are PixInsight's: a PixInsight icon of PixelMath opens here, and the panel saves one that PixInsight opens. It evaluates expressions only: no script, no code, and no access to files or the network; the only data it reads are the pixels of the images it names.
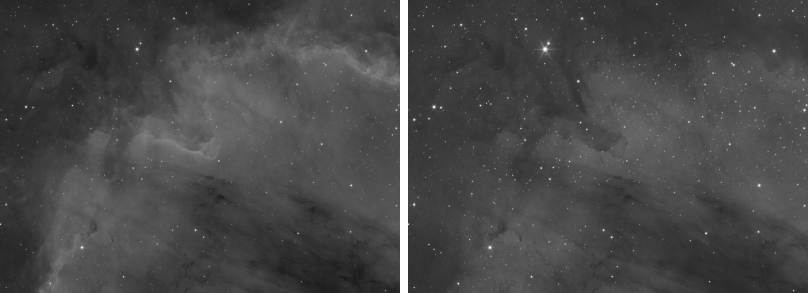
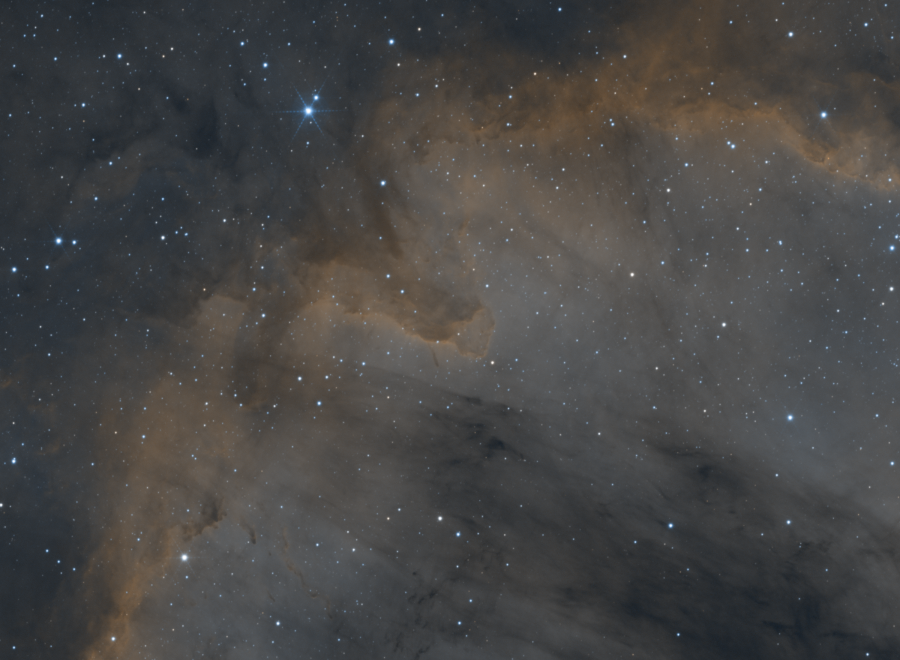
2Quick Start
- Open the images and bring to the front the one the result is based on; choose .
- Type the expression in the RGB/K box:
$Tis the image itself, and any open image is named as its tab shows it. The panel says, as we type, whether the expression is valid and which images it reads. - For a result in a new image, check Create a new image and give it a name.
- Click Apply.
3Interface & Parameters
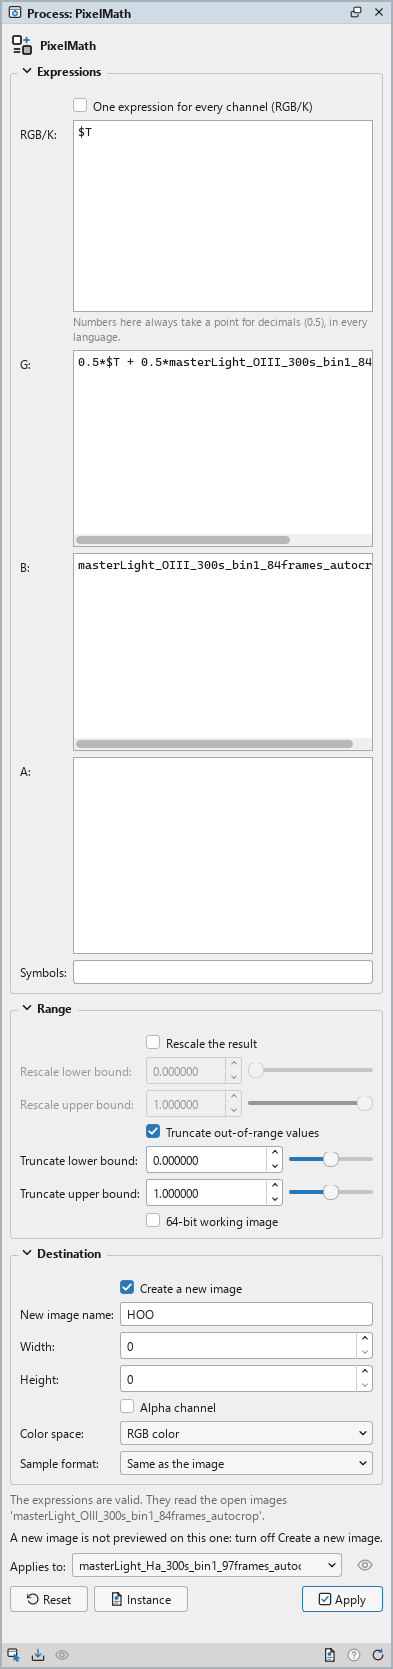
The panel has three sections, Expressions, Range and Destination, each of which folds away with the arrow beside its title. Under them are the line that checks the expressions, the preview, the image the process applies to, the buttons and the system bar along the bottom.
3.1Expressions
One expression for every channel (RGB/K): On, the default, the RGB/K expression is evaluated for each channel of the image, and an image named in it gives the same channel. Off, each channel has its own expression, R or K in the first box, then G, B and A.
RGB/K: The expression; with an expression per channel, the red channel's, or a gray image's. A box of several lines: statements, comments and long expressions fit.
G: The green channel's expression, when each channel has its own. Empty, the channel is left as it is.
B: The blue channel's expression, the same way.
A: The alpha channel's expression, when each channel has its own and the result has an alpha channel. Empty, the alpha channel is left as it is.
Symbols: The variables the expressions use, separated by commas, each with its starting value if
it has one: k = 0.5, m, c = -2.8. Every pixel starts with these values. A name an expression assigns is a
variable too, declared or not.
Numbers in the boxes always take a point for decimals, 0.5, in every language, as the note under the
first box says.
3.2Range
Rescale the result: Maps the results, from their lowest to their highest value over every channel, onto the range below. Off by default.
Rescale lower bound: The value the lowest result becomes; 0 by default.
Rescale upper bound: The value the highest result becomes; 1 by default.
Truncate out-of-range values: When not rescaling, results below the lower bound become the lower bound, and above the upper bound the upper bound. On by default. Integer images are always kept between 0 and 1.
Truncate lower bound: The lowest value a result keeps; 0 by default.
Truncate upper bound: The highest value a result keeps; 1 by default.
64-bit working image: Keeps the results in 64-bit floating point until they are written. The expressions are always evaluated in 64 bits; off, the default, the results are kept in 32 bits, unless the image is 64-bit.
3.3Destination
Create a new image: Writes the result to a new image instead of replacing the image the process is applied to. Off by default.
New image name: The new image's name. Empty, the image's name with _PixelMath.
Width: The new image's width in pixels; 0, the default, the image's own. Images of another size are sampled where each new pixel falls on them.
Height: The new image's height in pixels; 0, the image's own.
Alpha channel: Gives the new image an alpha channel: the A expression, or opaque without one.
Color space: The new image's channels: Same as the image, the default, RGB color, or Grayscale. An RGB image made from a gray one is how gray masters become a color image.
Sample format: The new image's sample format: Same as the image, the default, or 8, 16 or 32-bit integer, 32 or 64-bit floating point.
3.4Apply, Preview and Instance
Under the sections, a line checks the expressions as we type: valid, with the open images they read, or the first error with its line and column, in the theme's error color. An image named that is not open is reported there too.
Live preview (the eye): At the end of the Applies to row; Preview in the system bar is the same switch. When the result replaces the image, the image shows it in the part in view, as the expressions change, with the banner "PREVIEW only, nothing applied"; the image itself does not change until Apply. Before, in the banner, or the backslash key held, shows the image as it is. Image statistics in the expressions are computed once on the whole image, so at 1:1 the preview is what Apply gives there. A new image is not previewed on the image in front, and the panel says so.
Preview: When the result cannot be followed live, because it is rescaled over the whole image or
an expression reads pixels elsewhere with pixel(), the Preview box computes it on demand, on the
whole image, with its progress and Stop; Apply then reuses it.
Applies to: The image Pixel Math is applied to, $T in the expressions, chosen in a list
of the open images. It shows the image in front, and follows it as we bring other images to the front. Picking another
image in the list makes the panel work on that one, its live preview included, without bringing it to the front; the
pick stays while we work on other images, and Follow Active, the small button that appears beside the list, makes
the panel follow the image in front again. An image that a tool or a run is working on is listed, but cannot be
picked.
Apply: Evaluates the expressions. The result replaces the image named in Applies to, in one history step that Undo takes back, through its mask if it has one; or arrives as a new image in its own tab. Every image the expressions name must be open.
Instance: Shows the process as the panel has it now, as text: the settings as a DSPX
process (.dsproc) or as a PixInsight process icon (.xpsm) of PixelMath, chosen under
Format. Copy puts the text on the clipboard; Save... saves it as a file and puts it on the Process
Shelf.
Reset: Puts every setting back to its default, the expressions emptied.
The system bar along the bottom of the panel has the same commands as small icons: at the left, drag to apply and Apply; at the right, Instance, Help (this page) and Reset. Drag to apply, the first icon, carries the process with its settings: dropped on an image's window, it applies them to that image, whatever image the panel works on; dropped on the Process Shelf, it is kept there as a row of its own. With , the bar alone has them.
4The Language
4.1Expressions and Statements
- Numbers:
2,.5,1e-3. - Operators:
+ - * / %and^, the power, which groups from right to left and binds tighter than a sign:-2^2is −4. A sign before a value:-,+,!(not) and~(1 minus the value:~$Tinverts an image). - Comparisons and logic:
< <= > >= == !=,&&and||, and the conditionala ? b : c; a true comparison is 1, a false one 0. - Statements: separated by
;, the last one giving the pixel's value. Assignments= += -= *= /=set variables:m = med($T); $T - m + 0.1. - Comments:
// to the end of the lineand/* anywhere */.
4.2Images
$T, or$target, or the image's own name: the image the process is applied to.- Any open image by its name, as its tab shows it. An image of another size than the result is sampled where each pixel falls on it.
Image[k]: channel k of an image, 0 for red; without an index, the channel being evaluated, and the one channel of a gray image.pixel( image, x, y )andpixel( image, x, y, c ): the value at another position, 0 outside the image.
4.3Functions
- Arithmetic:
abs ceil floor frac round sign trunc sqrt exp ln log log2 pow;logis base 10. - Trigonometry:
sin cos tan asin acos atan atan2 sinh cosh tanh asinh acosh atanh. - Of several values:
min max mean med median, asmax( R, G, B ). - Of one image, its statistics:
min max mean med median sdev var mdev adevof the channel being evaluated, computed once per run:$T - med($T). A statistic ignores samples that are not finite (NaN, infinity), as PixInsight's do. - Values and curves:
iif( condition, a, b ),range( x, a, b ),rescale( x, a, b ), andmtf( m, x ), the midtones transfer function of Histogram. - Position and constants:
x()andy(), the pixel's coordinates,X()andY()the same from 0 to 1,w()andh()the size,n()the number of channels,pi(), andrandom(), which gives the same values every run. - Blending:
combine( a, b, op_screen() )withop_add op_sub op_mul op_div op_pow op_dif op_min op_max op_mov op_screen op_exclusion op_color_dodge op_color_burn op_linear_burn op_linear_light op_vivid_light op_pin_light op_overlay op_soft_light op_hard_light. - Color components of an image at the pixel, as
CIEL( $T ):CIEL CIEa CIEb CIEc CIEh CIEX CIEY CIEZ H Sv V Si I, computed as Channel Extraction computes them.
4.4What Pixel Math Does Not Have
Some of PixInsight's PixelMath is not here, and an expression that uses it is refused with a message that names it:
the image generators and filters (gconv, bconv, mconv, kconv,
erosion, dilation, medfilt, translate, rotate...), the
statistics bwmv, pbmv, Sn, Qn, norm,
modulus, ssqr, asqr, maxsample, minsample,
kurtosis and skewness, the bitwise operators, global variables and the table of results.
5Examples
- Blend two images:
0.7*$T + 0.3*Other. - Invert:
~$T. - A bicolor HOO image: with one expression per channel and a new RGB image, R
Ha, G0.5*Ha + 0.5*OIII, BOIII. - A threshold mask:
$T > 0.2 ? 1 : 0, oriif( $T > 0.2, 1, 0 ). - A stretch to a median of 0.25:
mtf( mtf( 0.25, med($T) ), $T ), since the midtones balancemtf( 0.25, m )takes a median m to 0.25. - Put the stars back:
combine( Starless, Stars, op_screen() ), with the two images that Deep Star Removal makes.
6Usage Tips and Tricks
Read the check line. It names the images an expression reads: a name misspelled shows there at once, before we apply.
Names in Symbols. Constants we will want to change, such as a weight, read better as symbols: k =
0.3 in Symbols and k*Ha + (1 - k)*OIII in the expression.
Rescale for unbounded results. A difference of images or a ratio can leave the range from 0 to 1; Rescale the result brings it back without clipping, Truncate clips it.
New images for experiments. With Create a new image, the image the process is applied to never changes, and several versions can be compared side by side.
7Related Tools
Channel Combination: gray images into a color image, without an expression.
Channel Extraction: a color image's channels or components as gray images.
LRGB Combination: a luminance image as the lightness of a color image.
Range Mask: a mask from a range of brightness.