
LRGB Combination
A luminance image as the lightness of a color image
LRGB Combination replaces the lightness of a color image by a luminance image, keeping the colors: the classic way to join a deep, sharp luminance with shallower color data, or to use a hydrogen alpha master as the luminance of a narrowband image. It has transfers for the lightness and the saturation, an optional reduction of the chrominance noise, and can take the red, green and blue of the color image from other images first.
1Introduction
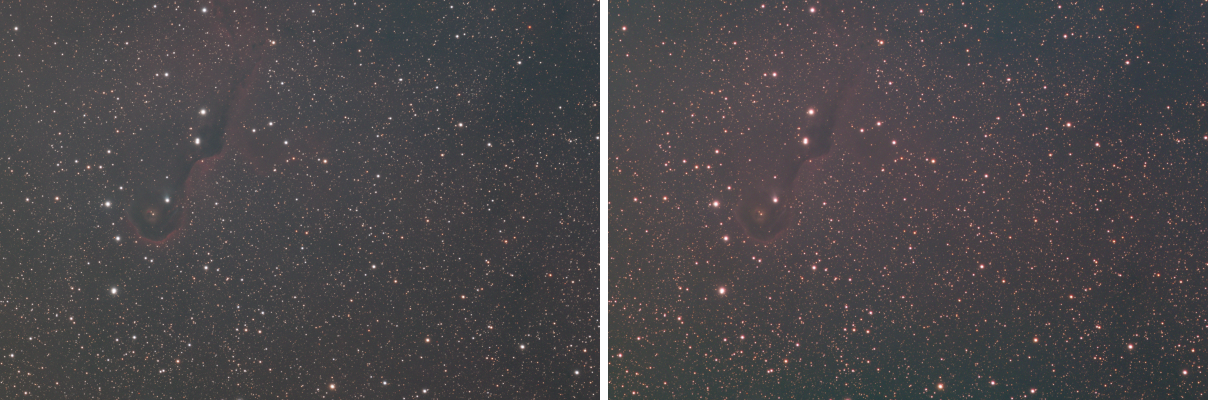
The eye takes its detail from brightness and much less from color. Astrophotographers use this by spending most of their time on a luminance filter, which collects all the light, and less on color filters. LRGB Combination joins the two: the color image is converted to CIE L*a*b*, its L* is replaced by the luminance image, and the image is converted back. The detail and the depth are the luminance's; the color is the color image's.
Two transfers shape the result. Lightness is a midtones balance for the new lightness, to brighten or darken it as it goes in. Saturation is a midtones balance for the chroma, which a brighter luminance tends to wash out: below 0.5 it gives the colors back their strength. An optional chrominance noise reduction smooths the color components at small scales, where their noise is, and leaves the lightness as it is.
LRGB Combination is our own engine, with the parameters of PixInsight's LRGBCombination: a PixInsight icon of LRGBCombination opens here, and the panel saves one that PixInsight opens.
2Quick Start
- Open the color image and the luminance image, both stretched to a similar brightness, of the same size and registered to each other.
- Bring the color image to the front and choose .
- In the Channels table, pick the luminance in row L, and uncheck R, G and B so the color image's own channels are kept.
- With the live preview (the eye) on, adjust Saturation until the colors look as strong as before.
- Click Apply.
3Interface & Parameters
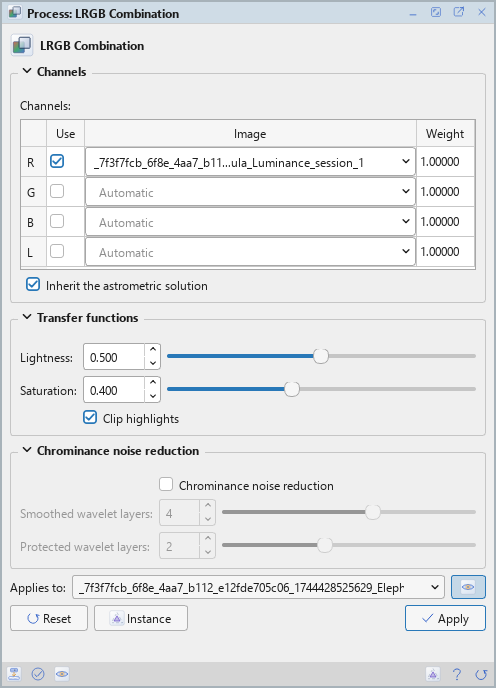
The panel has three sections, Channels, Transfer functions and Chrominance noise reduction, each of which folds away with the arrow beside its title. Under them are the image the process applies to with the live preview's eye, the buttons and the system bar along the bottom.
3.1Channels
Channels: Four rows: L, the luminance, and R, G and B. Use
includes a row; Image names its gray image, picked among the open images or typed; Weight, from 0 to 1,
multiplies that image. An empty name, shown as Automatic, is the image's name with _L,
_R, _G or _B. The R, G and B rows used replace the color image's channels first;
those not used keep its own. With L not used, the image's own lightness goes through the transfers, so the process
becomes a saturation and noise tool.
Inherit the astrometric solution: On, the default, the image takes the luminance image's astrometric solution when it has one; the rest of its metadata stays. Off, or with no luminance image, it keeps its own.
3.2Transfer Functions
Lightness: The midtones balance of the luminance, from 0.001 to 1: below 0.5 brighter, above darker; 0.5, the default, leaves it.
Saturation: The midtones balance of the chroma, from 0.001 to 1: below 0.5 more saturated, above less; 0.5, the default, leaves it. The hue is always kept.
Clip highlights: On, the default, colors the new lightness takes above 1 are clipped. Off, the whole image is scaled down until none is above 1, which keeps the color of the brightest parts at the cost of a darker image.
3.3Chrominance Noise Reduction
Chrominance noise reduction: Smooths the color components a* and b* at small scales, where their noise is, leaving the lightness as it is. Off by default.
Smoothed wavelet layers: How many of the smallest scales (1, 2, 4... pixels) of a* and b* are taken away, from 1 to 6; 4 by default.
Protected wavelet layers: Of those, how many of the smallest keep their significant structures, those above three times their noise: the color of small stars and sharp edges. From 0 to 5; 2 by default.
3.4Apply, Preview and Instance
Live preview (the eye): At the end of the Applies to row; Preview in the system bar is the same switch. On by default. The image shows the combination in the part in view, as the settings change, with the banner "PREVIEW only, nothing applied"; the image itself does not change until Apply. Before, in the banner, or the backslash key held, shows the image as it is. With Clip highlights off, the scaling is found on what is in view, so the preview is close, not exact, and the banner says so. With the noise reduction on, its scales are fitted to the zoom of the view.
Applies to: The color image LRGB Combination changes, chosen in a list of the open images. It shows the image in front, and follows it as we bring other images to the front. Picking another image in the list makes the panel work on that one, its live preview included, without bringing it to the front; the pick stays while we work on other images, and Follow Active, the small button that appears beside the list, makes the panel follow the image in front again. An image that a tool or a run is working on is listed, but cannot be picked.
Apply: Combines the images into the image named in Applies to, in one history step that Undo takes back, through its mask if it has one. The images named must be open, gray and of the image's size; otherwise nothing is done and the Log says which image is wrong.
Instance: Shows the process as the panel has it now, as text: the settings as a DSPX
process (.dsproc) or as a PixInsight process icon (.xpsm) of LRGBCombination, chosen under
Format. Copy puts the text on the clipboard; Save... saves it as a file and puts it on the Process
Shelf.
Reset: Puts every setting back to its default.
The system bar along the bottom of the panel has the same commands as small icons: at the left, drag to apply and Apply; at the right, Instance, Help (this page) and Reset. Drag to apply, the first icon, carries the process with its settings: dropped on an image's window, it applies them to that image, whatever image the panel works on; dropped on the Process Shelf, it is kept there as a row of its own. With , the bar alone has them.
4What LRGB Combination Does
- The R, G and B rows used replace the image's channels, each image times its weight.
- The image is converted to CIE L*a*b*. Its L* becomes the luminance image times its weight, or stays its own, passed through the Lightness transfer.
- The chroma, the distance of a* and b* from neutral, passes through the Saturation transfer, the hue kept.
- With the noise reduction, a* and b* are decomposed into wavelet layers; the smallest layers are taken away, except in the protected ones the coefficients above three times the layer's noise.
- The image is converted back to RGB and clipped, or scaled down, into the range from 0 to 1.
The color spaces are computed in sRGB with a D50 white, PixInsight's default.
5Usage Tips and Tricks
Match the brightness first. A luminance much brighter or darker than the color image's own lightness washes out or muddies the colors. Stretching both to a similar background and brightness before combining gives the most natural result; Lightness corrects a small difference.
Saturation below 0.5 is normal. A deeper luminance brings more light than the color image had, and the colors look paler: a Saturation between 0.35 and 0.45 usually restores them.
Noisy color data. When the color was shot with less time, the chrominance noise reduction cleans it without softening the luminance's detail.
Process the luminance alone. A lightness extracted with Channel Extraction, sharpened or denoised, comes back with LRGB Combination as L.
6Related Tools
Channel Combination: gray images into a color image, or a lightness replaced with no transfers.
Channel Extraction: a color image's lightness, to process it alone.
Saturation: more or less saturation for each hue.
Pixel Math: any other way of mixing images, written as an expression.