
Saturation
More or less color for each hue, the lightness kept
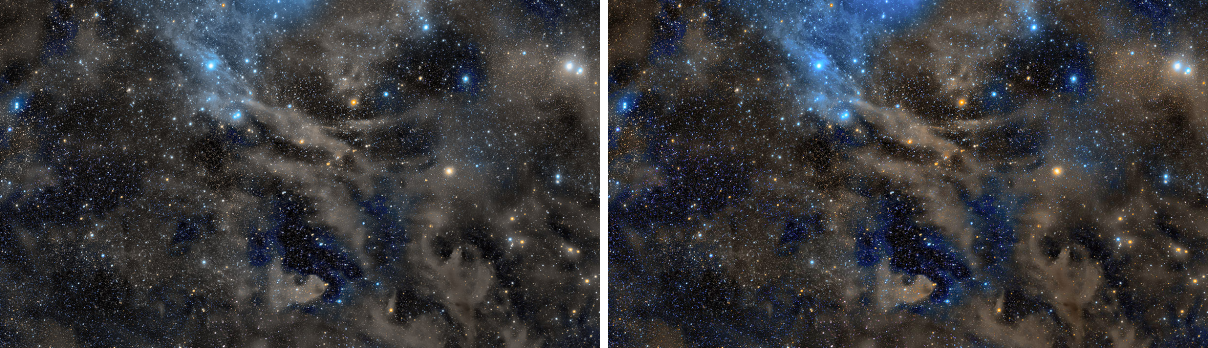
Saturation raises or lowers the saturation of a color image hue by hue, along a curve drawn over the hues: more red and blue and less green, for instance, in a single step. The hue and the lightness of every pixel stay as they are, so the image does not brighten or shift color as it gains saturation.
1Introduction
A single saturation control treats every color alike. Astronomical images rarely need that: the red of hydrogen and the blue of reflection nebulae may want more color, while a green cast or a noisy yellow background wants less. Saturation lets us say how much for each hue: the horizontal axis of its curve is the hue, from red through yellow, green, cyan, blue and magenta back to red, and the vertical axis is the change of saturation, 0 for none.
The change is made on the HSV saturation of each pixel, and the pixel's CIE lightness is then put back, so a more saturated color is not a brighter one. A change of 1 makes the saturation twice as strong, −1 half as strong; values above and below reach further, up to eleven times stronger or weaker.
Saturation is our own engine, with the parameters of PixInsight's ColorSaturation: a PixInsight icon of ColorSaturation opens here, and the panel saves one that PixInsight opens.
2Quick Start
- Open the color image, usually stretched, and choose . With the live preview (the eye) on, the result shows on the image as we draw.
- Click on the curve above the hue to change, using the band of colors under the plot as a guide, and drag the point up for more saturation or down for less.
- To raise every hue alike, drag both end points up by the same amount.
- Click Apply.
3Interface & Parameters
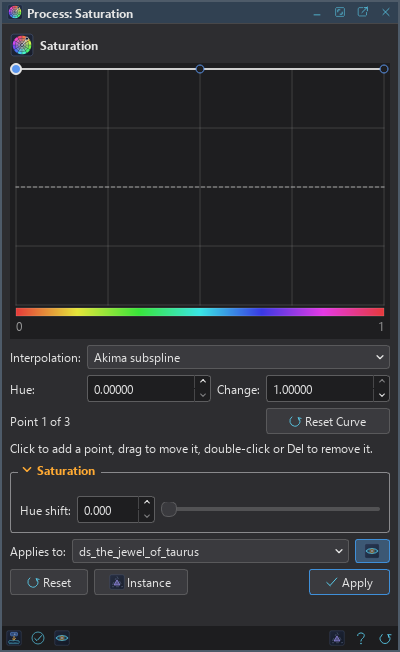
The panel is a curve editor: the plot of the curve over a band of the hues, the interpolation, the point chosen and Reset Curve. Under it are the Saturation section, which folds away with the arrow beside its title, the image the process applies to with the live preview's eye, the buttons and the system bar along the bottom.
3.1The Curve
Saturation curve: The change of saturation over the hues. Its points go from hue 0 to hue 1, both red, and from a change of −10 to 10; the plot shows from −1 to 1, and more when a point is past them. A click on the plot adds a point there, a point is dragged between its neighbors, and a double click or Delete removes it; the first and the last points cannot be removed. Hue and Change are the values of the point chosen, which can be typed. Reset Curve makes the curve flat at 0 again.
Interpolation: How the curve goes through its points:
- Akima subspline: the default. Smooth, and it does not overshoot: between two points the curve stays within their values. With the PixInsight compatibility mode on (), it is PixInsight's Akima, which can overshoot between points far apart in value. A curve of fewer than five points is drawn as a cubic spline.
- Cubic spline: a natural cubic spline, smoother.
- Linear: straight lines from point to point.
3.2Saturation
Hue shift: Where the curve's hue axis starts, from 0 to 1: the curve is read at the pixel's hue plus this value. It turns the whole curve around the color wheel, to move a correction to a neighboring hue without redrawing it. 0 by default.
3.3Apply, Preview and Instance
Live preview (the eye): At the end of the Applies to row; Preview in the system bar is the same switch. On by default. The image shows Saturation applied to the part in view, as the curve changes, with the banner "PREVIEW only, nothing applied"; the image itself does not change until Apply. Before, in the banner, or the backslash key held, shows the image as it is. At 1:1 the preview is exactly what Apply gives there; at a reduced zoom it is computed on the reduced view and is very close.
Applies to: The image Saturation works on, chosen in a list of the open images. It shows the image in front, and follows it as we bring other images to the front. Picking another image in the list makes the panel work on that one, its live preview included, without bringing it to the front; the pick stays while we work on other images, and Follow Active, the small button that appears beside the list, makes the panel follow the image in front again. An image that a tool or a run is working on is listed, but cannot be picked.
Apply: Changes the saturation of the image named in Applies to, in one history step that Undo takes back, through the image's mask if it has one. A gray image is refused: it has no color.
Instance: Shows the process as the panel has it now, as text: the settings as a DSPX
process (.dsproc) or as a PixInsight process icon (.xpsm) of ColorSaturation, chosen under
Format. Copy puts the text on the clipboard; Save... saves it as a file and puts it on the Process
Shelf.
Reset: Puts the curve and the hue shift back to their defaults.
The system bar along the bottom of the panel has the same commands as small icons: at the left, drag to apply and Apply; at the right, Instance, Help (this page) and Reset. Drag to apply, the first icon, carries the process with its settings: dropped on an image's window, it applies them to that image, whatever image the panel works on; dropped on the Process Shelf, it is kept there as a row of its own. With , the bar alone has them.
4What Saturation Does
For each pixel, the curve is read at the pixel's hue, plus the hue shift. A value k of 0 or above multiplies the HSV saturation by 1 + k; a value below 0 divides it by 1 − k, so that k and −k undo each other. The hue stays as it was, and the pixel's CIE L* is then restored, so the lightness does not change. Gray pixels, which have no saturation, are left as they are.
5Usage Tips and Tricks
Stretched images. Saturation belongs after the stretch, when the colors we see are the colors we change.
Protect the background. More saturation raises the color of the background's noise too. Through an inverted star mask or a mask of the nebula, it reaches only what should be colorful.
Several gentle points. A curve with points close together and far apart in value can overshoot between them; moving them gently, or choosing Linear, keeps it under control.
Green in narrowband palettes. Lowering the greens with Saturation keeps their lightness, where SCNR takes the green away; the first is gentler, the second stronger.
GPU. In DSPX mode a large image is processed on the graphics card, about 3 to 5 times faster than on the processor, and the live preview updates faster too. A small image stays on the processor, where it is quicker. Choose CPU only in to keep it on the processor, and see GPU Acceleration for what else runs on the card.
6Related Tools
Curves: its S curve raises the saturation of every hue; its H curve moves hues.
SCNR: removes a green or other color cast.
LRGB Combination: its Saturation transfer raises the chroma as the lightness is replaced.
Color Calibration: balances the colors of a linear image.