
Masked Stretch
Many small stretches, each protecting the stars
Masked Stretch brings a linear image to a visible brightness in many small steps, each a midtones transformation masked by the image as the step before left it. The background rises to the level we choose while the stars, protected by their own brightness, stay small and keep their color. It is the stretch for star fields and for images where a plain stretch bloats the stars.
1Introduction
A single strong stretch lifts everything faint by a large factor, and the faint halo around every star is lifted with the nebula: the stars swell and their cores turn white. Masked Stretch splits the stretch into many small ones, 100 by default. Each is masked by the image itself as it is at that moment: a dark pixel, the background, takes the step in full; a bright pixel, a star, barely moves. As the background rises step by step, the stars, already bright, are left almost where they were.
We ask for a target, the level the median background should end at, 0.125 by default, and the process finds the midtones balance of each step that takes the background there in the number of steps given. The result has a background at a known level and stars that look the size they look in the linear data.
Masked Stretch is our own engine, written from PixInsight's description of its MaskedStretch process, with the same parameters: a PixInsight icon of MaskedStretch opens here, and the panel saves one that PixInsight opens.
2Quick Start
- Open the linear image, its gradients removed and, for color, its background neutral.
- Choose . With the live preview (the eye) on, the image shows the stretch, without its screen stretch.
- Set Target background: 0.125, the default, is a classic dark sky; higher is brighter.
- Click Apply. The Log says where the background was and the midtones balance used; the screen stretch is turned off, and the image is shown as it now is.
3Interface & Parameters
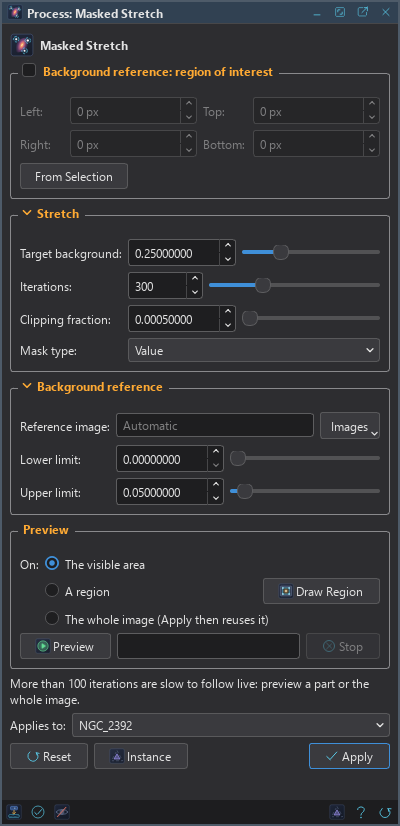
At the top of the panel is the region of interest, a rectangle of the background reference, with its own check box. Under it are two sections, Stretch and Background reference, each of which folds away with the arrow beside its title, then the image the process applies to with the live preview's eye, the buttons and the system bar along the bottom.
3.1Region of Interest
Region of interest: The box in the title of the group. Checked, the background is measured only in this rectangle of the reference image; unchecked, or with an empty rectangle, on the whole reference.
Left: The left edge of the rectangle, in pixels of the reference image.
Top: Its top edge.
Right: Its right edge; the column at this value is not included.
Bottom: Its bottom edge; the row at this value is not included.
From Selection takes the rectangle from the selection drawn on the image, turns the region on and clears the selection, so that it does not limit where the stretch is applied.
3.2Stretch
Target background: The median background the stretch ends at, from 0 to 1; 0.125 by default. On a color image the median of the channels ends near it, within a few thousandths.
Iterations: How many masked transformations the stretch is made of, from 2 to 1000; 100 by default. More are gentler on the stars and take longer.
Clipping fraction: The share of the pixels clipped to black first, the darkest ones: 0.0005, the default, is 0.05%. It sets the black point under the background, so cold or dead pixels do not hold the stretch back.
Mask type: What masks each pixel in each step:
- Intensity: the default. The mean of its channels.
- Value: the largest of its channels, which protects saturated colors more: a pure red star is as protected as a white one of the same peak.
3.3Background Reference
Reference image: The image whose pixels give the background the stretch starts from, chosen with Images among the open images, or typed. Empty, shown as Automatic, it is the image itself.
Lower limit: Reference pixels with a sample at or below this value are not background. 0 by default.
Upper limit: Reference pixels with a sample above this value are not background. 0.05 by default, which leaves out stars and bright nebulosity in linear data.
3.4Apply, Preview and Instance
Live preview (the eye): At the end of the Applies to row; Preview in the system bar is the same switch. On by default. The image shows Masked Stretch applied to the part in view, as the settings change, with the banner "PREVIEW only, nothing applied"; the image itself does not change until Apply. An image shown through a screen stretch is previewed without it, since the stretch is what we are previewing. Before, in the banner, or the backslash key held, shows the image as it is. The clipping point, the background and the midtones balance are measured once on the whole image, so at 1:1 the preview is exactly what Apply gives there. Up to 100 iterations the preview is live, updating when we release the mouse if it is slow; above 100 it is too slow to follow, and the panel offers a preview of a part or of the whole image on demand, with Preview, which Apply then reuses when it covers the whole image.
Applies to: The image Masked Stretch works on, chosen in a list of the open images. It shows the image in front, and follows it as we bring other images to the front. Picking another image in the list makes the panel work on that one, its live preview included, without bringing it to the front; the pick stays while we work on other images, and Follow Active, the small button that appears beside the list, makes the panel follow the image in front again. An image that a tool or a run is working on is listed, but cannot be picked.
Apply: Stretches the image named in Applies to, in one history step that Undo takes back, through the image's mask if it has one. When the live preview showed the image without its screen stretch, Apply turns that stretch off. The size, the sample format and the metadata stay as they are. Gray images are stretched too.
Instance: Shows the process as the panel has it now, as text: the settings as a DSPX
process (.dsproc) or as a PixInsight process icon (.xpsm) of MaskedStretch, chosen under
Format. Copy puts the text on the clipboard; Save... saves it as a file and puts it on the Process
Shelf.
Reset: Puts every setting back to its default.
The system bar along the bottom of the panel has the same commands as small icons: at the left, drag to apply and Apply; at the right, Instance, Help (this page) and Reset. Drag to apply, the first icon, carries the process with its settings: dropped on an image's window, it applies them to that image, whatever image the panel works on; dropped on the Process Shelf, it is kept there as a row of its own. With , the bar alone has them.
4What Masked Stretch Does
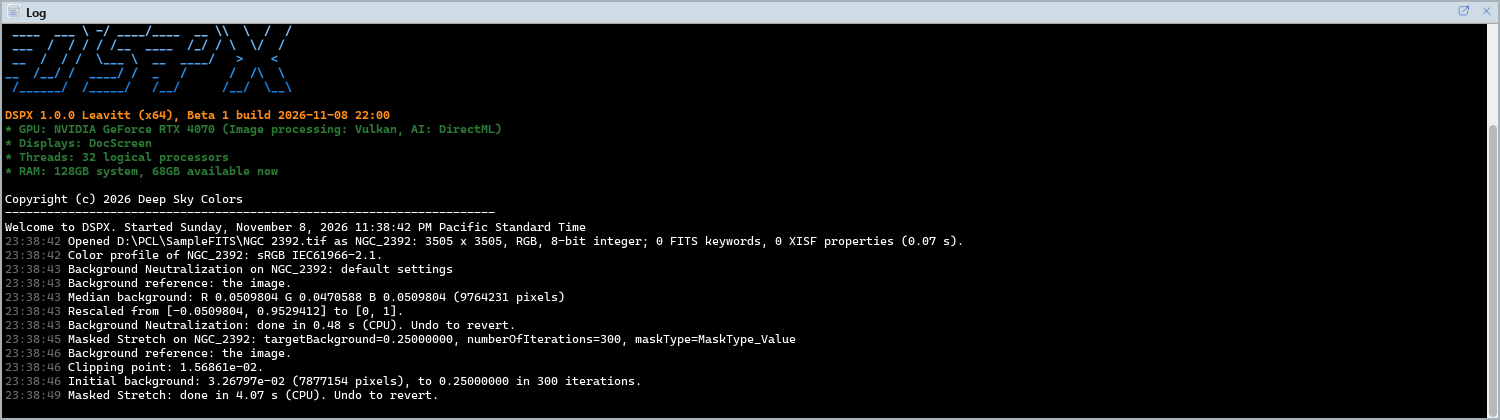
The process first measures. The clipping point is the level below which the clipping fraction of the pixels lies. The background is the median of the reference's pixels within the limits, after that clip. Then it looks for the one midtones balance that, applied in the given number of masked steps to a pixel at the background's level, brings it to the target.
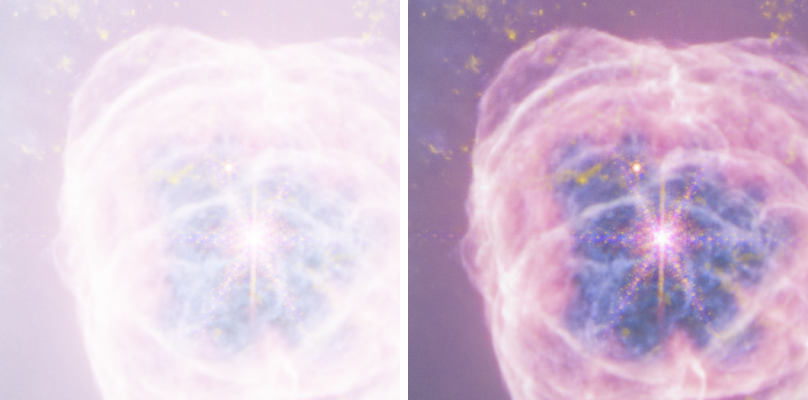
Then every pixel is clipped and rescaled, and stretched in steps: in each step every channel becomes a mix of its midtones transformation and its present value, the pixel's own intensity (or value) deciding how much of each. A dark pixel takes almost the whole transformation, a bright one almost none. The Log gives the clipping point, the background found and the midtones balance.
5Usage Tips and Tricks
A background reference for nebulous fields. When nebulosity fills the image, a region of interest over the darkest sky makes the target mean what we expect: that patch of sky ends at the target.
Low contrast is normal. Masked Stretch keeps the bright parts where they were, so its result is soft. A Curves or Histogram afterward gives it its contrast.
Value for colorful stars. Mask type Value protects saturated star colors better; Intensity gives a slightly brighter star field.
Combine with another stretch. A common recipe stretches the image twice, once with Masked Stretch for the stars and once with another stretch for the nebula, and blends the two through a star mask made by Deep Star Mask.
GPU. In DSPX mode a large image is processed on the graphics card, about 10 times faster than on the processor, and the live preview updates faster too. A small image stays on the processor, where it is quicker. Choose CPU only in to keep it on the processor, and see GPU Acceleration for what else runs on the card.
6Related Tools
Arcsinh Stretch: a stretch that keeps the color of every pixel.
Hyperbolic Stretch: a stretch whose contrast we place where we want it.
Histogram: the classic stretch, and the way to put a screen stretch into the pixels.
Deep Morphology: makes stars smaller after the stretch.