
Histogram
Shadows, midtones and highlights, and the screen stretch made real
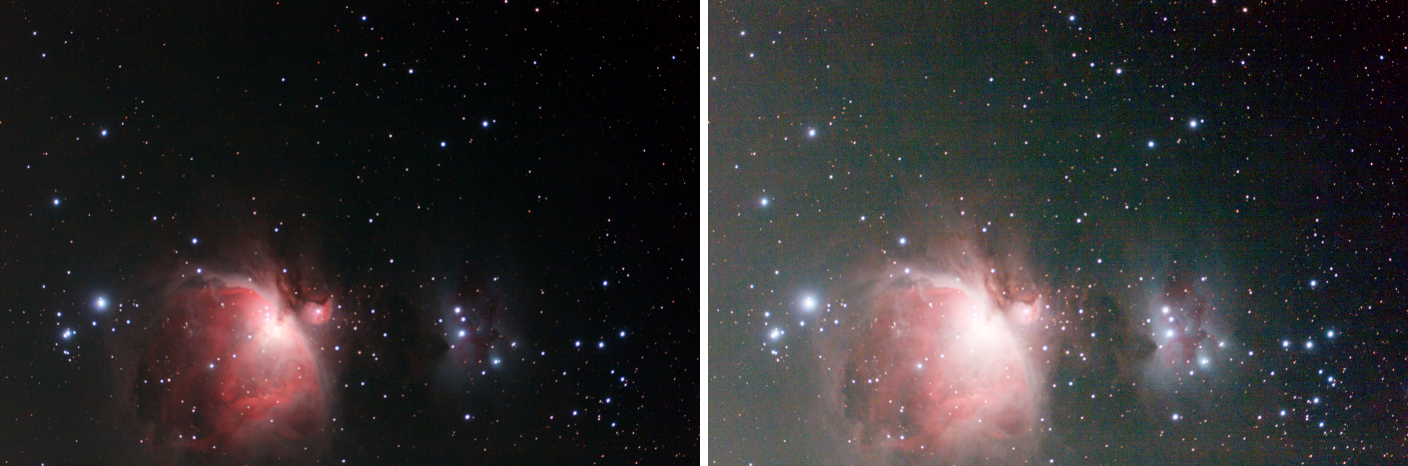
Histogram clips the shadows and the highlights, moves the midtones and expands the range, for each channel and for the three together, on the image's own histogram. It is the classic way to stretch a linear image, and the way to make the screen stretch we see the image's real pixels.
1Introduction
A histogram transformation has three points. Everything below the shadows point becomes black, everything above the highlights point white, and between them the midtones balance bends the curve: below 0.5 it brightens the midtones, above 0.5 it darkens them. The curve is PixInsight's midtones transfer function, the same one a screen stretch uses, which is why a screen stretch can be turned into a histogram transformation exactly.
The transformation can be set for the red, green and blue channels each, and for the three together (RGB/K), which is applied after them. A gray image uses RGB/K alone. Optionally the range is expanded below 0 or above 1, to leave room for later work.
Histogram is our own engine, written from PixInsight's documentation of HistogramTransformation, with its parameters: a PixInsight icon of HistogramTransformation opens here, and the panel saves one that PixInsight opens.
2Quick Start
The quickest way to stretch a linear image keeps what we see on the screen:
- Open the linear image and give it a screen stretch: (Ctrl+A), adjusted in the Screen Stretch panel if we like.
- Choose . The pixels take the stretch, in one history step, and the screen stretch is turned off.
Or, with the panel:
- Choose .
- Click From Screen Stretch to start from the screen stretch, or drag the handles under the histogram, or type the values.
- Click Apply.
3Interface & Parameters
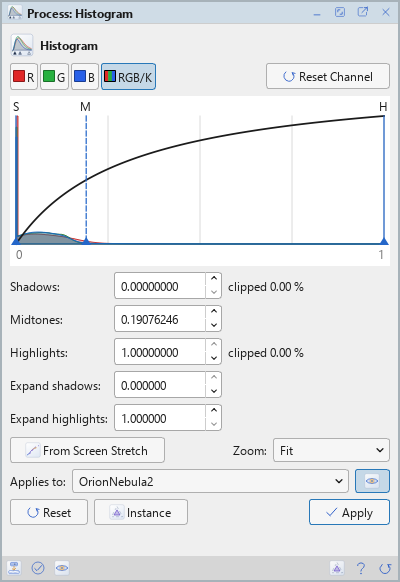
The panel is an editor: the channel buttons and Reset Channel, the image's histogram with the curve and its handles, the values of the channel chosen, and From Screen Stretch with the histogram's zoom. Under it are the image the process applies to with the live preview's eye, the buttons and the system bar along the bottom.
3.1The Transformations
Transformations: A transformation for each of the red, green and blue channels, one for the three together (RGB/K), and one for the alpha channel, which a PixInsight icon may carry. The buttons R, G, B and RGB/K choose the one the editor shows; R, G and B are grayed out for a gray image. Reset Channel puts the one shown back to no change.
The histogram is the image's, in the channel chosen; for R, G or B the other two are drawn faint behind it. The curve over it is the transformation, and its handles are dragged with the mouse: S, the shadows, M, the midtones, and H, the highlights. Under it, the values of the channel chosen:
- Shadows: the shadows clipping point, from 0 to 1; what is below it becomes black. Beside it, the share of the pixels it clips.
- Midtones: the midtones balance, from 0 to 1; 0.5 changes nothing, below brightens and above darkens.
- Highlights: the highlights clipping point; what is above it becomes white. Beside it, the share it clips.
- Expand shadows: the low end of the range expansion, from −10 to 0: below 0, the result is compressed up from that value, leaving room under the shadows.
- Expand highlights: its high end, from 1 to 11: above 1, room is left over the highlights.
From Screen Stretch takes the screen stretch of the image in front: a linked stretch goes into RGB/K, an unlinked one into R, G and B. Zoom frames the histogram: Fit frames the data, so the narrow histogram of a linear image fills the view; Whole range shows it from 0 to 1.
3.2Apply, Preview and Instance
Live preview (the eye): At the end of the Applies to row; Preview in the system bar is the same switch. On by default. The image shows Histogram applied to the part in view, as the settings change, with the banner "PREVIEW only, nothing applied"; the image itself does not change until Apply. An image shown through a screen stretch is previewed without it, since the stretch is what we are previewing. Before, in the banner, or the backslash key held, shows the image as it is. At 1:1 the preview is exactly what Apply gives there; at a reduced zoom it is computed on the reduced view and is very close.
Applies to: The image Histogram works on, chosen in a list of the open images. It shows the image in front, and follows it as we bring other images to the front. Picking another image in the list makes the panel work on that one, its live preview included, without bringing it to the front; the pick stays while we work on other images, and Follow Active, the small button that appears beside the list, makes the panel follow the image in front again. An image that a tool or a run is working on is listed, but cannot be picked.
Apply: Transforms the image named in Applies to, in one history step that Undo takes back, through the image's mask if it has one. When the live preview showed the image without its screen stretch, Apply turns that stretch off. The size, the sample format and the metadata stay as they are.
Instance: Shows the process as the panel has it now, as text: the settings as a DSPX
process (.dsproc) or as a PixInsight process icon (.xpsm) of HistogramTransformation, chosen
under Format. Copy puts the text on the clipboard; Save... saves it as a file and puts it on the
Process Shelf.
Reset: Puts every transformation back to no change.
The system bar along the bottom of the panel has the same commands as small icons: at the left, drag to apply and Apply; at the right, Instance, Help (this page) and Reset. Drag to apply, the first icon, carries the process with its settings: dropped on an image's window, it applies them to that image, whatever image the panel works on; dropped on the Process Shelf, it is kept there as a row of its own. With , the bar alone has them.
4The Screen Stretch and Histogram
A screen stretch changes only how the image is shown; its pixels stay linear. Histogram uses the same three values and the same curve, so a screen stretch we like can become the image's own pixels without any difference:
- , also in the Screen Stretch panel's menu, applies the stretch of the image in front through Histogram, through the mask, in one history step. The Histogram panel then shows the values it used. When it is done the screen stretch is turned off, since the image would otherwise look stretched twice. Undo brings back the pixels, not the screen stretch: Auto Stretch gives one again.
- From Screen Stretch in the panel takes the values, to change them before applying.
5What Histogram Does
For each sample, in this order: values below the shadows point become 0 and above the highlights point 1; the rest is rescaled between them and passed through the midtones transfer function; then the range is expanded. A color image takes each channel's own transformation first, then RGB/K; a gray image takes RGB/K alone. Each sample is computed, not looked up in a table, so the result is exact in any sample format.
6Usage Tips and Tricks
Stretch in two steps. A first, moderate stretch, then a second one with the shadows point moved up to the foot of the histogram, gives more control over the background than one strong stretch.
Watch the clipped share. The figure beside Shadows says how much of the image turns black. A few hundredths of a percent is safe; more loses faint signal for good.
Unlinked for a color cast. An unlinked screen stretch, taken with From Screen Stretch, balances the channels as it stretches. Neutralizing the background with Background Neutralization first is usually better.
Fit the zoom. On linear data the histogram is a narrow spike at the left; Zoom Fit spreads it over the whole view so the handles can be placed precisely.
GPU. In DSPX mode a large image is processed on the graphics card, 2 to 3 times faster than on the processor, and the live preview updates faster too. A small image stays on the processor, where it is quicker. Choose CPU only in to keep it on the processor, and see GPU Acceleration for what else runs on the card.
7Related Tools
Curves: any curve drawn by hand, per channel or component.
Hyperbolic Stretch: a stretch whose contrast we place where we want it.
Masked Stretch: a stretch that keeps the stars small.
Arcsinh Stretch: a stretch that keeps the color of every pixel.