
Sample Format
The image's samples as 8, 16 or 32-bit integers, or floating point
Sample Format converts the numbers an image is stored in: 8, 16 or 32-bit integers, or 32 or 64-bit floating point. We use it to bring an image into floating point before processing it, and to bring a finished image to 16 or 8 bits for a format or a program that needs them.
1Introduction
Every pixel of an image is stored as numbers, its samples, one per channel. An integer format has a fixed number of levels: 256 in 8 bits, 65,536 in 16 bits, about 4.3 billion in 32 bits. A floating point format, 32 or 64 bits, holds any value with the same relative precision, very faint ones included, and values below 0 or above 1 too. In every format the image's range is read the same way, from black to white, so a conversion changes how finely values are stored, not how bright they are.
The conversions are those of PixInsight: to an integer format, values are clipped to the range from 0 to 1 and rounded to the nearest level (a value halfway between two goes to the even one; a NaN becomes 0); from one integer format to another, by the exact factors of their ranges, so 8 bits become 16 bits by 257; to floating point, divided by the range. Floating point keeps values outside the range from 0 to 1. The FITS keywords, the properties, the alpha channels, the color profile and the astrometric solution are kept.
Sample Format is our own engine, with the parameters of PixInsight's SampleFormatConversion: a PixInsight icon of it opens here, and the panel saves one that PixInsight opens.
2Quick Start
- Open the image and choose .
- Choose the format in Convert to: 32-bit floating point, the default, for processing; 16 bits for a finished image to share as a 16-bit TIFF or PNG.
- Click Apply.
3Interface & Parameters
The panel has one section, Sample format, which folds away with the arrow beside its title. Under it are the image the process applies to with the live preview's eye, the buttons and the system bar along the bottom.
3.1Sample format
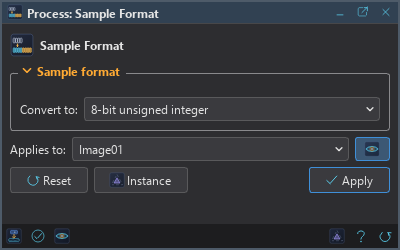
Convert to: The new format of the samples:
- 8-bit unsigned integer: 256 levels; for the web and for programs that read nothing finer. Only for a finished, stretched image.
- 16-bit unsigned integer: 65,536 levels; a finished image's usual format.
- 32-bit unsigned integer: about 4.3 billion levels, for programs that need integers.
- 32-bit floating point: the default. The format to process in: fine enough for the faintest signal of a linear image, and room for values outside the range from 0 to 1.
- 64-bit floating point: twice the precision, and twice the memory; rarely needed.
An image already in the format chosen does not change, and no history step is recorded.
3.2Apply, Preview and Instance
Live preview (the eye): At the end of the Applies to row; Preview in the system bar is the same switch. On by default. The image shows the conversion over the part in view, with the banner "PREVIEW only, nothing applied"; the image itself does not change until Apply. Most conversions look the same on the screen: what changes is the levels of the faintest values, which a screen stretch makes visible. Before, in the banner, or the backslash key held, shows the image as it is.
Applies to: The image Sample Format works on, chosen in a list of the open images. It shows the image in front, and follows it as we bring other images to the front. Picking another image in the list makes the panel work on that one, its live preview included, without bringing it to the front; the pick stays while we work on other images, and Follow Active, the small button that appears beside the list, makes the panel follow the image in front again. An image that a tool or a run is working on is listed, but cannot be picked.
Apply: Converts the image named in Applies to, in one history step that Undo takes back with the image as it was. A mask does not apply: the old and the new samples are not of one kind to mix. The selection and the image's mask stay.
Instance: Shows the process as the panel has it now, as text: the settings as a DSPX
process (.dsproc) or as a PixInsight process icon (.xpsm) of SampleFormatConversion, chosen
under Format. Copy puts the text on the clipboard; Save... saves it as a file and puts it on the
Process Shelf.
Reset: Puts the setting back to its default, 32-bit floating point.
The system bar along the bottom of the panel has the same commands as small icons: at the left, drag to apply and Apply; at the right, Instance, Help (this page) and Reset. Drag to apply, the first icon, carries the process with its settings: dropped on an image's window, it converts that image, whatever image the panel works on; dropped on the Process Shelf, it is kept there as a row of its own. With , the bar alone has them.
4Which Format When
- While processing: 32-bit floating point. Every process of DSPX works on any format, but rounding to integers after each step adds up, and a linear image's signal lives in its lowest levels.
- To share a finished image: 16 bits for a TIFF or a PNG that will be printed or edited again; 8 bits only at the very end, for a JPEG or the web. asks for the file's sample type itself, so the image open in DSPX can stay in floating point.
- Values outside the range: converting a floating point image with negative or overexposed values to integers clips them. When they matter, bring them into the range first, with a stretch or Pixel Math.
Sample Format changes the image's format, so for now it cannot be a step of a process container, cannot be a process layer, and does not work on a layer: a layer's image is always 32-bit floating point. Siril scripts can run it.
5Usage Tips and Tricks
Convert first. An 8 or 16-bit image from a camera or another program is best converted to 32-bit floating point before anything else is done to it.
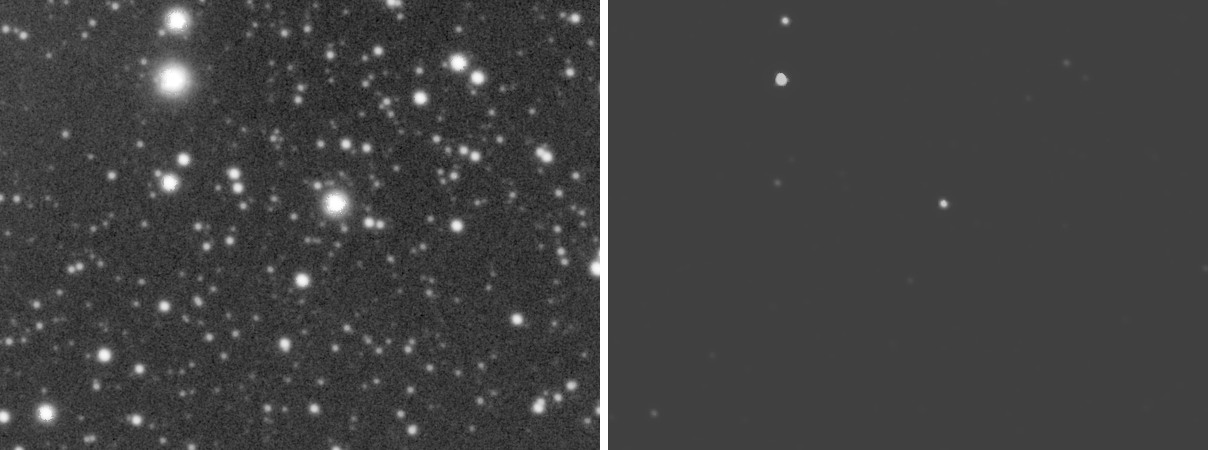
Never 8 bits while linear. As the picture above shows, a linear image in 8 bits loses nearly everything below its brightest stars. Stretch first, convert last.
Floating point to integers and back. A conversion to integers and back to floating point does not bring the lost levels back: Undo does.
6Related Tools
Convert Color: the other change of format, from color to gray or back.
Histogram: the stretch that makes a linear image ready for fewer bits.
Pixel Math: brings values outside the range back into it before a conversion to integers.