
Background Extraction
Gradients and vignetting modeled from samples of the sky, and corrected
Background Extraction removes the gradients of light pollution and the Moon, and the vignetting of the optics, from a linear image. It measures the sky in sample boxes, a grid over the image or boxes we place with the Background Extraction tool, leaves out those on stars, nebulae and galaxies, fits a smooth model of the background through the rest, and subtracts or divides it. It does in one process what PixInsight's DynamicBackgroundExtraction and AutomaticBackgroundExtractor do.
1Introduction
The sky in a long exposure is never even. Light pollution brightens one side, the Moon another, and the optics darken the corners. On a linear image these differences are small, but a stretch amplifies them into bands and blotches of color, and every later step suffers from them. Background Extraction models the background as a smooth surface and takes it away, so that the sky is the same everywhere and only the objects remain.
The model is built from samples: small square boxes on the sky. Inside each box the stars are left out and the median of the rest is the sky's value there. Boxes that fall on a nebula or a galaxy are rejected by comparing them with a fit of all of them, since added light is what spoils a box. Through the boxes that remain goes a thin plate surface spline, which follows a light dome or the corners of vignetting, or a polynomial, smoother and more global.
The boxes come from a grid over the whole image, in the process's automatic mode, or are placed by hand with the Background Extraction tool, which shows each box on the image and whether it is used. Both are the same process: the tool hands the process its boxes, and the process remembers them with its settings.
Background Extraction is our own engine. It reads PixInsight's icons of DynamicBackgroundExtraction, as manual mode with a surface spline, and of AutomaticBackgroundExtractor, as automatic mode with a polynomial, translating their units to ours; it writes manual mode as a DynamicBackgroundExtraction icon and automatic mode as an AutomaticBackgroundExtractor icon, listing in the icon's notes what PixInsight's process will not do the same way.
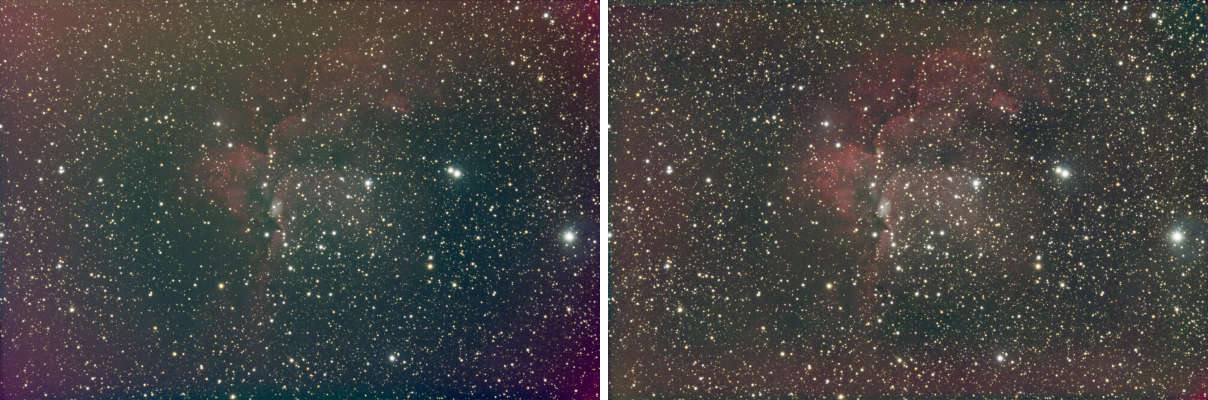
2Quick Start
With the process, automatic:
- Open the linear image and choose . With the live preview (the eye) on, the corrected image shows at once.
- Leave Samples from on the grid, the default. For vignetting, set Correction to Division.
- Click Apply. The Log says how many boxes were used and rejected.
With the tool, for full control over the boxes:
- Choose Background Extraction on the Tools toolbar, or in the menu, and click on the image's background: the session starts on that image.
- Click Generate for a grid of boxes, or click on the sky to place boxes one by one.
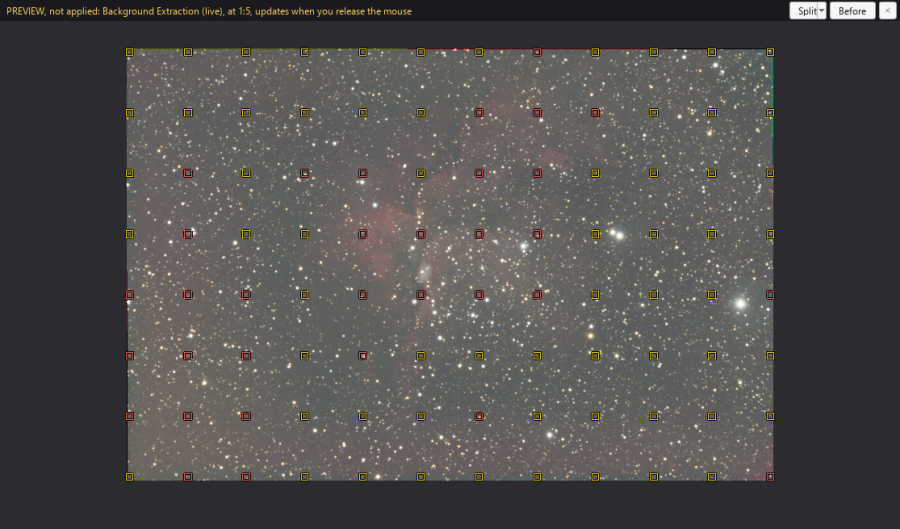
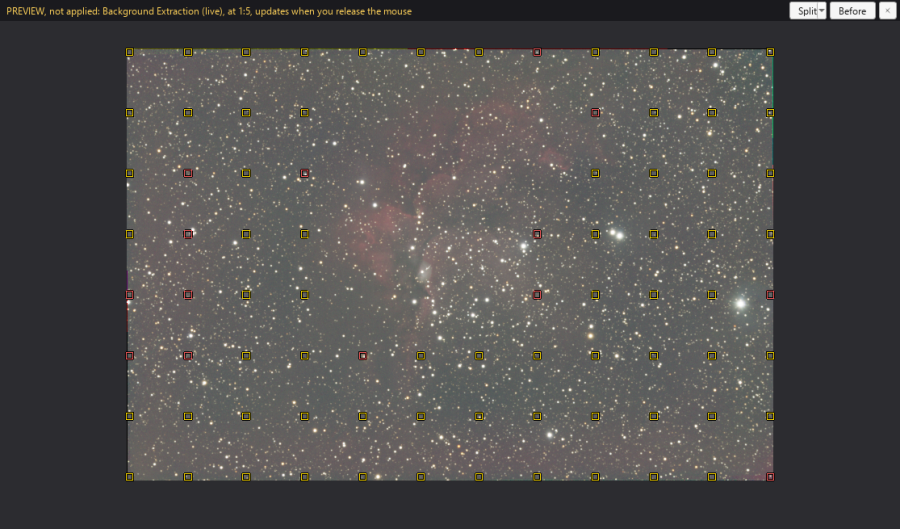
- Look at the boxes: those drawn in the second color are left out. Remove the boxes that sit on the nebula with Ctrl+click, and add boxes where the sky needs them.
- Click Apply Correction.
3Interface & Parameters
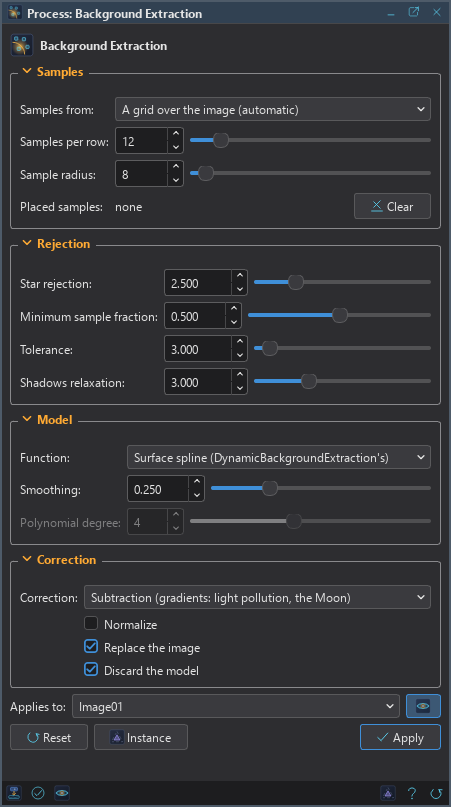
The process's panel has four sections, Samples, Rejection, Model and Correction, each of which folds away with the arrow beside its title. Under them are the image the process applies to with the live preview's eye, the buttons and the system bar along the bottom. The tool's panel has the same settings, and the controls of its boxes; it is described in The Background Extraction Tool.
3.1Samples
Samples from: Where the boxes come from:
- A grid over the image (automatic): the default. A grid of boxes over the whole image, from edge to edge, so that the model is never extrapolated.
- The samples placed on the image (manual): the boxes placed with the Background Extraction tool, kept with the settings. At least six are needed.
Samples per row: How many boxes the grid has across the image, from 2 to 100; 12 by default. The rows follow, about as far apart, so a 3:2 image gets 8 rows. Also the grid the tool's Generate makes.
Sample radius: Half the side of a box, in pixels, from 1 to 200; a radius of 8, the default, is a box of 17 by 17 pixels. Larger boxes measure the sky more precisely and are more often spoiled by stars.
Placed samples: The boxes of manual mode: their centers and radii, and the size of the image they were placed on, so that a run on an image of another size scales them. The panel says how many there are; Clear removes them. They are placed with the tool, and saved with the process.
3.2Rejection
Star rejection: Inside each box, the pixels further than this many sigma above the box's median, the stars, are left out. 2.5 by default.
Minimum sample fraction: A box that keeps less than this fraction of its pixels is not used: it is on a star. 0.5 by default.
Tolerance: Boxes brighter than a smooth fit of all of them by more than this many sigma are rejected as nebulae and galaxies, and the fit is made again until none is; at most half of the boxes are rejected. A box's brightness is its three channels together, so a corner whose color the gradient changed still counts. From 0.1 to 60; 3 by default. Lower rejects more.
Shadows relaxation: Below the fit, and below a box's median, the tolerances are this many times larger: dark boxes and dark pixels are rarely wrong. 3 by default.
3.3Model
Function: The smooth function through the boxes:
- Surface spline (DynamicBackgroundExtraction's): the default. A thin plate surface spline, which follows local variations: a light dome, the corners of vignetting.
- Polynomial (AutomaticBackgroundExtractor's): a polynomial of the whole image, smoother and more global.
Smoothing: How far the spline may stay from the boxes, from 0 to 1: 0 goes through each of them, higher is smoother. 0.25 by default.
Polynomial degree: The polynomial's degree, from 1 to 8; 4 by default. Higher follows stronger variations, and can oscillate between the boxes.
3.4Correction
Correction: How the model corrects the image:
- None (the model only): the image is not changed; the model is the result.
- Subtraction (gradients: light pollution, the Moon): the default. Light added to the image is taken away.
- Division (vignetting, uneven illumination): the image is divided by the model, for light the optics took away.
Normalize: Keeps the image's background level: its median is added back after a subtraction, and multiplies the result of a division. Off, the default, a subtracted background goes to zero, and an image that would go below zero is rescaled into the range, keeping its noise; a division keeps the background's level by the model's mean. The Log says what was done. The live preview of a subtraction without Normalize is shown through the screen stretch moved with the new background, so it is not black; after Apply, Auto Stretch shows the image so.
Replace the image: On, the default, the image itself is corrected, in one history step. Off, the
corrected image is a new image, named after the image with _corrected.
Discard the model: On, the default, the model is not kept. Off, it is also a new image, named
after the image with _background.
3.5Apply, Preview and Instance
Live preview (the eye): At the end of the Applies to row; Preview in the system bar is the same switch. On by default. The image shows the corrected image in the part in view, as the settings change, with the banner "PREVIEW only, nothing applied"; the image itself does not change until Apply. Before, in the banner, or the backslash key held, shows the image as it is. The model is fitted once on the whole image, so at 1:1 the preview is exactly what Apply gives there. It takes a fraction of a second, so the preview updates when we release the mouse.
Applies to: The image Background Extraction works on, chosen in a list of the open images. It shows the image in front, and follows it as we bring other images to the front. Picking another image in the list makes the panel work on that one, its live preview included, without bringing it to the front; the pick stays while we work on other images, and Follow Active, the small button that appears beside the list, makes the panel follow the image in front again. An image that a tool or a run is working on is listed, but cannot be picked.
Apply: Models the background of the image named in Applies to and corrects it as Correction says, in one history step that Undo takes back, through its mask if it has one. The Log says how many boxes were used, how many were on stars, and how many were rejected.
Instance: Shows the process as the panel has it now, as text: the settings as a DSPX
process (.dsproc) or as a PixInsight process icon (.xpsm), chosen under Format: a
DynamicBackgroundExtraction icon in manual mode, an AutomaticBackgroundExtractor icon in automatic mode. Copy puts
the text on the clipboard; Save... saves it as a file and puts it on the Process Shelf.
Reset: Puts every setting back to its default, the placed boxes removed.
The system bar along the bottom of the panel has the same commands as small icons: at the left, drag to apply and Apply; at the right, Instance, Help (this page) and Reset. Drag to apply, the first icon, carries the process with its settings: dropped on an image's window, it applies them to that image, whatever image the panel works on; dropped on the Process Shelf, it is kept there as a row of its own. With , the bar alone has them.
4The Background Extraction Tool
4.1Placing the Boxes
The tool, Background Extraction on the Tools toolbar and in the menu, works on the image we first click on. On it:
- a click on the background places a box there;
- a box is dragged to move it;
- Ctrl+click on a box, or Delete with it selected, removes it;
- Ctrl+Z and Ctrl+Y undo and redo the changes to the boxes; while the tool works on the image in front, goes to it too.
Every change measures the boxes and rejects them as the process will. The boxes used are drawn in the theme's frame color; those on stars or rejected in a second color, so we see at once which boxes count. The selected box is drawn thicker. The live preview follows the boxes, a dragged box included.
4.2The Tool's Panel
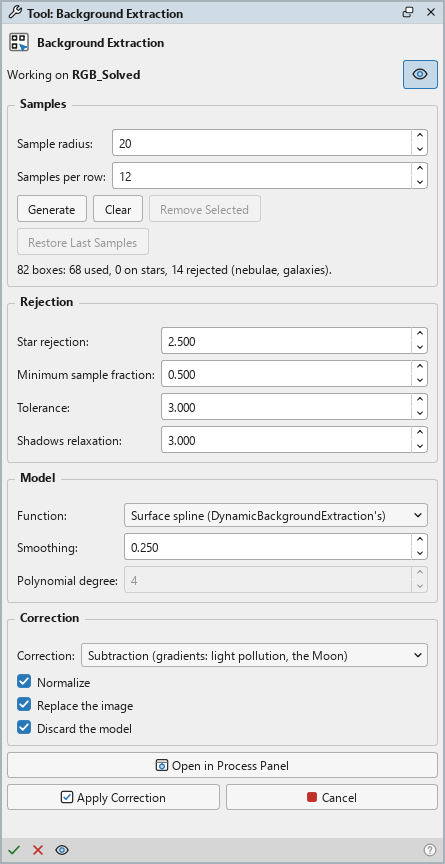
The tool's panel, in the Tool panel, has the process's settings, and these controls of its own:
- Sample radius and Samples per row, the size of new boxes and of the grid.
- Generate: replaces the boxes with a grid over the image.
- Clear: removes every box. Remove Selected: removes the selected box.
- Restore Last Samples: the boxes of the last Apply, on this image, scaled to its size.
- The counts: how many boxes, how many used, on stars and rejected, and the position of the selected box.
- Open in Process Panel: the same settings, the boxes among them, in the process's panel, where they can be saved as a process.
- Apply Correction: runs the process with the boxes, in one history step, and ends the session; Cancel ends it with nothing changed.
4.3The Model
With Discard the model off, the model is a new image: the background the process took away, smooth and without stars. Looking at it shows what was corrected, and whether the model followed anything that was not sky: a bump in it under a nebula means boxes on the nebula were used.

5How the Background Is Modeled
- Each box is measured per channel: the pixels further than Star rejection sigma above its median are left out, and so are those further below than that times Shadows relaxation; the median of the rest is the box's value. A box keeping less than Minimum sample fraction of its pixels is on a star, and is not used.
- Boxes on nebulae are rejected by a fit made as a lower envelope: a box above the fit is weighted down, one below counts in full, and the fit is repeated until the weights settle, first as a polynomial and then, for the spline, as the spline itself. Boxes further than Tolerance sigma above the fit, or Tolerance times Shadows relaxation below it, are rejected, the furthest first, at most half of them. A box's brightness, its channels together, decides: light added to the sky brightens it, while a color gradient only moves its channels apart.
- The model is the spline or the polynomial through the boxes kept, each weighted by the share of its pixels it kept, computed on a grid of nodes a few pixels apart and interpolated smoothly between them.
- The correction subtracts or divides it, with or without normalizing, and brings a result below zero back into the range.
6Usage Tips and Tricks
Linear data, early. Gradients are simplest to model before the stretch, and Background Extraction belongs right after the image is integrated and cropped, before Background Neutralization and Color Calibration.
Read the counts. When half of the boxes are rejected, the limit, the rejection is taking real sky for added light, usually where the gradient is strongest: the corners are then left uncorrected. Raising Tolerance, and removing the boxes on the nebula by hand, gives the model its corners back. When nebulosity fills the frame, no grid finds sky: place the boxes by hand.
Keep boxes off the nebula. A box on faint nebulosity that is not rejected makes the model follow the nebula, and the correction darkens it. In a field full of nebulosity, fewer boxes placed by hand on the darkest sky do better than any grid.
Normalize for a natural level. With Normalize on, the background keeps its brightness and the screen stretch we had still shows the image well; off, the background goes to zero, and the image needs a new screen stretch.
Division, then subtraction. For an image with both vignetting and light pollution, a division first with the boxes over the whole field, then a subtraction, separates the two.
7Related Tools
Background Neutralization: a neutral gray sky, once it is even.
Color Calibration: balances the colors against a white reference.
Photometric Glow Subtraction: removes the glow of bright stars, which no background model can.
Pixel Math: subtracts or divides by a model of our own.