
HDR Composition
Linear exposures of one field combined into one image of a wider range
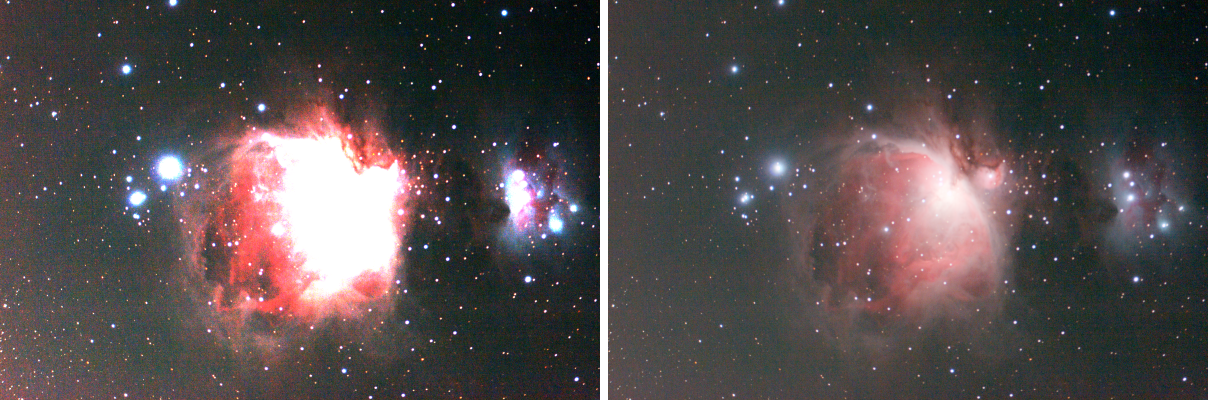
HDR Composition combines linear, registered images of one field taken with different exposures into one image of a wider dynamic range. The long exposure gives the faint structure; where it saturates, the shorter exposures take over, scaled to match. We use it for fields with a bright core and faint surroundings, such as the Orion Nebula, where no single exposure holds both. It works on files and writes the composite to a file.
1Introduction
No single exposure of a nebula with a very bright core records both the core and the faint outer parts: the exposure that shows the outer parts saturates the core, and the one that keeps the core is too dark for the rest. Taking several exposures solves the problem at the camera; HDR Composition solves it at the computer. It starts from the longest exposure, and for each shorter one it finds where the composite is about to saturate, measures how the shorter image relates to the composite there, and replaces the saturated areas with the shorter image carried into the composite's units. The replacement is blended through a soft mask, so there is no seam.
The images must be linear, registered onto one another, of the same size and with the same channels. At least two are needed, and none may be constant. The process reads them as files; open images that are saved are handed over as files, as Integration takes them. The composite is written to a file and opened.
HDR Composition follows PixInsight's HDRComposition by its parameters, and a PixInsight icon of that process opens here. The output settings, the folder, name, extension, overwrite and Open the result when done, are our own and are not written to one.
2Quick Start
- Choose .
- Add the registered exposures with Add Files..., or Add Images... for the ones open in the program. Leave Automatic exposures on: the images are put in the order of their exposures.
- Leave the other settings as they are for a first try. If the seam between the exposures is visible, raise Mask smoothness.
- Click Run. The composite is written next to the first input, as
HDRComposition.xisf, and opened with the masks.
3Interface & Parameters
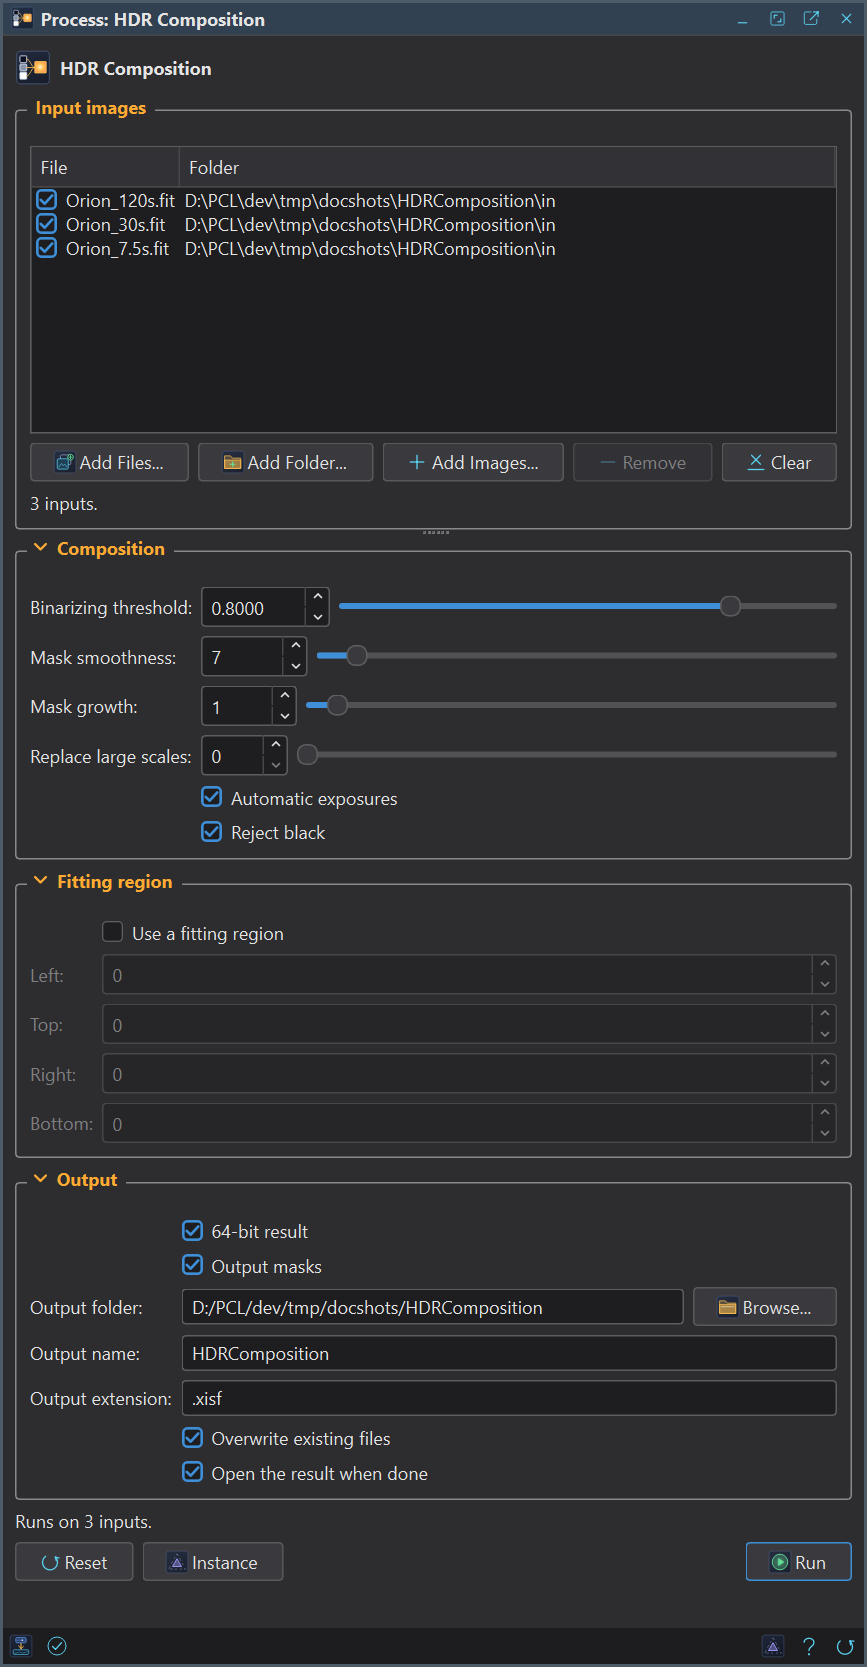
HDR Composition is a process that works on files: its panel lists the images at the top, under Input images, and has three sections of settings, Composition, Fitting region and Output, each of which folds away with the arrow beside its title. Under them are the buttons and the system bar along the bottom. It works on no open image, so it has no Applies to and no live preview.
3.1Input Images
Input images: The exposures to combine. Each row shows a file and its folder, with a check box that keeps it in the run or leaves it out. Add Files... and Add Folder... add files, Add Images... adds images open in the program, Remove takes the selected rows away and Clear empties the list.
3.2Composition
Binarizing threshold: Where the composite reaches this fraction of its maximum, the next shorter exposure takes over. From 0 to 1, 0.8 by default. A lower value hands over more of the bright areas to the shorter exposures.
Mask smoothness: The radius, in pixels, of the Gaussian that softens the edges of the replacement masks, from 1 to 100. 7 by default.
Mask growth: The number of pixels the replaced areas grow by, before they are softened, from 0 to 25. 1 by default.
Replace large scales: The number of dyadic wavelet layers above which the large structures of the composite come from the fitted composite. From 0 to 6. 0, the default, does not do it. It is a setting of ours, for the cases where the exposures differ in the large-scale background, such as a gradient that changed between them.
Automatic exposures: Puts the images in order of their relative exposures, measured on the images. On by default. Off, the order of the list is used, and it must be the longest exposure first; a wrong order ends in a bad fit, and the run is refused.
Reject black: The black pixels of a shorter exposure never replace the composite's. On by default. It keeps the empty borders of registered images out of the result.
3.3Fitting Region
Use a fitting region: Fits the exposures to each other only inside a rectangle of the image. Off by default, the whole image is used.
Left: The left edge of the region, in pixels.
Top: The top edge, in pixels.
Right: The right edge, in pixels; the pixel at this column is not in the region.
Bottom: The bottom edge, in pixels; the pixel at this row is not in the region.
3.4Output
64-bit result: Writes the composite in 64-bit floating point; off, in 32 bits. The range of an HDR image needs the precision. On by default.
Output masks: Writes the replacement mask of each step too, as _mask01,
_mask02 and so on. On by default.
Output folder: Where the composite is written. Empty, the default: the folder of the first input file.
Output name: The composite's file name, without its extension. HDRComposition by
default.
Output extension: The file format: .xisf, the default, or .fits.
Overwrite existing files: Off by default: a file of the same name is kept, and the new one gets a
new name, with _1, _2 and so on at the end. On, it is replaced.
Open the result when done: On by default: the composite, and the masks, open as images when the run ends.
3.5Run and Instance
Run: Combines the images checked in the list. The panel shows its progress and Cancel. The Log lists the images with their relative exposures, the longest as 1, and gives, for each step, the threshold and the line fitted.
Instance: Shows the process as the panel has it now, as text: a DSPX process
(.dsproc), the list of images included, or a PixInsight process icon (.xpsm), chosen under
Format. Copy puts the text on the clipboard; Save... saves it as a file and puts it on the Process
Shelf.
Reset: Puts every setting back to its default.
The system bar along the bottom has the same commands as small icons: at the left, drag and Run; at the right, Instance, Help (this page) and Reset.
4How the Composite Is Made
- Each input is rescaled to the range 0 to 1 by its minimum and maximum over all its channels.
- The images are put in order, the longest exposure first. The relative exposure of an image is the number of its pixels at or above the binarizing threshold in any channel, relative to the image with the most.
- The composite starts as the longest image and is carried, one step for each shorter image, into that image's units. In a step, the mask is where the composite reaches the threshold times its maximum in any channel, grown by Mask growth and smoothed by Mask smoothness. The shorter image Y is fitted to the composite x, channel by channel, as a line Y = a + b x through the pixels that are neither black nor near saturation, inside the fitting region if one is set. A slope above 1 is refused. The composite becomes (a + b x) times one minus the mask, plus Y times the mask.
- With Replace large scales above 0, the composite's large-scale component is replaced after each step by that of the fitted composite.
- The composite is rescaled to the range 0 to 1 and written, with the keywords and properties of the longest exposure, its field and astrometric solution included, a HISTORY line, and without the noise and signal estimates, which no longer describe it. The Log says what 1 in the composite is, in samples of the longest exposure.
4.1Memory
The images are read whole as 32-bit floating point and the composite is computed in 64 bits. Three 24-megapixel color exposures take about 1.4 GB.
5Usage Tips and Tricks
Register first. The exposures must lie on one another to the pixel. Register them with Registration before the composition.
Linear data. The exposures must be linear: their ratio is the ratio of the exposure times. A stretched image does not fit.
Check the masks. With Output masks on, each step's mask is opened. It should be white in the saturated core, black over the sky and soft between. If the mask is too small, lower the Binarizing threshold; if the seam shows, raise Mask smoothness.
A fitting region for a clean overlap. If the fit is thrown off by a bright star or a moving object, a fitting region on the nebula gives the exposures a clean area to be matched on.
Stretch the composite carefully. The composite has a very wide range. Hyperbolic Stretch or Exponential Transformation handle it well.
6Related Tools
Registration: aligns the exposures before the composition.
Integration: stacks frames of the same exposure; HDR Composition combines the stacks of different exposures.
Linear Fit: the fit between two images that HDR Composition makes for each step.
HDR Compression: brings the wide range down to what the screen shows.