
Deconvolution
Richardson-Lucy against the PSF the image's own stars measure
Deconvolution undoes the blur of a linear image the classical way, with Richardson-Lucy iterations against the point spread function measured from the image's own stars across the whole frame, so a frame that is softer in the corners is treated as such. A hold against the dark rings around bright stars is built in. It is the choice when we want detail recovered without a neural network, or to compare with Deep Sharpen.
1Introduction
Deconvolution is the classical counterpart of Deep Sharpen, and the only other sharpening process here that recovers detail rather than redistributing it. It starts from the same measured PSF field and inverts it with the Richardson-Lucy algorithm: the image is processed in tiles with the local PSF, feathered together. It needs linear data: the method assumes photon counts, and a stretched frame is no longer counting photons.
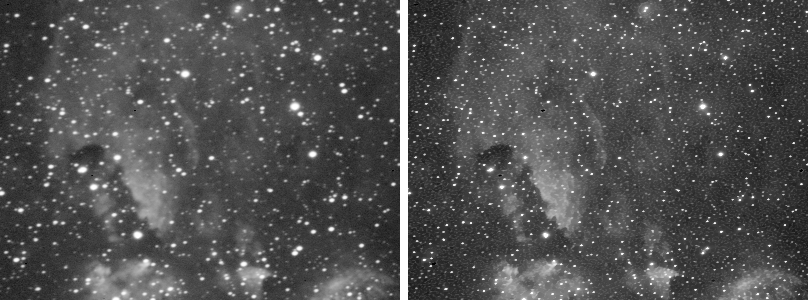
Several figures below come from one test, the round trip: a real linear frame whose stars measured 1.8 pixels was blurred with a Gaussian to 4.3 pixels, then deconvolved back. Because the frame before the blur is kept, the result can be measured against the truth: how much of the lost resolution came back, and how far each pixel ended up from where it started.
Deconvolution is DeepSharp's Deconvolution method. DeepSharp's PixInsight module puts its seven methods on seven tabs
of one process; in DSPX each is a process of its own in , and they
share DeepSharp's engine and its results. Its id is RLDeconvolution, so that it is never mistaken for
PixInsight's own Deconvolution process.
2Quick Start
- Open the linear image, before any stretch, and choose .
- Leave Measure the PSF from the stars, Moffat profile and Deringing at their defaults: the PSF measured, a Moffat profile, and the full hold of 1 that keeps the bright stars out of dark rings.
- Preview a region with a few bright stars at the default 30 Iterations, then raise them until the stars stop improving.
- Click Apply.
3Interface & Parameters
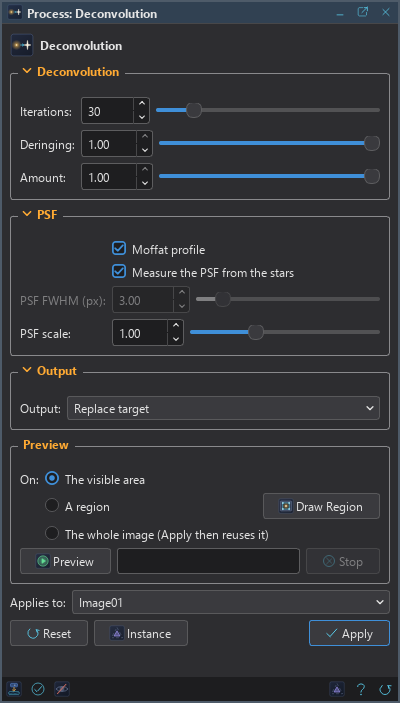
The panel has three sections: Deconvolution, the algorithm's own settings; PSF, how the blur is measured or stated; and Output. Each folds away with the arrow beside its title. Under them are the Preview box, the image the process applies to, the buttons and the system bar along the bottom.
3.1Deconvolution
Iterations: How many Richardson-Lucy steps to take, from 1 to 200; 30 by default. This is the setting that decides the result. There is no converged answer: every step sharpens a little more, and the estimate eventually starts inventing detail. On the round trip, 20 iterations recovered 60% of the lost resolution, 60 recovered 87%, and 120 recovered all of it with the lowest error against the original; by 200 the error was rising again. A frame that was never blurred on purpose has far less to recover, and needs far fewer. We start low, look at the stars, and raise it.
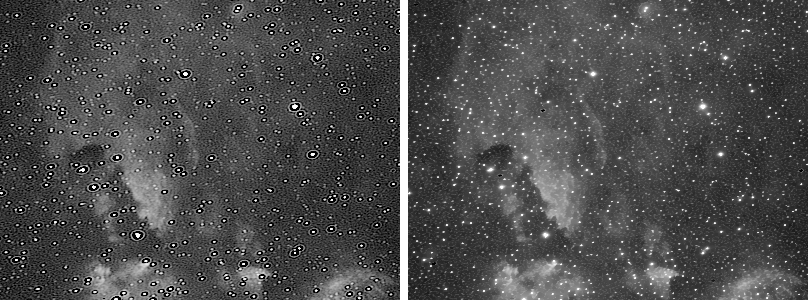
Deringing: Keeps the estimate from falling below the darkest value its own neighborhood had, from 0 (no hold) to 1, the full hold, which is the default. What makes people give up on deconvolution is the dark moat around a bright star, where the light moved into the core was taken from the ring just outside it. A moat is a value below anything the data had there, so this forbids it. The hold is on the dark side only: the bright side is where the sharpening is. It costs nothing measurable: on the round trip it improved both the star sizes and the error against the original.
Amount: How much of the result replaces the original, from 0 to 1. 1, the default, is the result itself; lower values mix it back toward the data. At 0 there is nothing to do, and the panel says so.
3.2PSF
Moffat profile: The shape the PSF is taken to have. On, the default, a Moffat profile, which has the wings a real star has; off, a Gaussian, which does not. Deconvolving with a Gaussian when the data has wings leaves those wings as a soft halo. On the round trip a Moffat PSF came out ahead of a Gaussian one, even though the blur applied there was itself Gaussian, the case least favorable to it.
Measure the PSF from the stars: On by default. The PSF is measured from the image's own stars, and a smooth field is fitted over the frame, the same measurement Deep Sharpen uses, so the PSF follows the frame instead of being one number for all of it. A frame with no measurable stars is refused, with the reason, rather than guessed at.
PSF FWHM (px): The PSF's full width at half maximum, in pixels, when it is not measured: one round PSF for the whole frame. From 0.80 to 20.00; 3.00 by default.
PSF scale: For a measured PSF: multiplies it, keeping its variation across the frame. From 0.50 to 2.00; 1.00 by default. Above 1 deconvolves harder than the measurement says and rings sooner; below 1 is the safe direction.
3.3Output
Output: Where the result goes.
- Replace target: the default. The image is deconvolved in place, in one history step that Undo takes back, through the image's mask if it has one.
- New image: the image is left untouched and the result arrives as a new image named after it, with
_deconvolvedat the end.
3.4Apply, Preview and Instance
Preview: Shows the result on the image without changing it, computed at full resolution on The visible area, on A region we draw on the image with Draw Region, or on The whole image, which Apply then reuses instead of running again. A preview never starts by itself: it is computed when we click Preview, with its progress and Stop. On a part of the image it is close, not exact: the PSF field is measured on the stars of the part. Before, in the image's banner, or the backslash key held, shows the image as it is.
Applies to: The image Deconvolution works on, chosen in a list of the open images. It shows the image in front, and follows it as we bring other images to the front. Picking another image in the list makes the panel work on that one, its preview included, without bringing it to the front; the pick stays while we work on other images, and Follow Active, the small button that appears beside the list, makes the panel follow the image in front again. An image that a tool or a run is working on is listed, but cannot be picked.
Apply: Deconvolves the image named in Applies to, as Output says, channel by channel for a color image. The run shows its progress in the panel, and Cancel leaves the image as it was.
Instance: Shows the process as the panel has it now, as text: the settings as a DSPX
process (.dsproc) or as a PixInsight process icon (.xpsm), chosen under Format. The icon is
a DeepSharp icon with its method set to Deconvolution, which DeepSharp's PixInsight module opens on that tab.
Copy puts the text on the clipboard; Save... saves it as a file and puts it on the Process Shelf.
Reset: Puts every setting back to its default.
The system bar along the bottom of the panel has the same commands as small icons: at the left, drag to apply and Apply; at the right, Instance, Help (this page) and Reset. Drag to apply, the first icon, carries the process with its settings: dropped on an image's window, it deconvolves that image, whatever image the panel works on; dropped on the Process Shelf, it is kept there as a row of its own. With , the bar alone has them.
4Iterations and Deringing
Richardson-Lucy improves its estimate of the unblurred image one step at a time: each iteration blurs the estimate with the PSF, compares it with the image, and corrects the estimate by the ratio. The first steps bring back the most; later ones bring back less and less, and past a point they amplify the noise into detail that was never there. There is no setting that says when to stop: the stars do. When they stop getting smaller and the background starts to crawl, we have gone far enough.
Every deconvolution pulls the light of a star's wings into its core. Where the wings sit on the sky, the estimate can be pulled below the sky itself, and a dark ring forms. Deringing forbids the estimate from falling below the darkest value its own neighborhood had in the data, which is exactly the ring and nothing else.
5Example
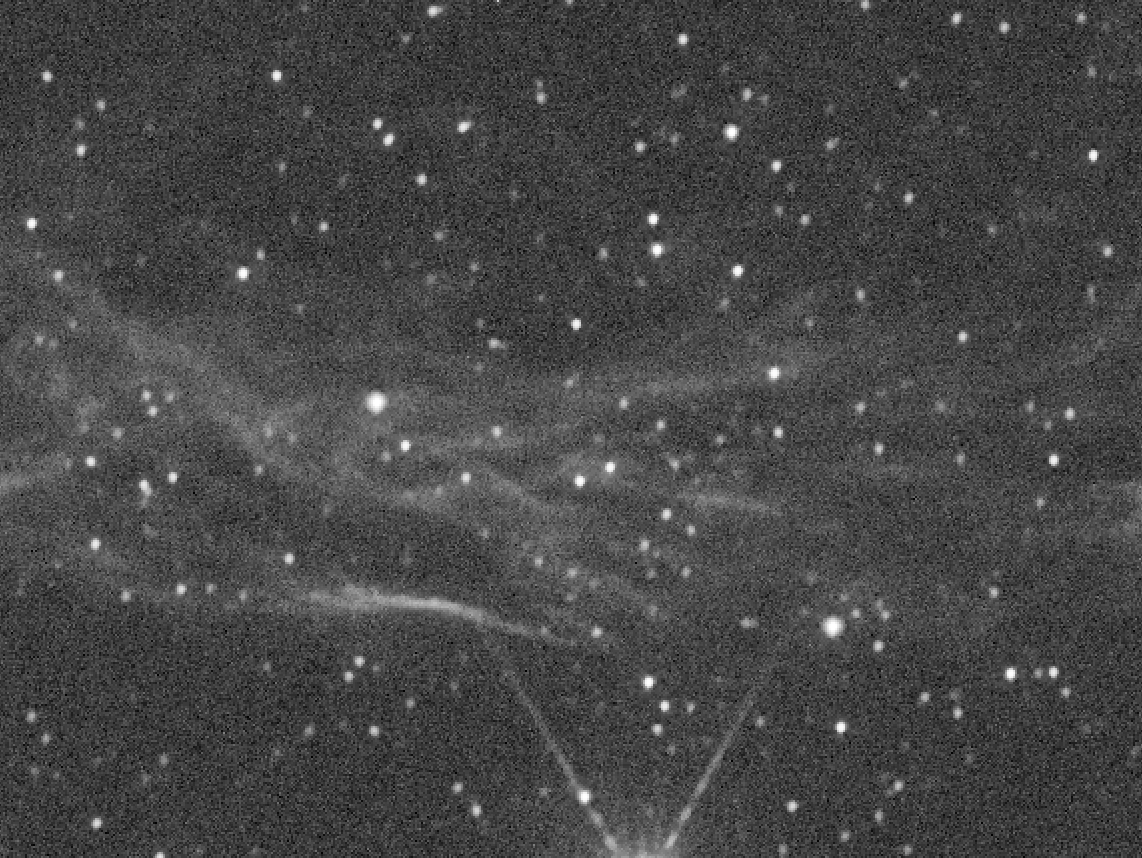
6Usage Tips and Tricks
Linear data only. Apply Deconvolution before any stretch.
Start low. A frame that was never blurred on purpose usually needs tens of iterations, not hundreds. Preview a region with bright stars at the default, then raise Iterations until the stars stop improving.
Leave Deringing at 1. The default, the full hold, costs nothing measurable, and it is what keeps the bright stars from sitting in dark moats. Lower it only to compare; below 1, faint rings can show on a stretched view.
Moffat for real stars. Real stars have wings, and a Gaussian PSF leaves them as a halo. Turn Moffat profile off only to compare.
PSF scale below 1 when in doubt. A slightly smaller PSF than measured deconvolves gently and rings later; a larger one rings sooner.
Star poor frames. When the stars cannot be measured, the image is refused; turn off Measure the PSF from the stars and state the PSF FWHM of the data.
Compare with Deep Sharpen. With Output set to New image, the two results can be compared side by side with the original.
GPU. In DSPX mode every iteration runs on the graphics card when the Processor setting allows one and the image is at least about 8,000 pixels (90 by 90); a run of fewer than the default 30 iterations needs a larger image. A 24 MP color image at the default 30 iterations takes about 2 seconds instead of one to two minutes, and the preview of a region of 1 MP about 0.3 seconds instead of 8. The result agrees with the processor's to a few millionths of the range (the difference grows by about one ten-millionth for each iteration), far below anything visible. In PixInsight compatibility mode the processor does the work. Choose CPU only in to keep it there; see The Processor and the GPU.
7Related Tools
Deep Sharpen: a trained network against the same measured PSF field, with separate amounts for the stars and the rest, and Correct only for aberrated stars.
Multiscale Sharpen: a gain for each size of detail, on linear or stretched images.
Texture Sharpen: sharpens the faint texture and quiets the sky in one pass.
Flow Sharpen: sharpens across the structure, never along it.
Clarity: local contrast that cannot form a rim along an edge.
Filament Sharpen: finds long thin structure, enhances it or makes a mask of it.
Deep Star Mask: a star mask, to keep the stars out of a deconvolution or to deconvolve them alone.